5
Step 3: Congure network
GNSS corrections for the Vision-RTK 2 are typically delivered over the internet, which necessitates
connectivity to a network with internet access.
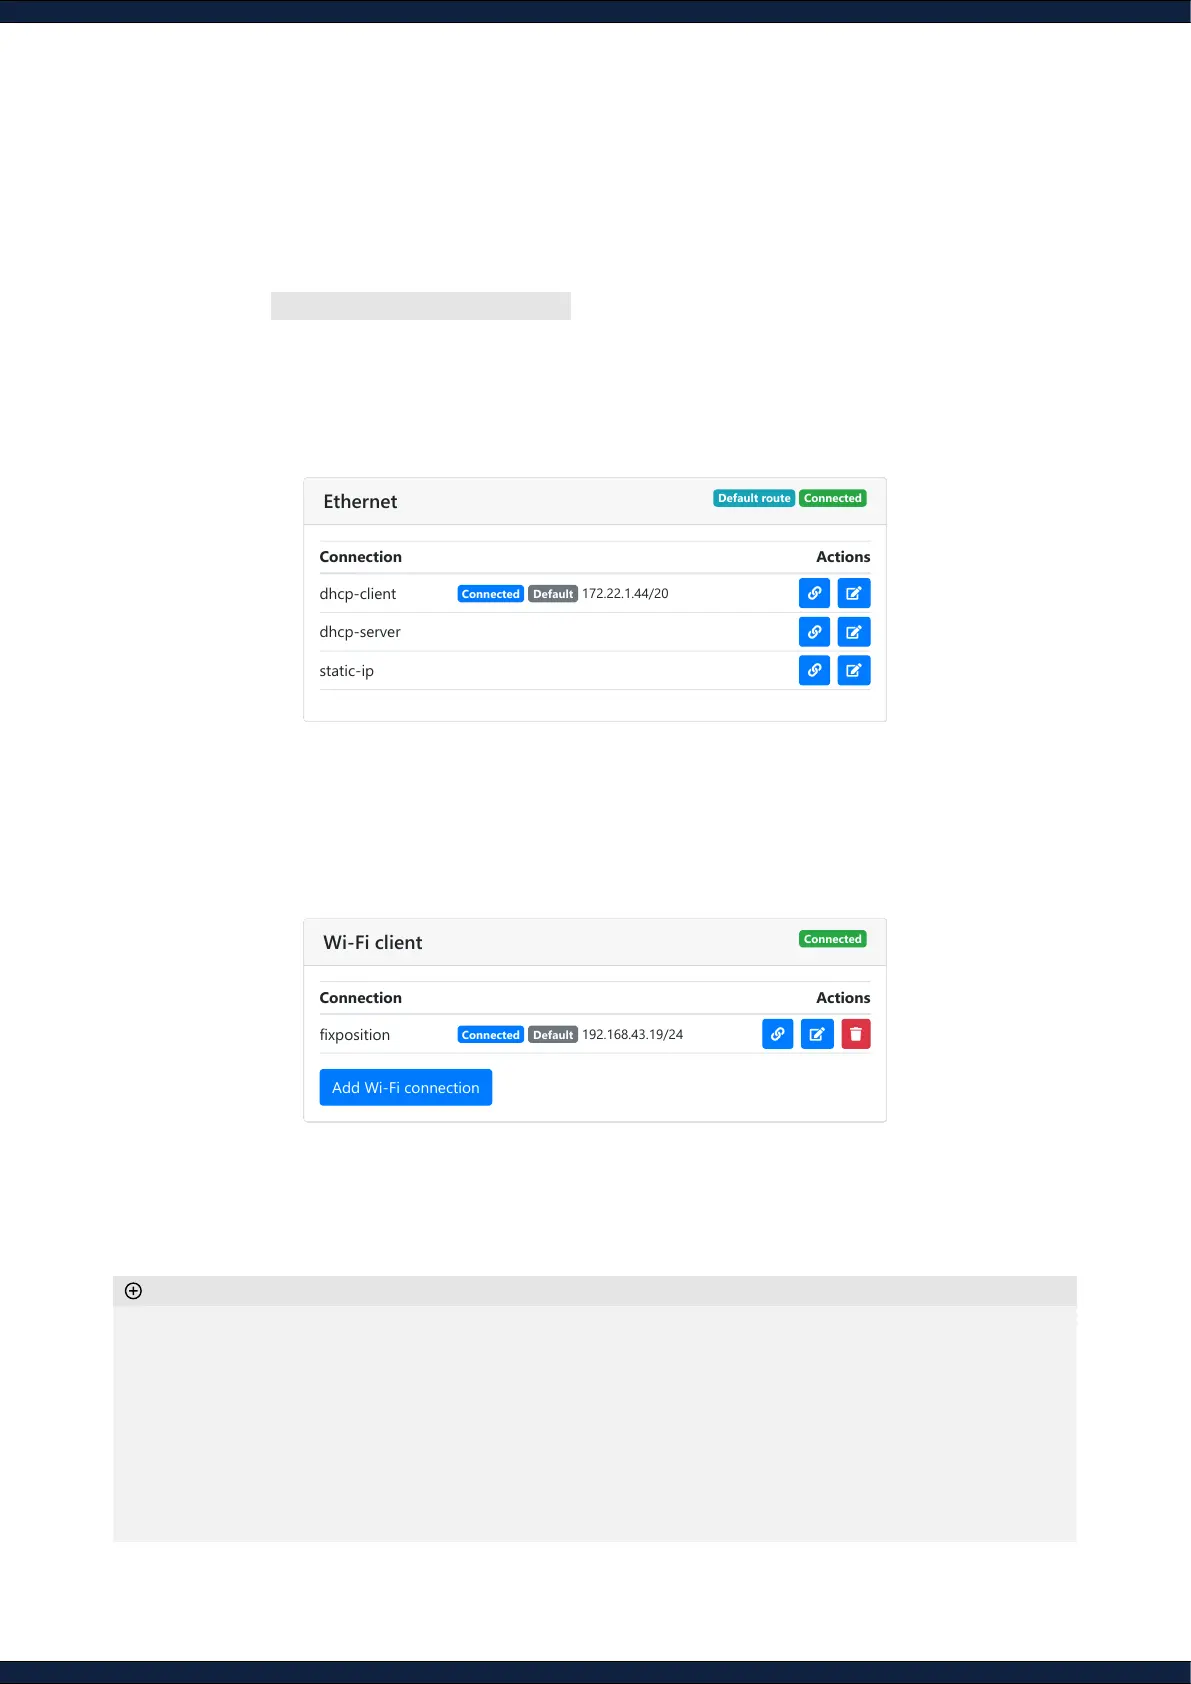
1. Navigate to Configuration ↪ Network
2. Establish a network connection over:
A. Ethernet (recommended)
◦ Connect the Vision-RTK 2 to the desired network
◦ Set the Vision-RTK 2 as
DHCP client
or
DHCP server
depending on the network topology
B. Wi-Fi
◦ Select the active Wi-Fi band (2.4 or 5 GHz)
◦ On the Wi-Fi client tab, click
Add Wi-Fi connection
◦ Search for available networks, select one, and type in the password to connect
◦ Wait until the connection is established (the label
“Connected”
will appear)
◦ The Vision-RTK 2 can only access the Internet if set as a DHCP client or with an static IP
◦ An Ethernet connection is always prioritized over Wi-Fi for Internet access
◦ Set the network as default to automatically reconnect to it after a disconnection or reboot
◦ 2.4 GHz is preferred over 5 GHz for Wi-Fi connections due to its range and reliability
◦ The only supported Wi-Fi security conguration is
wpa-psk
(WPA2)
◦ The network SSID must be alphanumeric
◦ Most Wi-Fi 6E access points use 802.11ax by default, which is not supported. It must be congured to one of
the supported bands
Additional information
ConnectedDefault route
Ethernet
Connection Actions
dhcp-client
Connected Default 172.22.1.44/20
dhcp-server
static-ip
Connection Actions
fixposition
Connected Default 192.168.43.19/24
Add Wi-Fi connection