15. Turn the lapping plate over and place a few drops of
water on the 600 grit side of the plate. Lap the check
valve body in a figure-8 pattern until the body is
evenly polished.
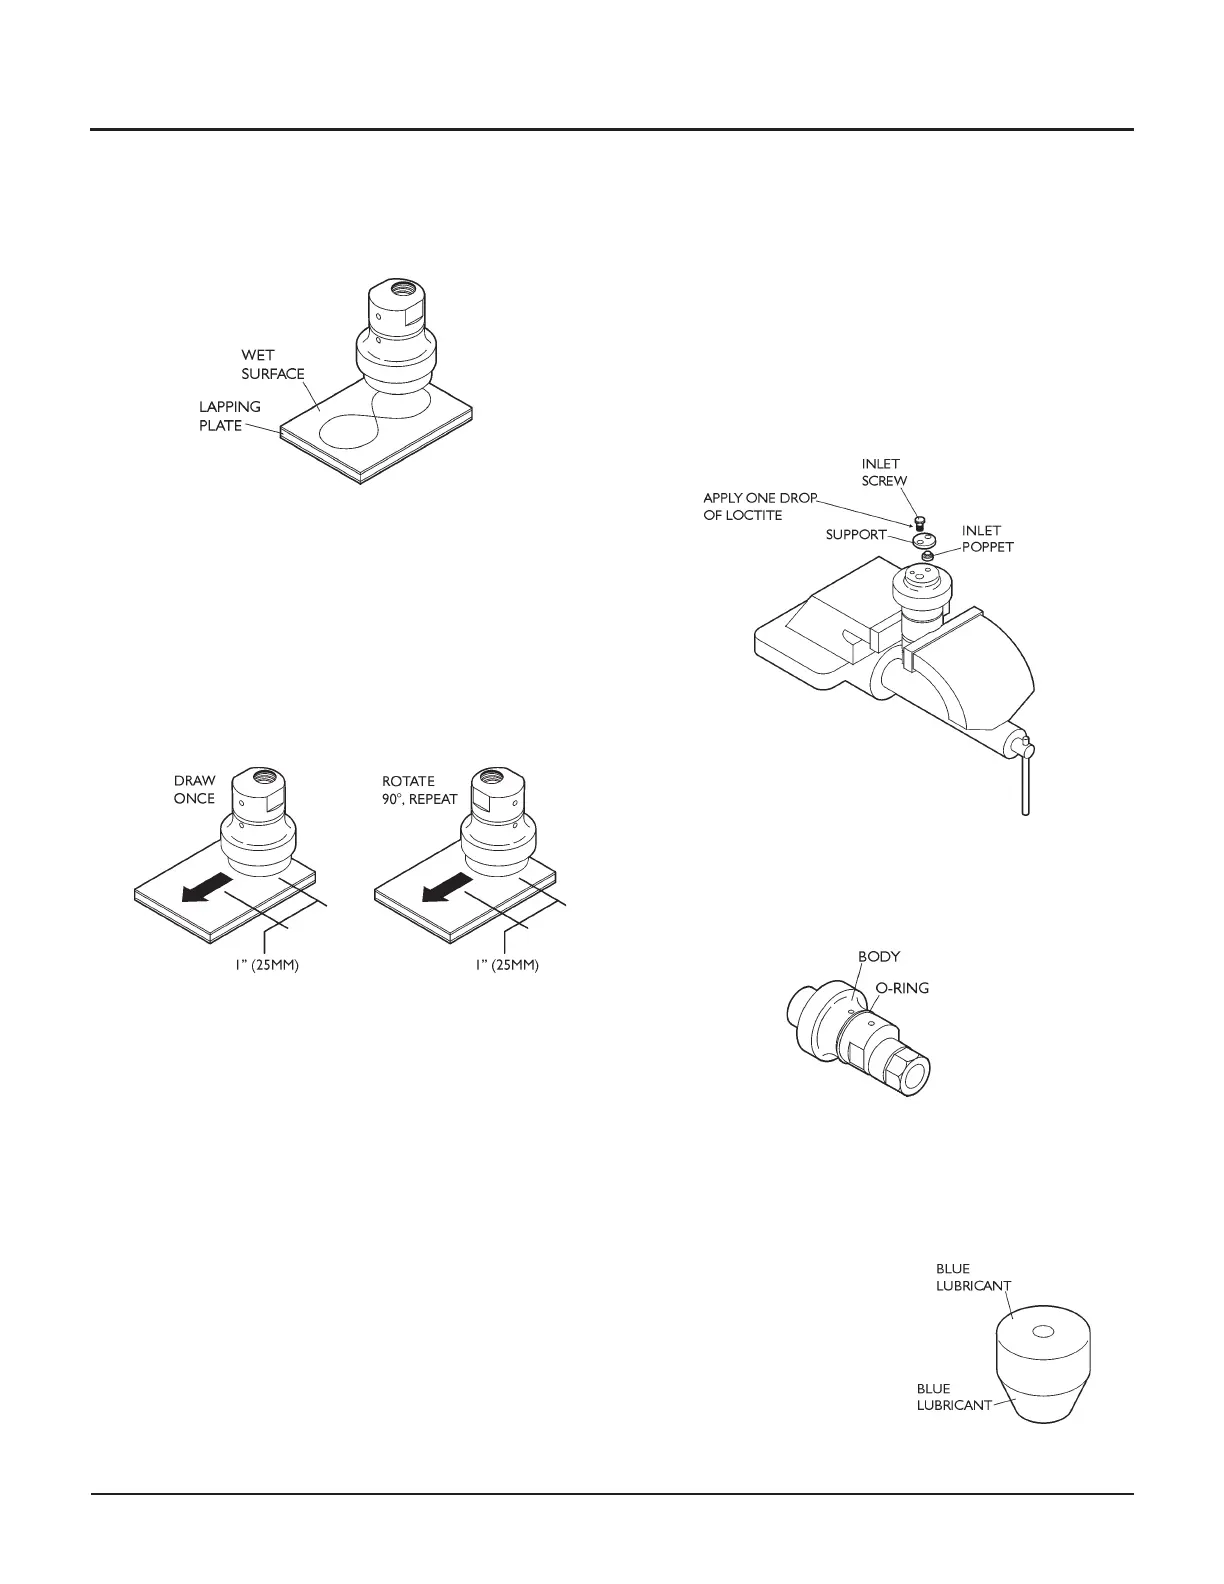
16. To avoid poppet sticking problems, turn the lapping
plate back to the 320 grit side and draw the check
valve body for 1 in. (25 mm) in a straight line along
the abrasive strip once, then rotate the body 90° and
repeat the 1 in. (25 mm) score.
17. Carefully clean the newly-lapped check valve body
with clean solvent such as isopropyl alcohol. Dry and
re-inspect the part.
CAUTION
Lapping debris remaining after incomplete
cleaning will result in reduced component life.
Installing the check valve inlet replacement kit
18. Set out and inspect the components of the check
valve inlet replacement kit (014884-1).
19. Apply one drop of Loctite #242 to the threads of the
new retainer screw. Position the new inlet check
valve support and new poppet on the main body,
with the pin of the inlet check valve support in its lo
-
cating hole.
Insert the retainer screw and tighten to 40 in-lb,
(4.52 N-m).
20. Lubricate the o-ring (removed from the check valve
body in Step 10) with food grade grease (A-4689).
Replace the o-ring on the check valve body.
21. Clean and inspect the outlet check valve seat, outlet
poppet, compression spring, outlet spring seat and
the threads and bore of the outlet adapter with sol
-
vent. See parts identified on the next page.
Apply a small amount
of Blue Lubricant to the
outlet adapter threads
and the conical surfaces
of the outlet check
valve seat.
40 | M-376 © Flow International Corporation
94K HYPERPRESSURE INTENSIFIER