37. Thoroughly clean the tie rods to ensure no old anti-seize lubricant remains (it can interfere with proper torque up).
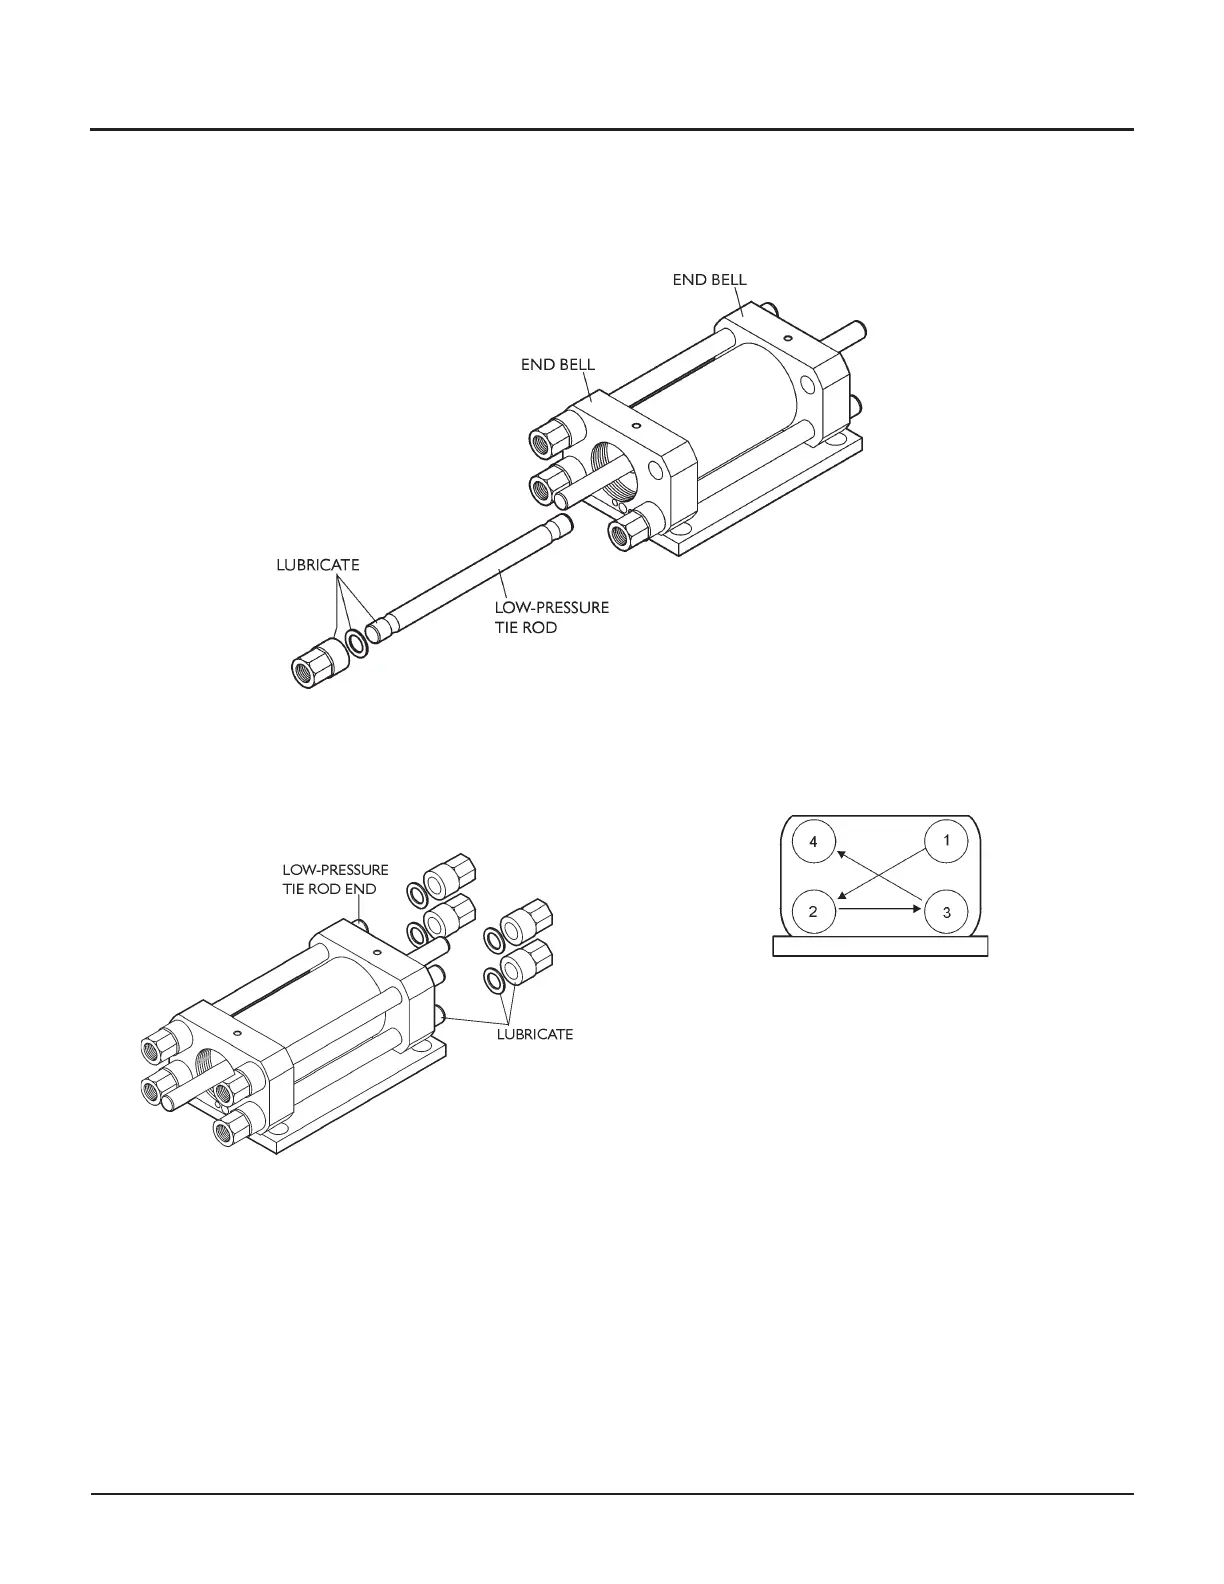
Then apply fresh anti-seize lubricant (A-10039) to one end of the low-pressure tie rods and to the faces of the
washers and nuts. Run the nuts onto the tie rods until they bottom out, then slide the tie rods through the two end
bells.
38. Apply anti-seize lubricant to the exposed threads of
the tie rods and the faces of the washers and nuts.
Install the nuts onto the tie rods hand tight.
39. Draw the low-pressure cylinder carefully onto the
end bells by tightening the nuts evenly in a figure-8
pattern, as shown below. Be careful not to nick the
seals and back-up rings. There must be no seal or
back-up ring debris visible at the cylinder/end bell
interface. Be sure to check for any problems before
continuing.
Following the figure-8 pattern shown below, torque
all nuts evenly to 20 ft-lb (27 N-m) to seat all parts.
40. Loosen and remove nuts and washers from both
ends of the tie rods.
41. Visually center the tie rods between the end bells,
leaving the same number of tie rod threads exposed
on both sides of the assembly. Apply anti-seize lubri
-
cant to the faces of all mating components.
© Flow International Corporation M-376 | 57
CHAPTER 3
Maintenance Procedures