EasyManua.ls Logo

Fluidmaster EVERYTHING - User Manual

Fluidmaster EVERYTHING
32 pages
To Next Page IconTo Next Page
Loading...
K-400H-038
‘THE EVERYTHING’
TM
3˝ TOILET TANK REPAIR KIT
HOW-TO VIDEO
VISIT: FLUIDMASTER.COM
K-400H-038 PRODUCT PAGE
VIDEO
HELPFUL
TOOLS INCLUDED!
FRENCH - Page 23
*See back page for important product warnings and warranty information.
Question and Answer IconNeed help?

Do you have a question about the Fluidmaster EVERYTHING and is the answer not in the manual?

Fluidmaster EVERYTHING Specifications

General IconGeneral
BrandFluidmaster
ModelEVERYTHING
CategoryPlumbing Product
LanguageEnglish

Summary

Step 3: Install New Flush Valve

Insert Flush Valve into Tank

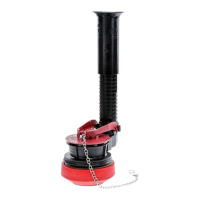
Position the new flush valve through the tank's mounting hole.

Step 3 (Continued): Install New Flush Valve

Measure and Adjust Flush Valve Height

Set the correct height for the new flush valve using a measuring tool.

Step 4: Install Tank-to-Bowl Gasket

Apply Tank-to-Bowl Gasket

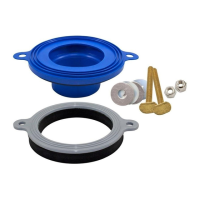
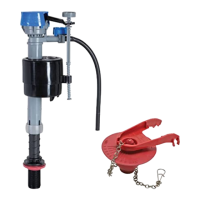
Place the red gasket onto the flush valve locknut.

Step 5: Secure Tank to Toilet Bowl

Tighten Tank Bolts to Bowl

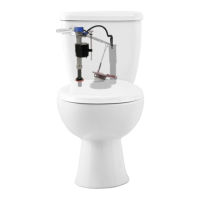
Secure the tank to the bowl by tightening the hex nuts.

Step 6: Adjust Toilet Flapper

Adjust Flapper Dial Setting

Adjust the flapper dial to achieve the best flush.

Step 7: Adjust Fill Valve Height

Adjust Fill Valve Height Mechanism

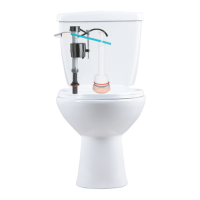
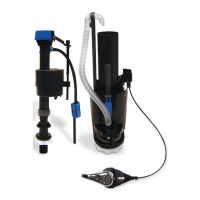
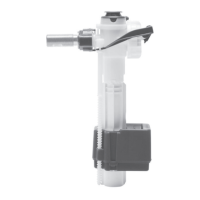
Turn the fill valve to adjust its height relative to the overflow pipe.

Step 8: Install New Fill Valve

Insert Fill Valve into Tank

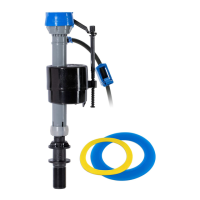
Position the fill valve correctly within the tank.

Step 8 (Continued): Install New Fill Valve

Secure Fill Valve with Locknut

Tighten the locknut to secure the fill valve shank.

Step 9: Install Lever and Flapper Chain

Install Tank Lever

Insert and secure the tank lever into the tank.

Step 10: Finishing Installation Steps

Connect Water Supply to Fill Valve

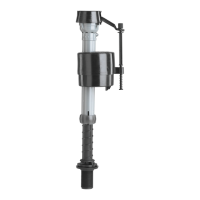
Reconnect the water supply line to the new fill valve.

Step 11: Fine-Tune Tank Water Level

Check Tank Water Level After Flush

Flush the toilet to assess the current water level.

Adjust Tank Water Level

Correct low or high water levels by adjusting the fill valve.

Step 12: Fine-Tune Flush

Adjust Flapper for Efficient Flush

Fine-tune the flapper dial for optimal flushing.

Step 13: Fine-Tune Bowl Water Level

Adjust Bowl Water Level Setting

Modify the fill valve dial to correct bowl water level.

Step 14: Final Flush and Completion

Troubleshooting Common Issues

Fill Valve Not Working Correctly

Address issues where the fill valve fails to operate.

Troubleshooting: Bowl Water Level Too Low

Troubleshooting: Flapper Stays Open (Double Flush)

Important Warnings and Warranty

Warning: Avoid Bleach;Chlorine Cleaners

Crucial warning against using bleach or chlorine cleaners in the tank.

Related product manuals