417D/424D
Users Manual
12
Timer
Fluke recommends that you use a time-delay for the most
accurate measurements at long distances. This prevents Meter
movement when you push .
To turn on the timer:
1. Push 1x to turn on the 5-second timer. This is the default
time interval to release the laser for a measurement.
2. Push or to adjust the timer up to 60 seconds.
3. Push to begin the timer.
The seconds until measurement (for example, 59, 58, 57...)
show as a countdown. The last 5 seconds count down with a
beep. After the last beep, the Meter makes the measurement
and the value shows on the display.
Note
The timer is useful for all measurements.
Beeper
Push at the same time for 2 seconds to turn on and turn off
the beeper. The display shows the status as or
.
Measurements
The Meter measures the distance to a target, the area bounded
by two distances, or the volume in three measurements.
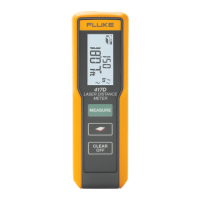
Single Distance Measurement
To measure distance:
1. Push to turn on the laser.
2. Push again to make the distance measurement.
The measurement shows on the display.
Note
Measurement errors can occur if you point the laser at
colorless liquids, glass, polystyrene, semi-permeable
surfaces, and high-gloss surfaces. The measurement time
increases when you point the laser at dark surfaces.
A target plate is useful for long distance measurements if the
target reflectivity and illumination is a problem.
Continuous Measurement
Use continuous measurement to make a series of quick
measurements. For example, to mark stud positions along a wall
plate.
To start continuous measurement:
1. While the meter is on, push for 2 seconds.
2. Move the laser to each position and view each
measurement.
The Meter continuously shows measurements until you push
or < or the Meter times out.