71X Series
Calibration Manual
48
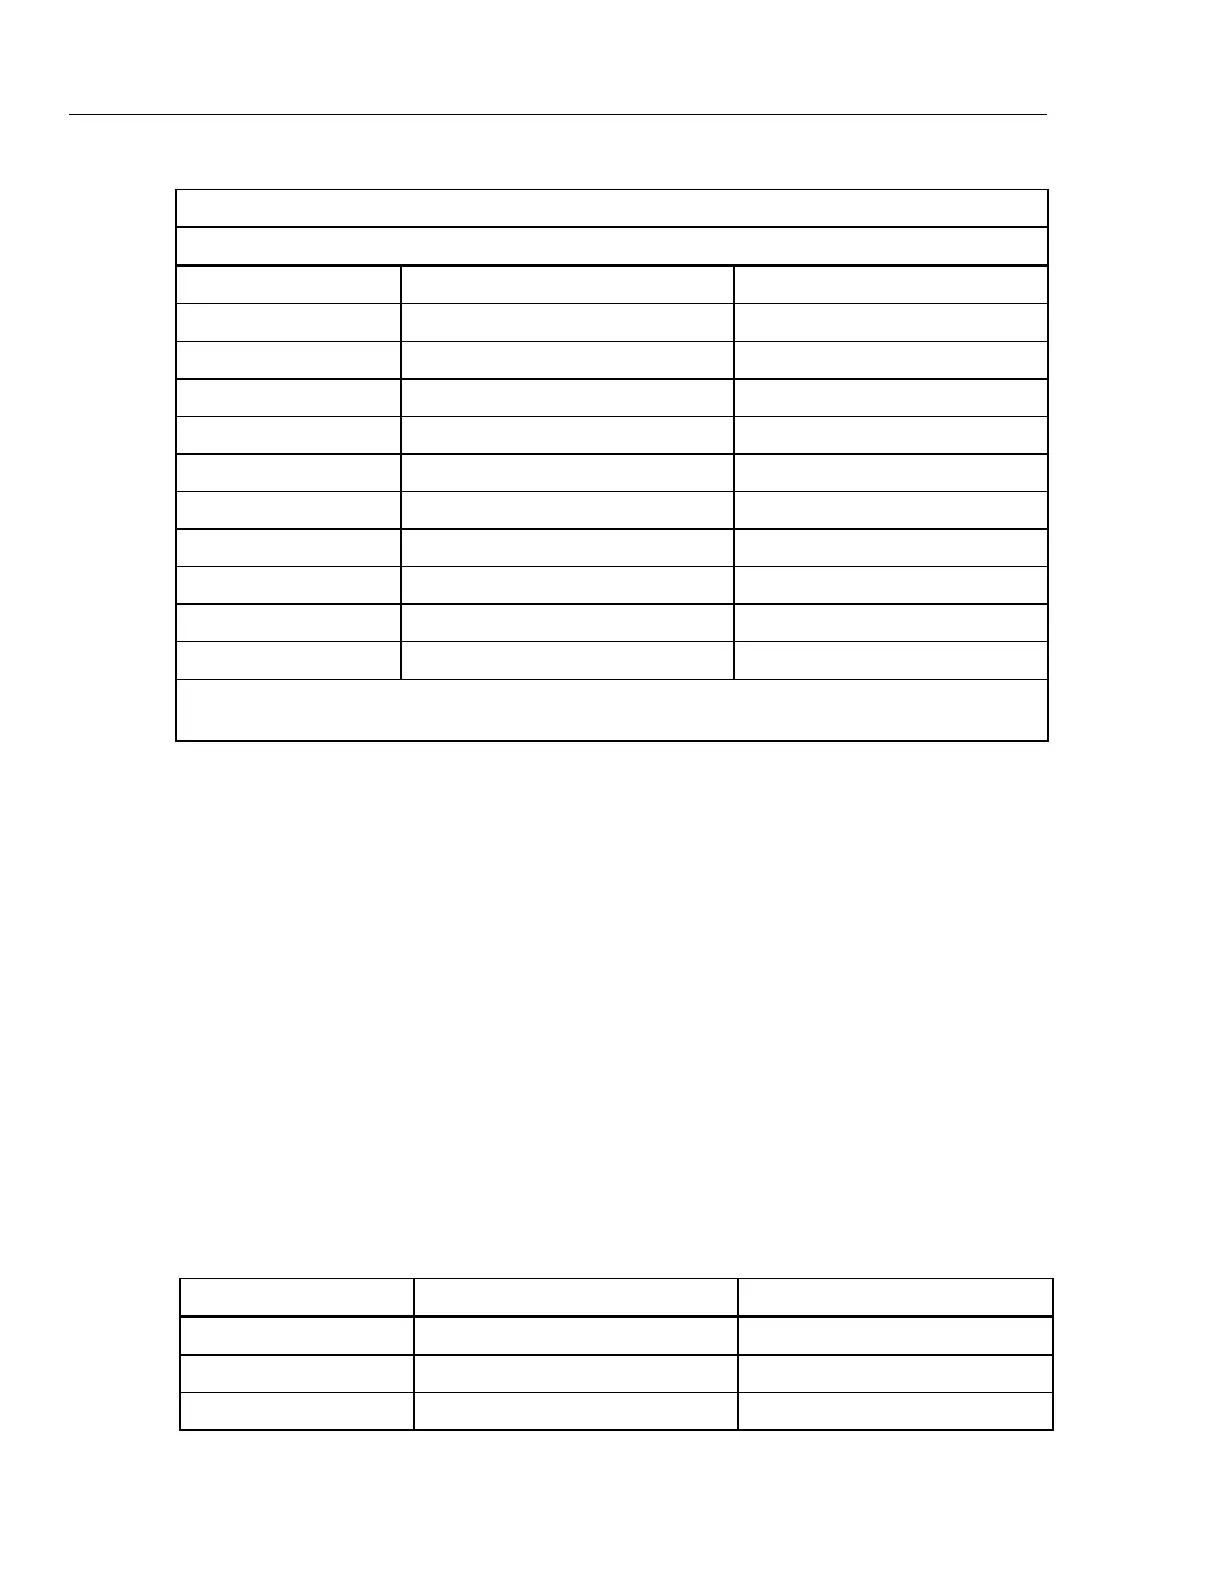
Table 62. 717 Pressure Verification (cont.)
Version 4.0 or Higher
717 10000G
Input Pressure 6-Month Display Reading 1-Year Display Reading
0 PSI -4 to 4 -5 to 5
2000 PSI 1996 to 2004 1995 to 2005
4000 PSI 3996 to 4004 3995 to 4005
6000 PSI 5996 to 6004 5995 to 6005
8000 PSI 7996 to 8004 7995 to 8005
10000 PSI 9996 to 10004 9995 to 10005
8000 PSI 7996 to 8004 7995 to 8005
6000 PSI 5996 to 6004 5995 to 6005
4000 PSI 3996 to 4004 3995 to 4005
2000 PSI 1996 to 2004 1995 to 2005
*To display the firmware version, start with the 717 off, push and hold the center bottom button ( or ),
then push the power button.
4. Carefully vent all pressure and disconnect the 717 from the deadweight tester.
mA Measure Verification
1. Push
to turn power on. The display should read:
---------- mA
then change to:
0.000 mA 0.00PSI
2. Connect a test lead from Red AUX terminal of the 5520A to the Fluke 8508A I+
terminal.
3. Connect a test lead from Black AUX terminal of the 5520A to the 717 Calibrator
Com terminal.
4. Connect a test lead from I- terminal of the Fluke 8508A to the 717 Calibrator mA
terminal.
5. Adjust the 5520A if necessary so that the current shown on the Fluke 8508A is the
same as the 5520A values shown in Table 63.
6. Verify that the display readings on the 717 Calibrator are within the limits.
Table 63. 717 mA Measure Verification
Fluke 5520A Fluke 717 (V2.9 and lower) Fluke 717 (V3.0 and higher)
4.0000 mA 3.998 mA to 4.002 mA 3.997 mA to 4.003 mA
12.0000 mA 11.996 mA to 12.004 mA 11.996 mA to 12.004 mA
24.0000 mA 23.993 mA to 24.007 mA 23.994 mA to 24.006 mA
1.888.610.7664 sales@GlobalTestSupply.com
Fluke-Direct.com

 Loading...