28
It is also necessary for you to check the following
components of your FLYER e-bike:
• Please check that the battery is secure.
• Check the charging state of the battery to en
-
sure
thatthecharge issucientforthedrive
planned.
• Familiarise yourself with the functions of the
operating element.
Familiarize yourself with your
new FLYER e-bike’s riding and handling
performance by testing its features out in
a safe and quiet area.
1.
Only use a FLYER with a frame size that
suits you. Ensure that your legs have
enough
room to manoeuvre. You
must be able to dismount quickly with-
out
touching the frame. Insucient
clearance or room to manoeuvre may
lead to severe injuries.
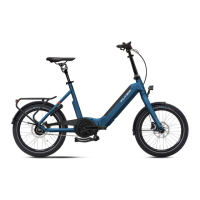
2. Please note that while preparing to
mount your FLYER that it will imme
-
diately start moving as soon as you
put your foot onto the pedal when the
support
mode is switched on. Do not
place your foot on the pedal when
mounting. Hold the brake, as the
unfamiliar thrust may otherwise lead
to falls or other accidents. Stand to
one side of the FLYER and lift your
leg over the e-bike. Firmly hold the
handle bars with both hands, as you
would do with a bicycle.
3. Modern brakes have a substantial
-
ly higher braking performance than
conventional
brakes. Carefully prac-
tise using your brakes. Note that in
wet conditions and on slippery roads,
your bike’
s braking power, especially
when using rim brakes, is severely
reduced. Expect a longer braking
distance if you are riding in wet con
-
ditions. Look ahead while riding and
familia
rise yourself with the brakes’
response time.
9. Beforetherstride
Ensure that the e-bike is ready for use
and
adjustedtotyourbody.
This includes:
• Settingthepositionandxtureoftheseatand
handlebars
• Adjusting the brakes
• Securing the wheels into the frame and fork
• Any parts that are not supplied already assem
-
bled
should be tted by a FLYER specialist
retailer.
To ensure that you enjoy a safe and comfortable
riding position, please allow your FLYER special
-
ist retailer to set up your handlebars and stem.
Have
the saddle set to a safe and comfortable
position (see Chapter 12.2.).
Have the brake handles set by the FLYER spe
-
cialist retailer so that you can reach them easily
at all times and can use the brake without getting
tired. Be sure to familia
rize yourself with the brake
levers connected to the front and back wheels –
the left brake lever is usually for the front wheel
and the right lever is usually for the back one!
Despite this general rule, however, you should
still check what wheels the brakes are connected
to since this standard isn’t always followed.
Before each ride, and anytime your bike has
been left unattended for a short period of time,
make sure to check if each screw, quick-release
lever, thru axel or other important components
are properly secured where they belong. A table
listing the most important screw connections and
the prescribed fastening torques is provided in the
“Technical Data”, while notes on the correct use of
quickrelease fasteners and quick release axles
are provided in Chapter 12.1.
When you are driving with clipless/step-in pedals:
Functional testing is required. The pedals should
release easily and smoothly.
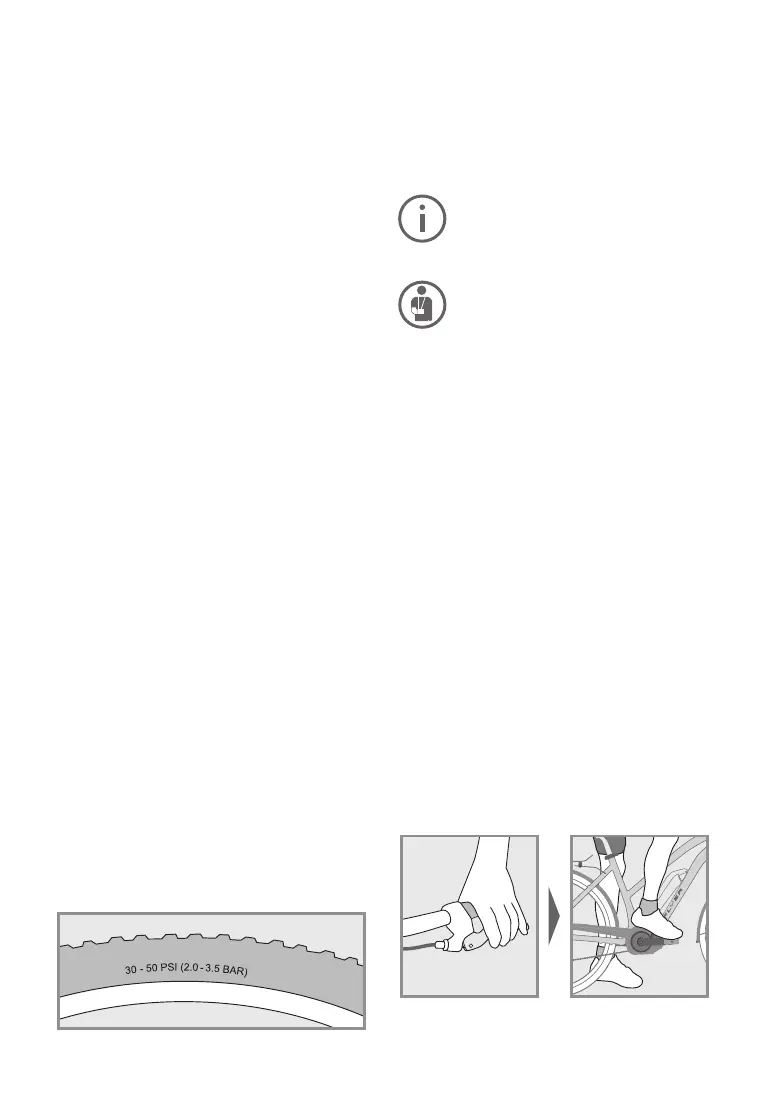
Check the tyre pressure. The manufacturer guide
-
lines
whichmaynotbeexceededorundercutare
printed on the side of the tyres. Do not exceed
eitherthe stipulated maximum pressure or drop
below the stipulated minimum pressure. General
comments: Lower air pressure gives greater trac
-
tion and comfort, while higher air pressure reduc-
es
resistanceandextendsrange.
Exampleoftyrepressureinformation