30
12. Adjustingthe
bike to the rider
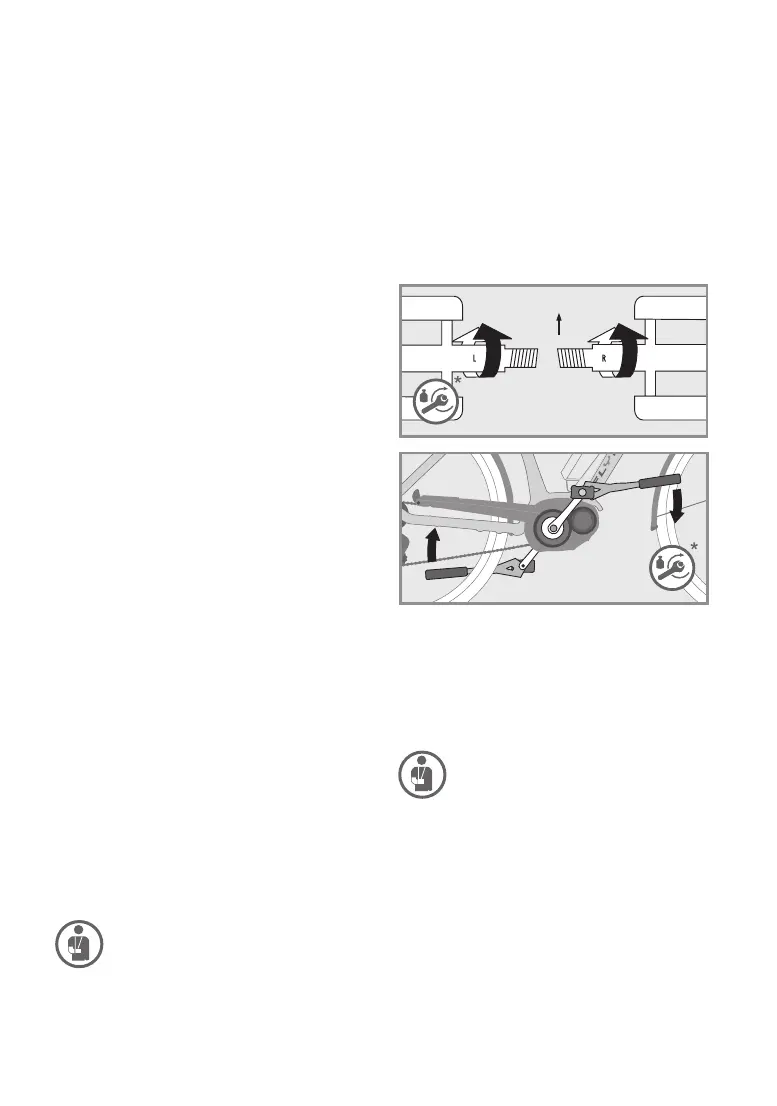
Installing pedals
Always have your pedals installed or changed by
your FLYER specialist retailer, and feel free to ask
for advice the correct handling. Pedals must be
installed with a suitable spanner. Please note that
thetwopedalsarescrewedonindierentdirec
-
tions and must be fastened with high torque (see
“T
echnical Data”). Apply assembly grease to both
threads.
Pleasetakenotethattherightpedalisdierent
from the left. You can recognise which pedal be-
longs on which side from the screws which turn in
opposite directions. Usually
, an “R “ is embossed
on the right pedal with an “L” on the left. Screw the
right pedal clockwise and the left pedal anti-clock
-
wise into the cranks.
1.
The pedals must be fastened with a
suitable spanner. Adhere to the cor
-
rect fastening torque when screwing
on the pedals, see “T
echnical Data”.
Ensure that the pedals are tted
straight.Iftheyarettedatanangle,
there is a danger of breaking and of
having a fall!
2. We advise against the use of pedals
with hooks and straps. Tightened
straps will NOT release your feet.
Inadequate tyres can result in falling
over and injury.
3. Ensure that you have read the man
-
ufacturer‘s instructions before using
magnetic or clipless
pedals. Practise
clipping your shoes in and out of the
Direction
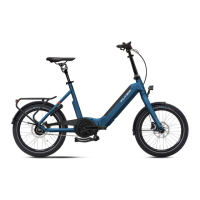
11. Afterafall
Have the vehicle and all components checked
for changes, damage, rm attachment and cor-
rect function by a FLYER specialist retailer. This
may
, in particular, include dents and cracks in the
frame and fork, bent components and parts such
as the handlebars or a shifted or turned seat. In
-
spection by a FLYER specialist retailer must cov-
er the following main points:
•
Carefully check the frame and fork. Deforma-
tions can usually be detected when looking at
surfaces
fromdierentangles.
• Are the seat, seat post, stem and handlebars
still in their correct positions? When this is not
the case, do NOT move the components back
from their changed position before loosening
the relevant screw connection. It is essential to
adhere to the prescribed fastening torque. Val
-
ues and information are provided in the “Tech-
nical Data” and in the “Quick release fastener”
chapter (12.1).
•
Check whether both wheels are correctly and
rmlyattachedtotheframeandfork,thatboth
the front and rear wheels rotate freely and that
the rim runs straight past the brakes without
snagging. The tyres must not touch the brakes.
• Check that both brakes are operating fully.
• Do not set o again without having checked
that the chain is sitting securely on both the
front chain wheel and rear sprockets. It must
beengaged fully with the cogs. If you seto
andthechainjumpsoacogyoumayfall,at
the risk of very severe injury.
• Check whether the display of the FLYER
e-bike shows a fault message or a warning.
Do
not drive your FLYER when a warning is
displayed. Immediately contact your FLYER
specialist retailer.
• Check that the display and the battery are un
-
damaged. Do not ride your FLYER if there are
any noticeable changes (cracks, scratches,
etc.).
Haveallpartsandfunctionsrstchecked
by your FLYER specialist retailer.
If you notice any changes to your bicycle, DO
NOT continue cycling. Do not retighten any loose
partswithoutrstcheckingthemandalwaysuse
a torque wrench. Take the FLYER to your FLYER
specialist retailer, describe the fall to them and
have the bicycle checked out!
There is a risk that humidity or water
may penetrate the motor if the housing
of your battery is cracked. This may lead
to short circuits or electrical shocks. Im
-
mediately stop using the battery in this
case and contact your FL
YER specialist
retailer. Do not charge the battery.