39
EN
smallest sprocket. In this position, the rear de-
railleur poses the least hindrance in removing
the wheel.
•
If your FLYER is equipped with a quick-release
leverorathruaxel,openthem.
• IfyourFLYERhashexnuts,loosenthesewith
a suitable spanner anti-clockwise.
• Pull the rear derailleur backwards somewhat.
• Lift the bike slightly.
• Lightly strike the wheel from above with the
palm of the hand.
• Take the wheel out of the frame.
•
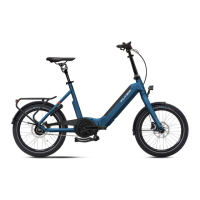
Typesofvalveonbicycletubes
2.Removingthetyreandinnertube
• Unscrew the valve cap, the fastening nut and
possibly the cap nut from the valve.
• Release all of the remaining air from the inner
tube.
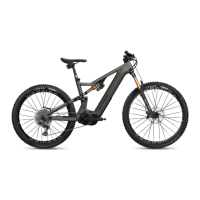
• Insert the tyre lever opposite the valve on the
inside of the tyre.
• Insertthesecondtyreleverapprox.10cmfrom
therst,betweentherimandtyre.Liftthetyre
bead over the edge of the rim.
• Repeat this lifting action around the wheel until
the entire tyre is free.
• Remove the inner tube from the tyre.
3.Changetheinnertube
Switch the inner tube for an intact one.
Sclaverand
13.3 Dealingwithaattyre
Correctandsaferepairofaattyrerequiresspe-
cialised e-bike knowledge and special tools.
Have
technicaldefectsandattyresexclusively
repaired by your FLYER specialist retailer.
Repairing a tire puncture involves having
to adjust safety-relevant components.
Incorrect mounting of the wheels and
brakes can lead to severe falls and inju
-
ries. We strongly advise you not to repair
a
tire puncture alone. Ask your FLYER
retailertoxthetirepunctureforyou.
Get thorough instructions from your
FLYER specialist dealer and practise
changing the wheels and tyres under
their supervision if you plan to repair
yourownattyres.Thesystemmustbe
switchedoandthebatterymustbere
-
moved before changing a tyre or wheel.
Y
ou need the following equipment to repair a tire
puncture:
• Plastic tire lever
• Patches
• Rubber cement
• Sandpaper
• Open-ended spanner or wrench (for wheels
without quick release skewers)
• Air pump
• Spare tube
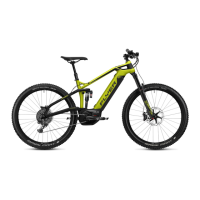
Your FLYER is equipped with a disc brake. This
way, you can remove the wheel without doing any
further preparation.
Pleasenote:whenttingthewheel,thediskmust
be slotted between the brake linings of the brake
calliper and ultimately be centred without contact.
1.Removingthewheel
• If your FLYER is equipped with a quick-release
leverorathruaxel,openthem.
• Ifyourbikehashexagonalbolts,thenloosen
them in anti-clockwise direction with a tting
ringspannerorbox-endwrench.
You can then remove the front wheel according to
the steps listed above.
Thefollowingapplies
forrearwheels:
• If your FLYER
uses a derail-
leur gear system,
change gear to the
Source: Shimano
®
techdocs