22
Installation and Operation Manual
• The display will flash “CONF” and “DUAL.T”
alternately.
• Press the DOWN button once. The display will now
flash “CONF” and “RSTART”.
• Press the left internal button once. This puts you
back into the operational mode.
• Replace internal button screws and o-rings.
CALIBRATION AND SETUP MODE
Calibration and Setup is done by using the Digital
Display Control Module function buttons. To enter or
exit the calibration and setup mode, remove the cover
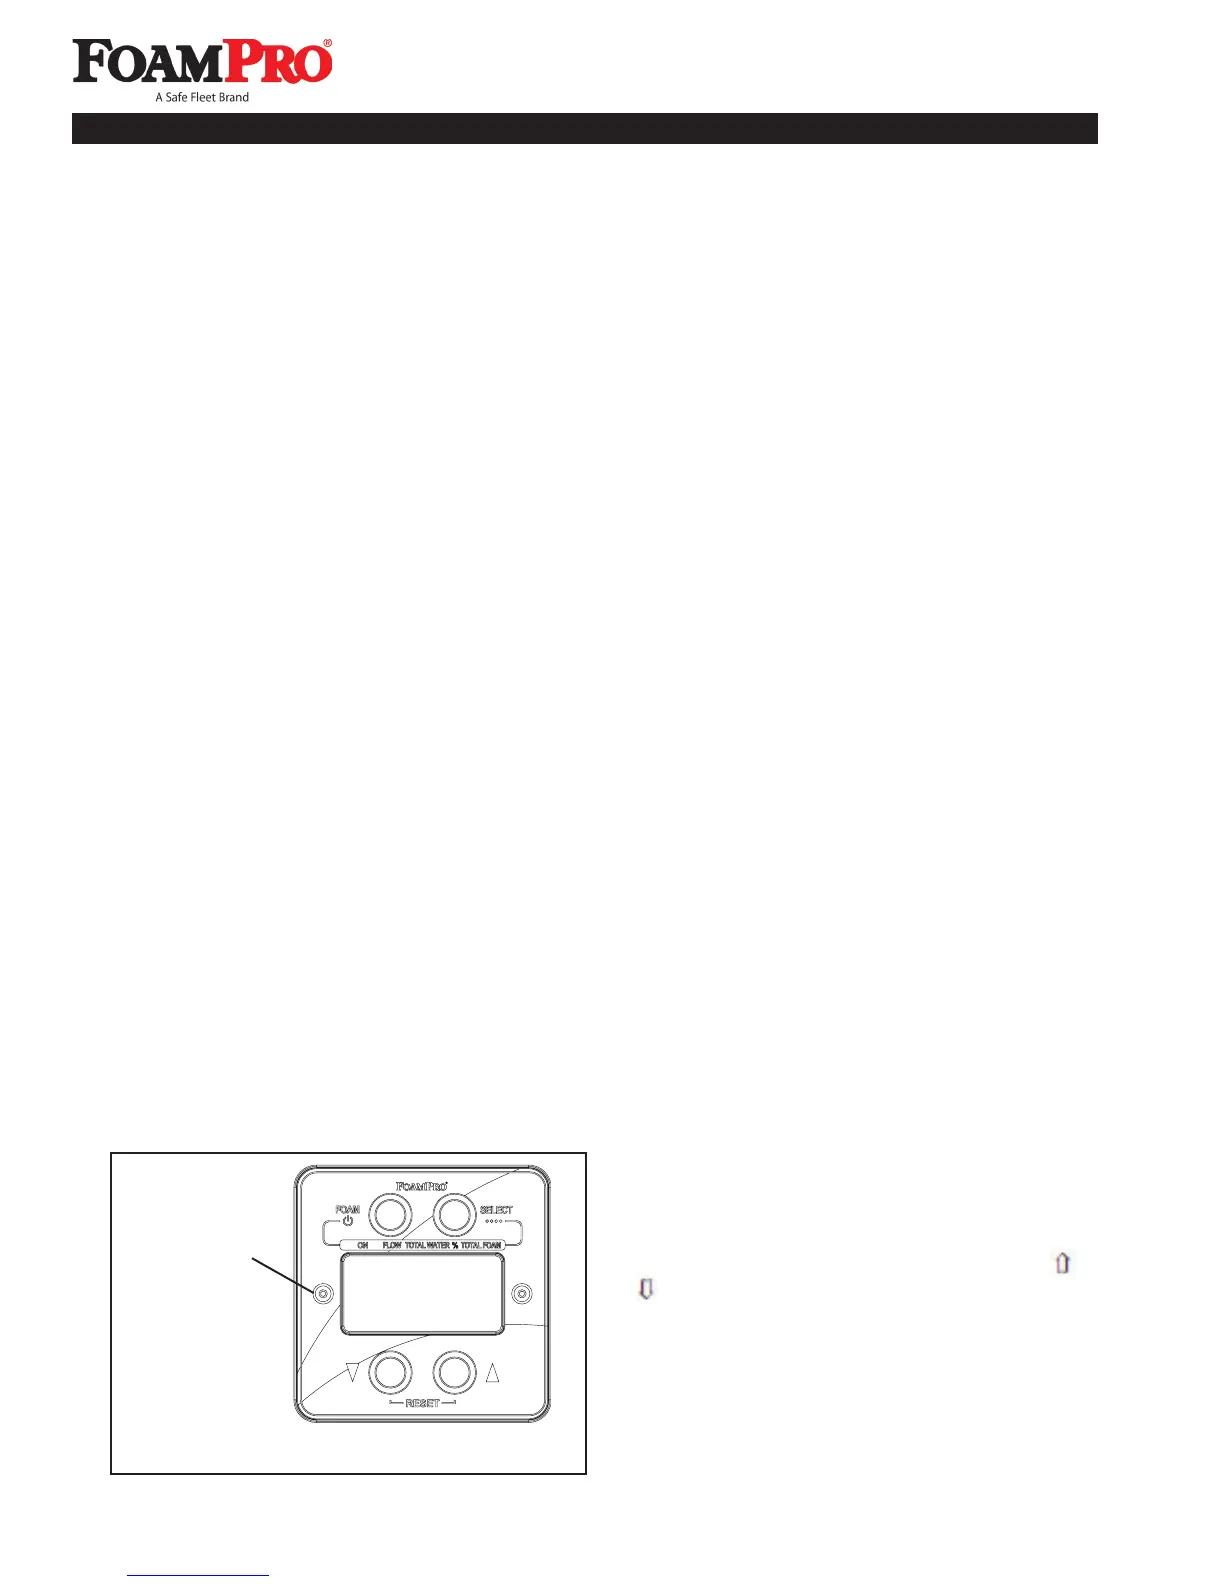
screw and o-ring to the left of the display readout panel
on the Digital Display Control Module (See Figure 24).
Use a 3/32 inch Allen wrench to remove the screw and
also to operate the switch that is located beneath it.
To enter Calibration and Setup mode, use the Allen
wrench to depress and release the switch inside the
screw opening. The display will show “Elec Setup” until
any function button is pressed.
Exit from Calibration and Setup mode is accomplished
by pressing and releasing the switch again. “FRC or
HYPRO” will appear followed by a zero after several
seconds. REPLACE THE COVER SCREW AND
O-RING WHEN DONE.
CAUTION: Always replace the cover screw and
o-ring to keep water and dirt from entering the
digital display control module or serious damage to
the components may occur.
SYSTEM RESET
During calibration procedures, it may be necessary
to return the system to the original factory default
settings. To return to the factory default values, enter
calibration and setup mode as previously described.
Immediately after entry into calibration and setup mode,
prior to pressing any other button, depress the and
simultaneously. This action will return the system
to the factory default settings. Proceed with calibration
and setup after performing this reset.
NOTE: If using the Dual-Tank Option on the
controller and Reset is used, the Dual-Tank default
will need to be reconfigured.
Figure 24. Calibration Switch Location
Cover Screw to
be Removed
SYSTEM SETUP PROCEDURES
FoamPro systems permit easy calibration of the foam
proportioning unit to assure accurate operation. The
calibration process will make adjustments to the
flowmeter(s) and foam pump display readings.
NOTE: FoamPro systems can be calibrated to
any unit of measure, i.e. U.S., Metric, Imperial, etc.
It is necessary to use the same unit of measure
throughout the calibration process to ensure proper
proportioning by the system.
IMPORTANT: Both the foam pump and flowmeter
readings must be calibrated as a part of the initial
setup after installation.
Recalibration should only need to be done after major
repairs or changes to the foam system.
SETUP FOR DUAL-TANK OR REMOTE
START/STOP OPERATION
The FoamPro controller is factory defaulted to the dual-
tank option. If you are installing a remote start/stop
system, you must change the default setting for proper
system operation. The procedure for this new setting
starting from the operational mode is as follows:
• Remove the screws to enter the setup and
diagnostic modes.
• Enter the setup mode by pressing the internal
button on the left side of the controller.
• Enter the diagnostics mode by pressing the internal
button on the right side of the controller.
9 Calibration and Setup