Printing | 27
4. Click Select. The Job Setup window opens.
5. Click Apply. The selected printer appears in the Job Info dialog box.
6. Enter or update the Job Name.
7. Click Print Now to start the print immediately if the printer is ready or Add to Queue to add
the print to the printer’s queue. Once the progress bar fills and the Print window closes,
the upload is complete.
5.4 Preparing the printer for printing
Before a print job can begin, the Form4B must be set up to match the correct material
settings. Insert the resin tank, build platform, and resin cartridge. Confirm the print job on the
printer’s touchscreen and wait for the print chamber inside the Form4B to preheat. For detailed
guidance and visual assistance, visit support.formlabs.com.
5.4.1 Automatic consumables checks
The Form4B checks the following before each print:
•
Accessories: Sensors check for the proper installation of the build platform, resin tank,
and resin cartridge.
•
Temperature: The printer heats the resin to its optimal temperature before starting the print.
• Resin: Resin flows from the resin cartridge into the resin tank when the cartridge dispense
arm squeezes the bite valve of the resin cartridge open. The Form4B regulates the volume
of resin in the resin tank through a sensor called the LevelSense, which is located above
the rear left-hand corner of the resin tank. The printer begins to fill the resin tank once a
print starts and maintains the level of resin in the resin tank during the print. Printing begins
automatically when LevelSense detects the proper amount of resin in the resin tank.
• Debris: The mixer and sensors check for debris left on the build platform.
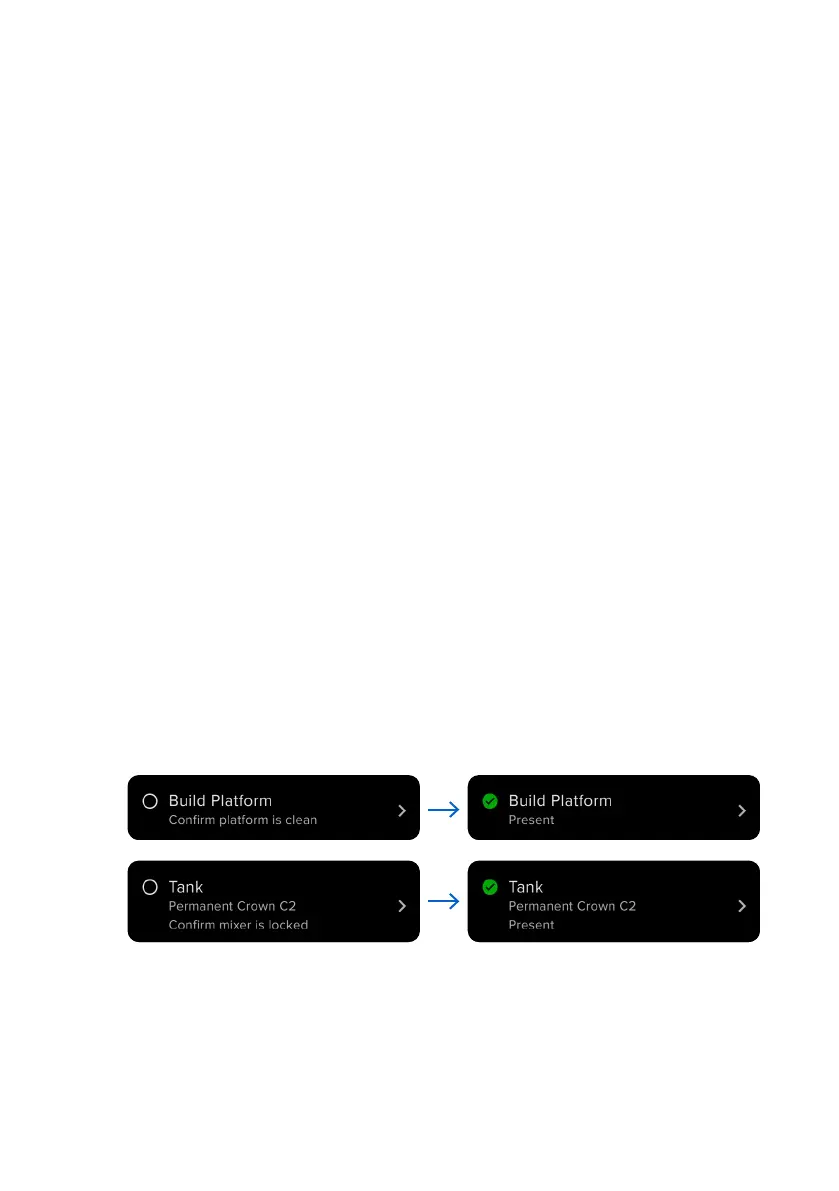
5.4.2 Readying your printer to start a print
Before the printer can start a print, confirm that the build platform is clean and ready to use
and that the mixer is secured in place. To ready your printer to start a print:
1. On the touchscreen, tap the printer icon on the sidebar.
2. Tap the check mark next to the Build Platform and Tank status items to confirm that they
are ready to be used.
3. The status in the top bar changes to Ready.
5.4.3 Starting a print
Once a print job is uploaded to the Form4B, the printer’s touchscreen displays the next print
job in the queue. To start the print, tap Print on the printer’s touchscreen.
If the file is not the next print job in the queue, tap the collapsed menu icon from Home to
access the Queue screen.