POWER-UP OF THE SOLAR SIREN
1. Connect the 9V PP3 initial power battery to the
battery clip.
Connect the rechargeable battery to the charging
leads. Connect the Red lead to the Red (+ve)
terminal and the Black lead the Black (-ve)
terminal. Both indicator LEDs will flash together in
a single long flash to indicate that the unit is
operational.
Important: Once the batteries have been connected
,
the Siren will be operational (and in Service Mode)
and it is important that the solar panel receives
sufficient light to maintain the battery charge. The
Siren should not be operated repeatedly during
installation and testing, as this will rapidly drain the
battery. It is recommended that the Siren be left
for at least a day in order to charge the battery
before the system is Armed.
2. Press the anti tamper switch, both indicator LEDs
will flash together four times.
3. Hinge the front cover locating tabs over the top
edge of the back plate and carefully push the base
of the siren cover into place. Secure the Siren
cover in place by refitting the fixing screw in the
bottom edge of the cover. Do not over tighten the
screw as this could damage the thread.
Important: Ensure that the rear tamper switch
is closed when you fit the siren cover to the
back-plate (i.e. listen for the switch to click). If
the switch does not close this will prevent the
Solar Siren from operating correctly. If necessary,
remove the siren cover again and adjust the
screw on the back-plate tamper plunger to
ensure the switch closes when the Siren is
secured in position.
4. If fitted remove the protective film covering the
Solar Panel.
The fitting of the Solar Siren is now complete and the
unit is automatically in Service Mode.
Note: While in Service Mode the Solar Siren will not
acknowledge any signals from Detectors, Personal
Attack Buttons, Tamper Switches etc. Service Mode
is controlled from the Remote Control and Keypad -
refer to page 17 for details.
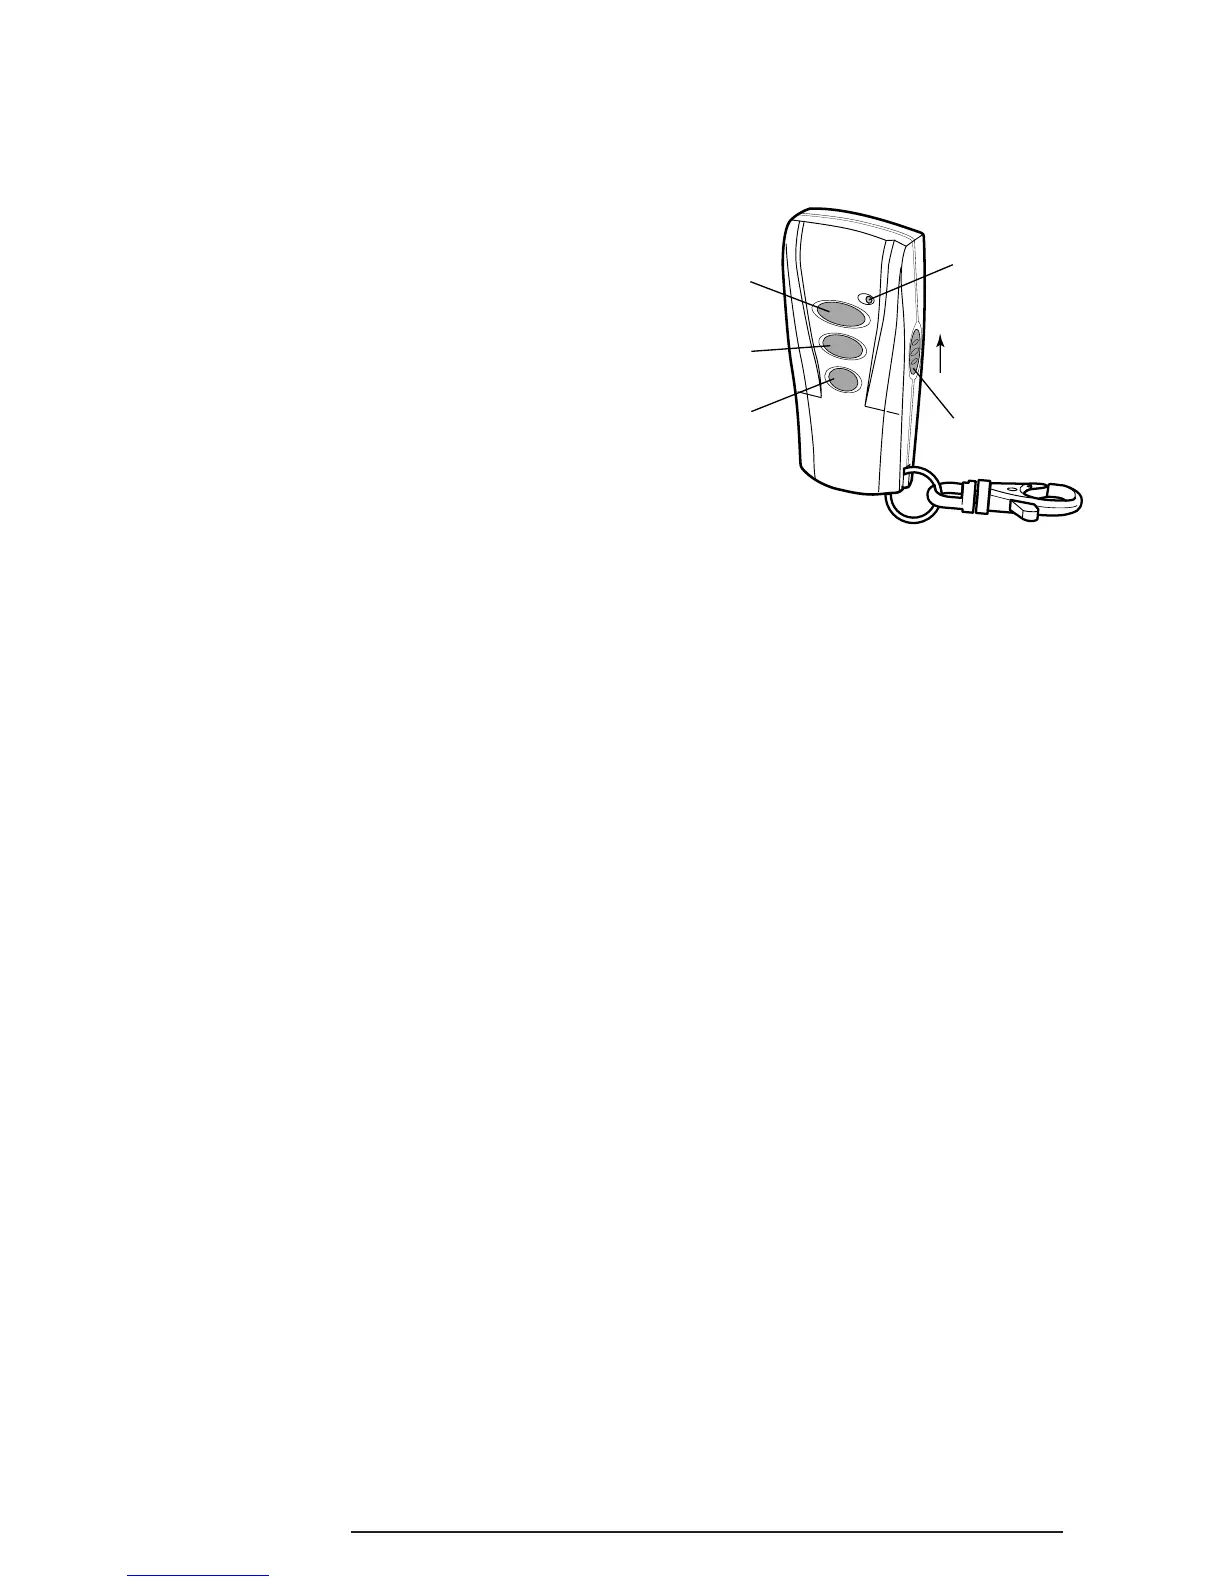
REMOTE CONTROL UNIT
The Remote Control Unit is used to Arm in either
Instant-Arm or Delay-Arm modes and to Disarm the
system.
The Remote Control Unit also incorporates a Personal
Attack (PA) switch. Activating the PA switch on the
side of the Remote Control will immediately initiate a
full alarm condition whether the system is Armed or
Disarmed. The alarm can be cancelled by pressing
the ‘DISARM’ button on the Remote Control.
Any number of Remote Control Units can be used with
your system, providing they are all coded with the
system House Code and are mounted within effective
radio range of the Solar Siren.
The Remote Control is powered by a CR2032 type
Lithium cell which under normal conditions will have an
expected life in excess of 1 year. Under normal battery
conditions the LED on the Remote Control will only
illuminate when a button is pressed. However, under
low-battery conditions this LED will continue to flash
after the button has been released. When this occurs
the battery should be replaced as soon as possible.
CONFIGURING THE REMOTE
CONTROL
1. Remove the rear cover by undoing the small screw
on the rear of the Remote Control.
2. Located above the battery cover is a row of 8 DIP
switches. These switches set the House Code for
the Remote Control and must be set to the same
ON/OFF combination as the House Code DIP
switches in all other system devices.
3. Ensure that the jumper link located immediately
below the House Code DIP switches is removed
for use with this alarm system.