11
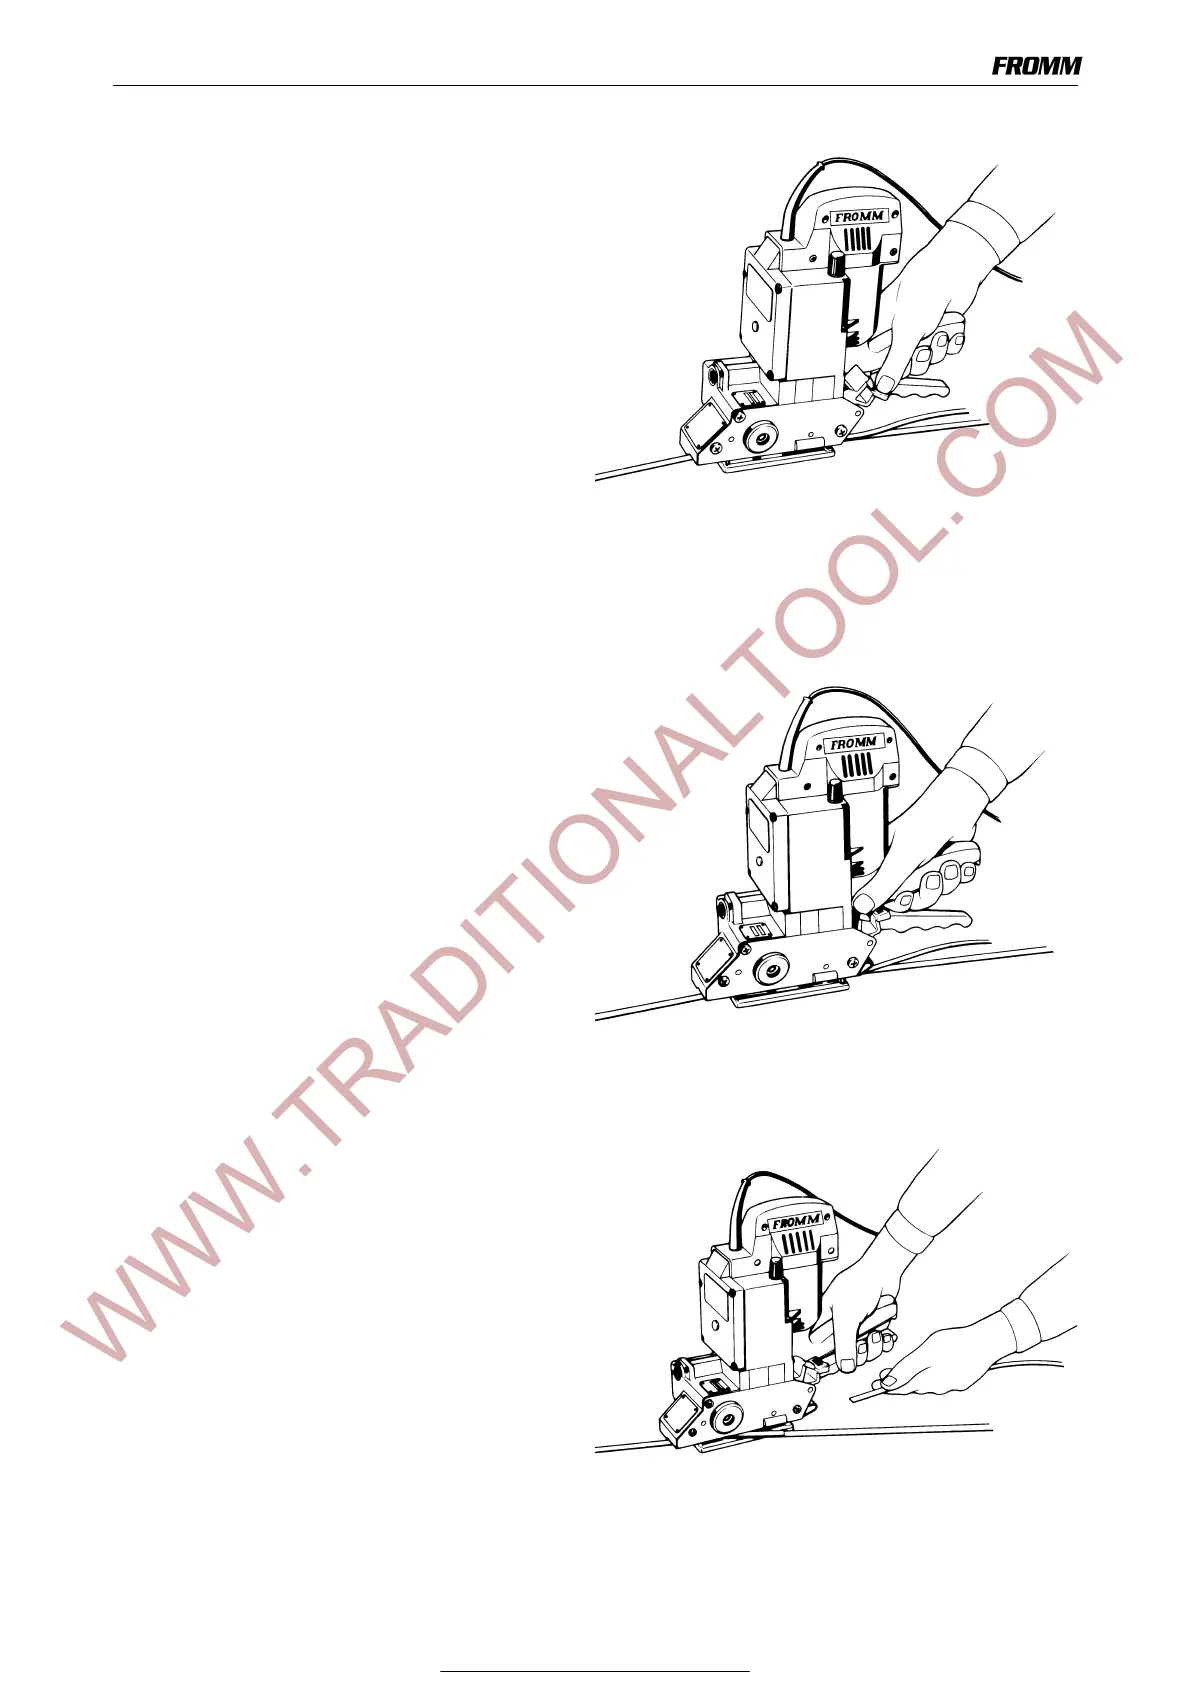
9.3 Tensioning
Press down the switching lever and then release it
again after the desired strap tension has been
reached. The tensioning operation can be interrupted
and restarted at any time.
The desired tension of the strap can be preselected
on the rotary knob. Turning it in a clockwise direction
increases the tension (+) and in a counter-clockwise
direction lowers it (-).
If a constant tension is desired apply tension until the
motor stalls. It is recommended to set the tool at the
maximum tension.
If maximum tension is not required tensioning cycle is
stopped by releasing the switching lever before the
motor stalls.
9.4 Sealing / welding
Press forward the switching lever firmly and release it
again IMMEDIATELY.
The strap is welded automatically by friction and then
cut.
Depending on the size and quality of the strap,
different WELDING TIMES are required.
The welding time can be set at the rotary
potentiometer under the cover using a screw-driver
with a small blade. Turning the rotary potentiometer
in a clockwise direction increases the welding time
and turning it in a counter-clockwise direction will
reduce it.
Attention! If adjusting the welding time
disconnect the tool from the power supply.
9.5 Removing the tool
To prevent breaking of the seal, always let the seal
cool down for approx. 2 seconds after welding.
Pull up the grip lever and push the tool to the right
from the strapping.
For Parts & Service 1-877-862-6699