© 2021 Flanders Scientic, Inc.
43
Return to Table of Contents
Appendix C - Ethernet Connectivity
BM & CM Series Monitors have basic remote control functionality available over ethernet.
Connecting to a Network
To connect a BM or CM Series Monitor to a network connect an ethernet cable to the monitor’s LAN port.
DHCP Settings
BM & CM Series Monitors are DHCP compatible and will obtain an IP address from your network. You can view the
monitor’s IP address in the System Status menu. DHCP can be set to OFF in the System menu, allowing you to assign a
static IP address and subnet mask.
Note: When changing static IP addresses, you must power cycle the monitor to set the new IP address.
Direct Connection
BM & CM Series Monitors can also be connected directly to your PC or Mac via ethernet connection. To directly connect
you must assign static IP addresses to your monitor and to your computer using the same subnet mask. The IP addresses
must be different for each device.
When connecting directly, you should disable other network connections (including WiFi) on your computer.
Suggested Settings:
Computer IP: 192.168.001.002
Subnet Mask on Computer and Monitor: 255.255.255.0
Monitor IP: 192.168.001.003
Gateway IP setting on monitor: 192.168.001.001
Note: When changing static IP addresses, you must power cycle the monitor to set the new IP address. If the
monitor fails to obtain an IP address or disconnects, try toggling DHCP On and Off to reset the network settings.
Remote Control
BM & CM Series Monitors can be controlled remotely using FSI’s IP Remote Utility, available free at FlandersScientic.com.
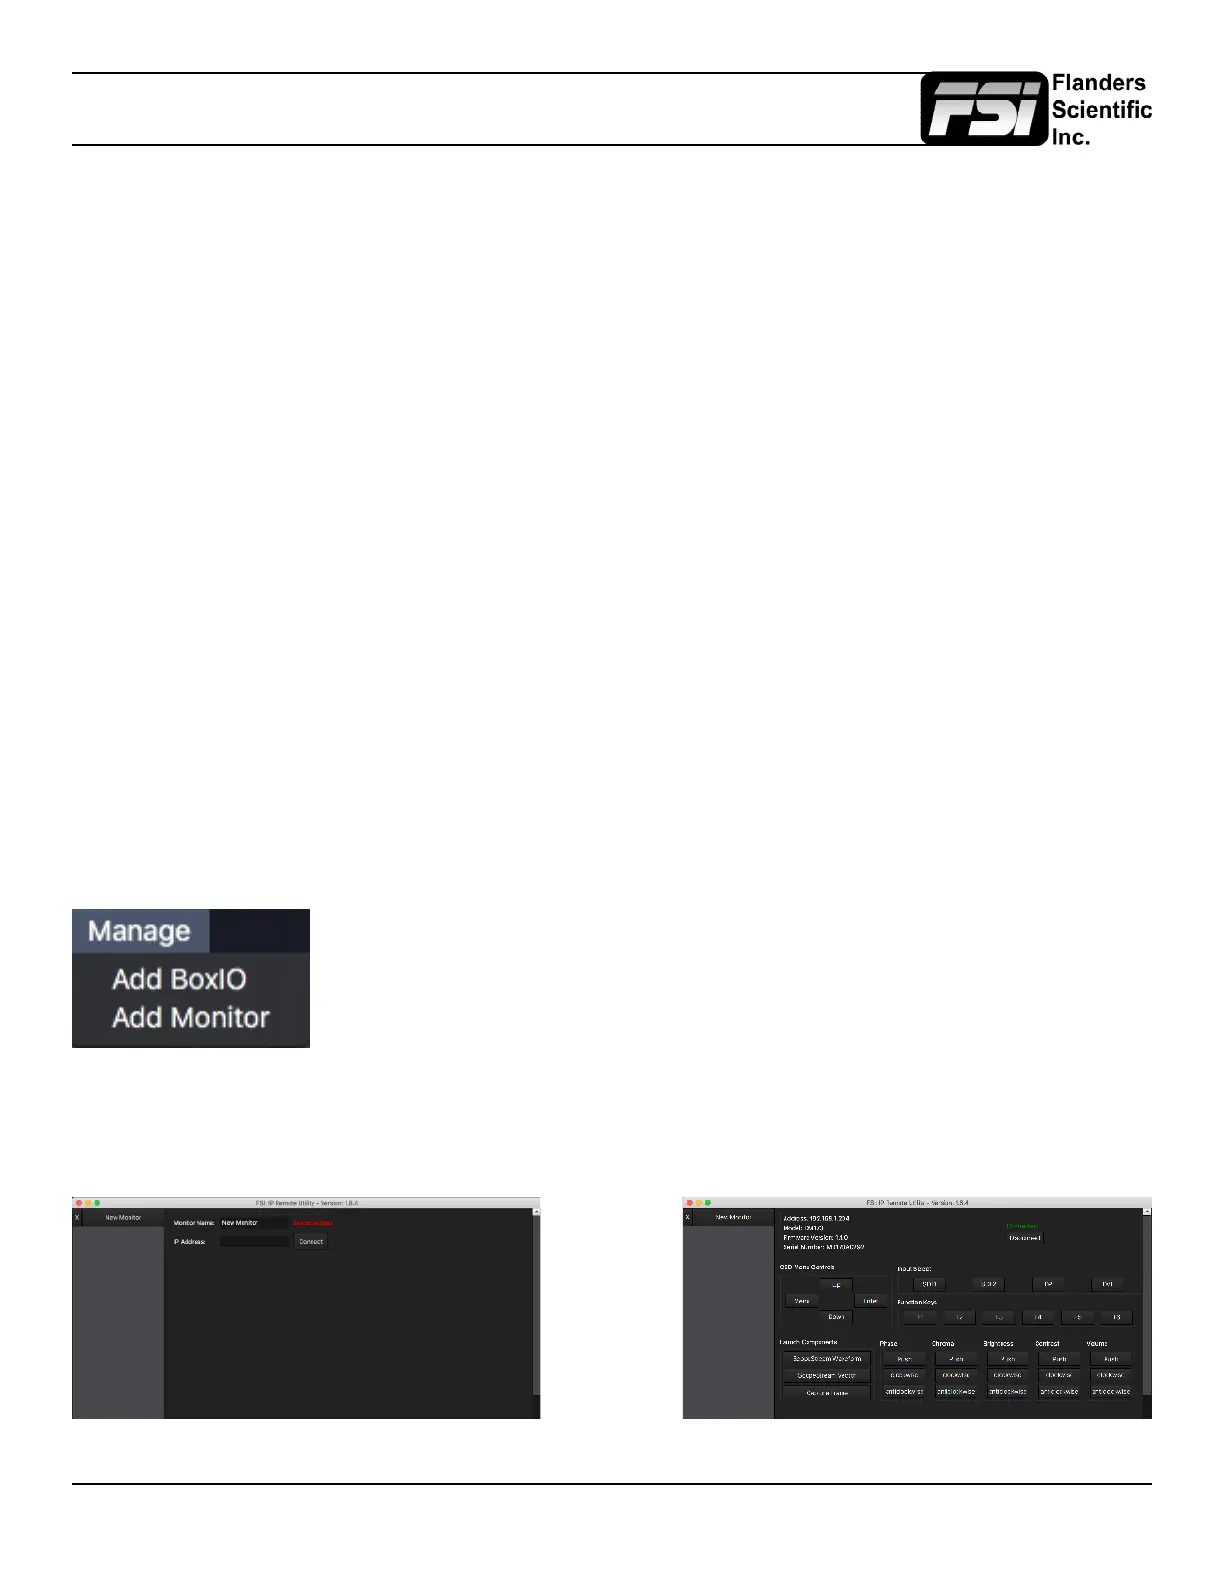
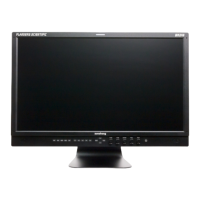
From the Manage menu, select “Add Monitor” to add a monitor control tab to your IPRU
window.
Enter the IP address of the monitor you would like to control in the IP Address eld and
press connect.
You can control multiple monitors or BoxIO by adding additional tabs.