700-Bubbler-Man Rev 12 13 Feb 2020
Page 10/51
5) Firmly replace the top housing ensuring the bowl is evenly and fully seated. Do not tip the bowl
during this step. If any silica gel pellets lodge in the gaskets, they can prevent the bowl from
seating properly or forming a seal.
6) Wrap Teflon tape around the threads of the barbed desiccant adaptor fitting.
7) Remove the shipping plugs from the inlet and outlet sockets.
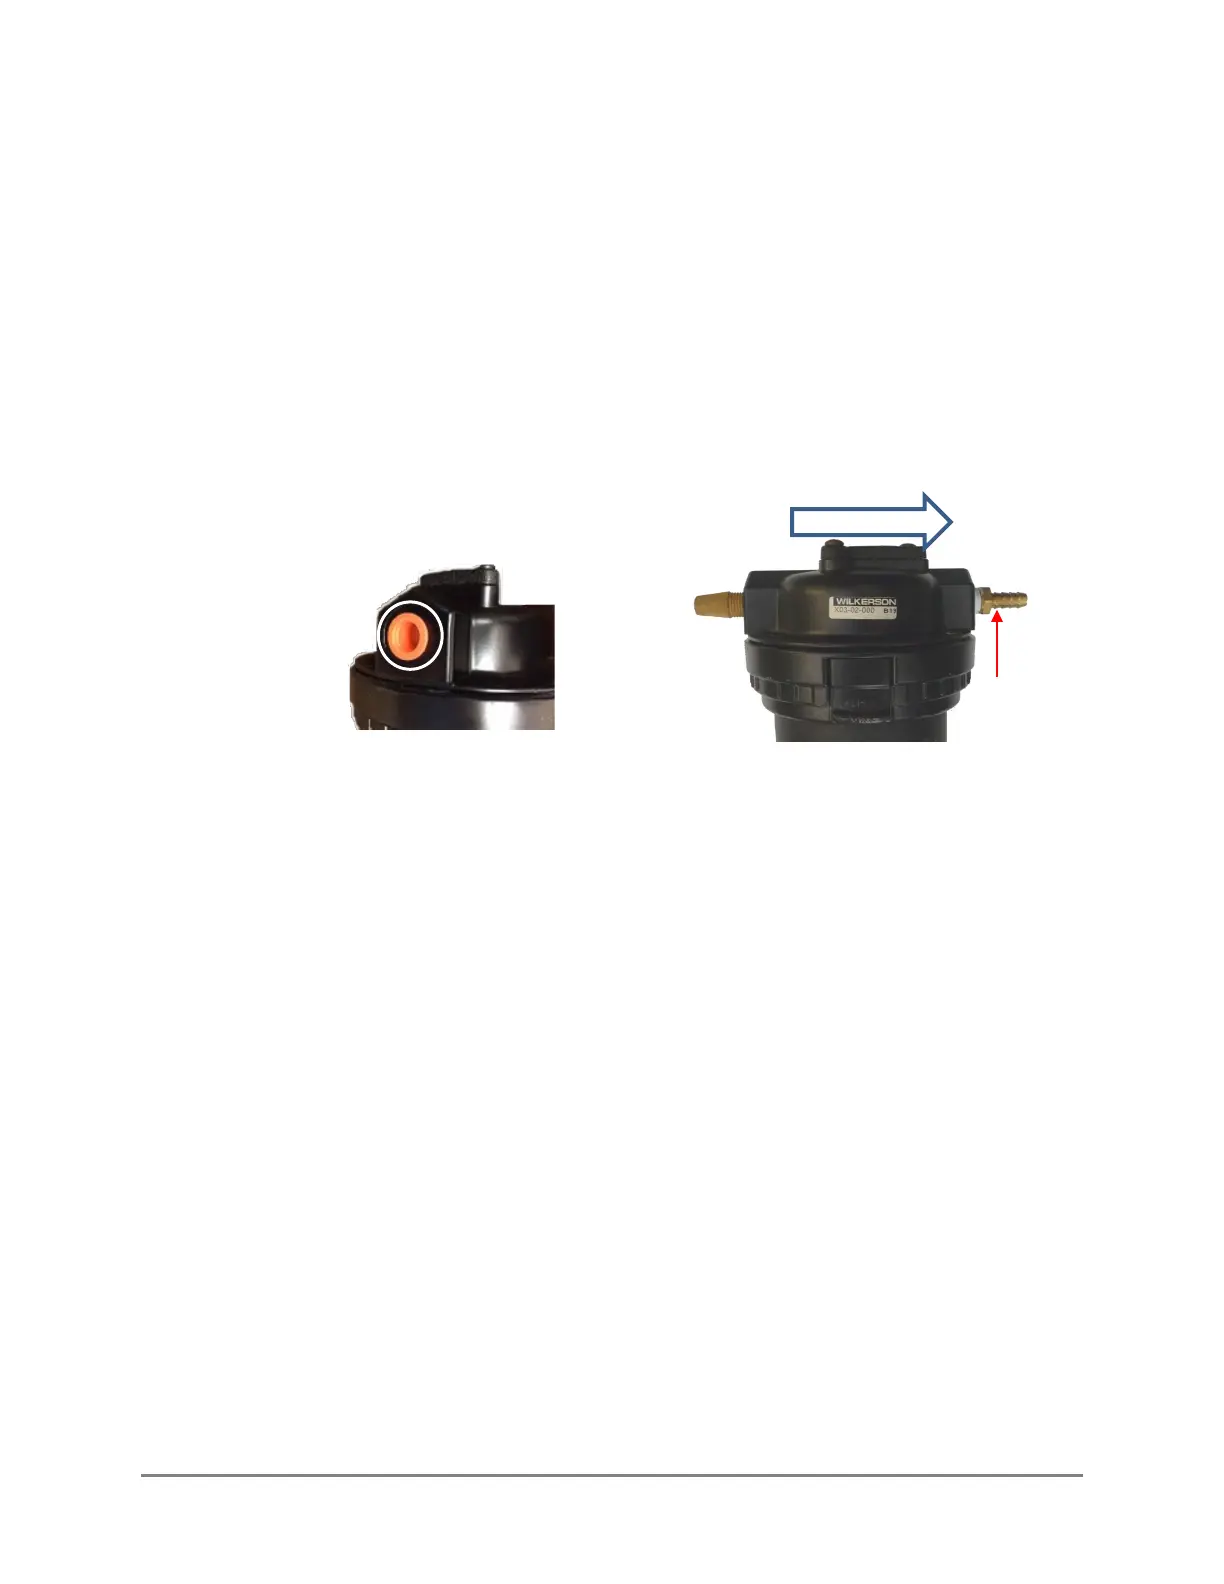
8) Screw the desiccant adaptor (part# 19469) into the air dryer’s outflow socket. Screw in finger
tight and then tighten two turns with a wrench.
9) Insert the inlet vent (part # 20625), tighten finger tight and turn 1 full turn with a screwdriver.
Figure 2-4: Air dryer with inlet vent and desiccant adaptor in place
10) Place the desiccant dryer in the mounting bracket.
11) Push the desiccant tubing firmly onto the dryer’s barbed desiccant adaptor fitting, ensuring a
tight seal.
12) Attach the desiccant hose to the barbed hose fitting on the Bubbler’s air intake (see Figure 2-2).
2.5.3 REPLACING THE DESICCANT
Observe the silica gel safety handling precautions (section 2.5.1). The silica gel desiccant, visible
through the clear polycarbonate plastic bowl, contains a colour indicator: blue indicates it is dry, and
pink indicates it is wet and needs to be replaced. The frequency of changing the desiccant is
dictated by the individual characteristics of each site and levels of humidity.
Before replacing the desiccant, the Bubbler must be powered off. You may need to remove the
desiccant hose from the air dryer in order to manipulate the top housing.
1) Remove the air dryer from the mounting bracket
2) Open the bowl following steps 2 and 3 in the preceding section.
Plug
Part # 20625
adaptor