700-Bubbler-Man Rev 12 13 Feb 2020
Page 13/51
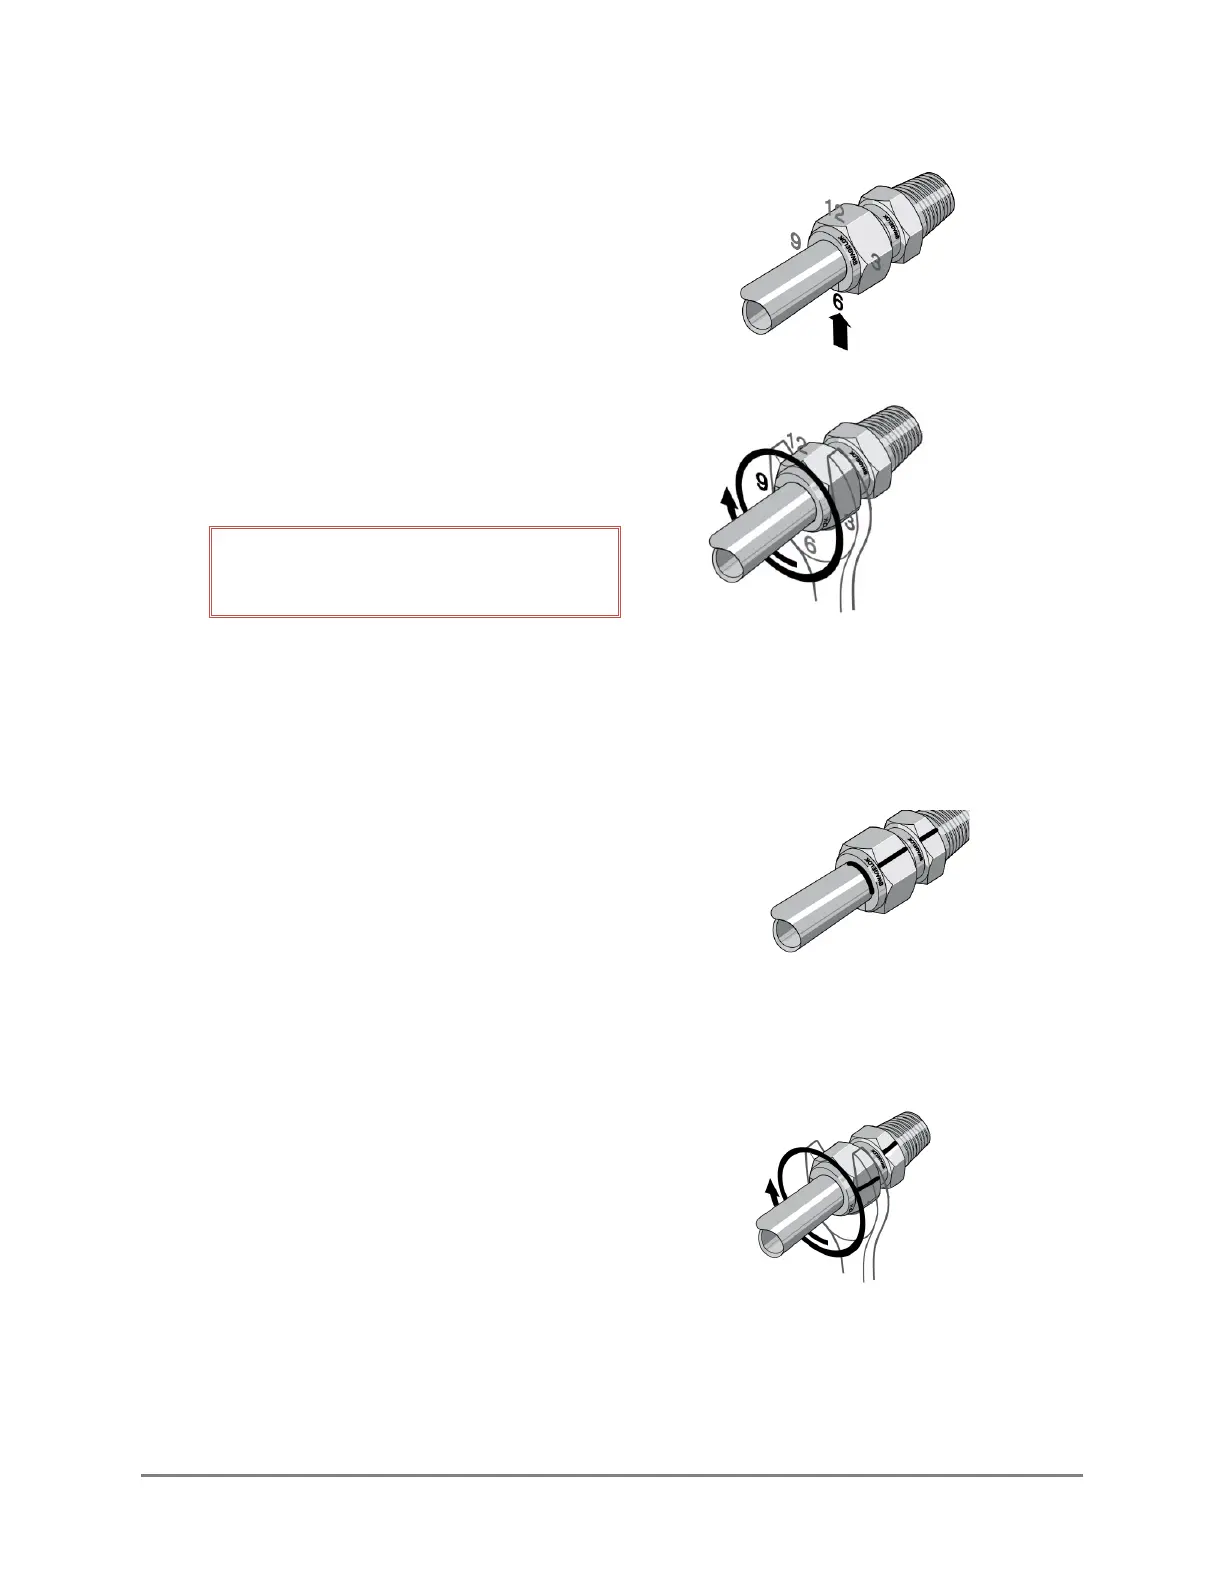
2) Screw the nut on until finger tight.
3) Mark the nut at the 6 o’clock position.
4) Use a wrench to tighten the nut one and a quarter
turns (pass the 6 o’clock position once and stop at
the 9 o’clock position).
DO NOT twist the Bubbler outlet. Only
turn the nut.
DISASSEMBLY
1) Mark a line along the back of the nut and Bubbler
outlet. These marks will be used to return the nut to
this position.
2) Use a wrench to loosen the nut.
3) Once maintenance is complete, replace the nuts
and ferrules, and re-insert the line as shown in Step 1
of the assembly instructions.
4) Tighten the nut to the marked position. At this
point, resistance will increase. Tighten the nut
slightly.