Setup Menu
349
System Settings
11
Port Number
Set the forwarding destination port number. Specify a number in the range from 1 to 65535.
Important • If a port number has already been set, [Standard Port] is disabled. To change the setting in
such a case, delete the existing address, and re-register a new address.
S/MIME Certificate
Allows you to make a link with a S/MIME certificate. The S/MIME certificate needs to be
registered in advance.
In order to link a certificate, select a certificate in a screen displayed when selecting [Create/
Change Link]. To delete a link, select [Cut Link].
Important • If a linked certificate is deleted due to some reason such as hard disk initialization, the
certificate is delinked from the S/MIME certificate on Address Book. When re-registering the
S/MIME certificate, you need to manually link it again.
Note • If many certificates are registered in the machine, it may take a long time to link a certificate.
For information on the certificate, refer to the Network Administrator Guide.
When the [Delete All Settings] Button is Selected
Selecting this button deletes all the information registered for the selected address. To delete
all the registered information, select [Yes].
Important • Deleted information cannot be recovered.
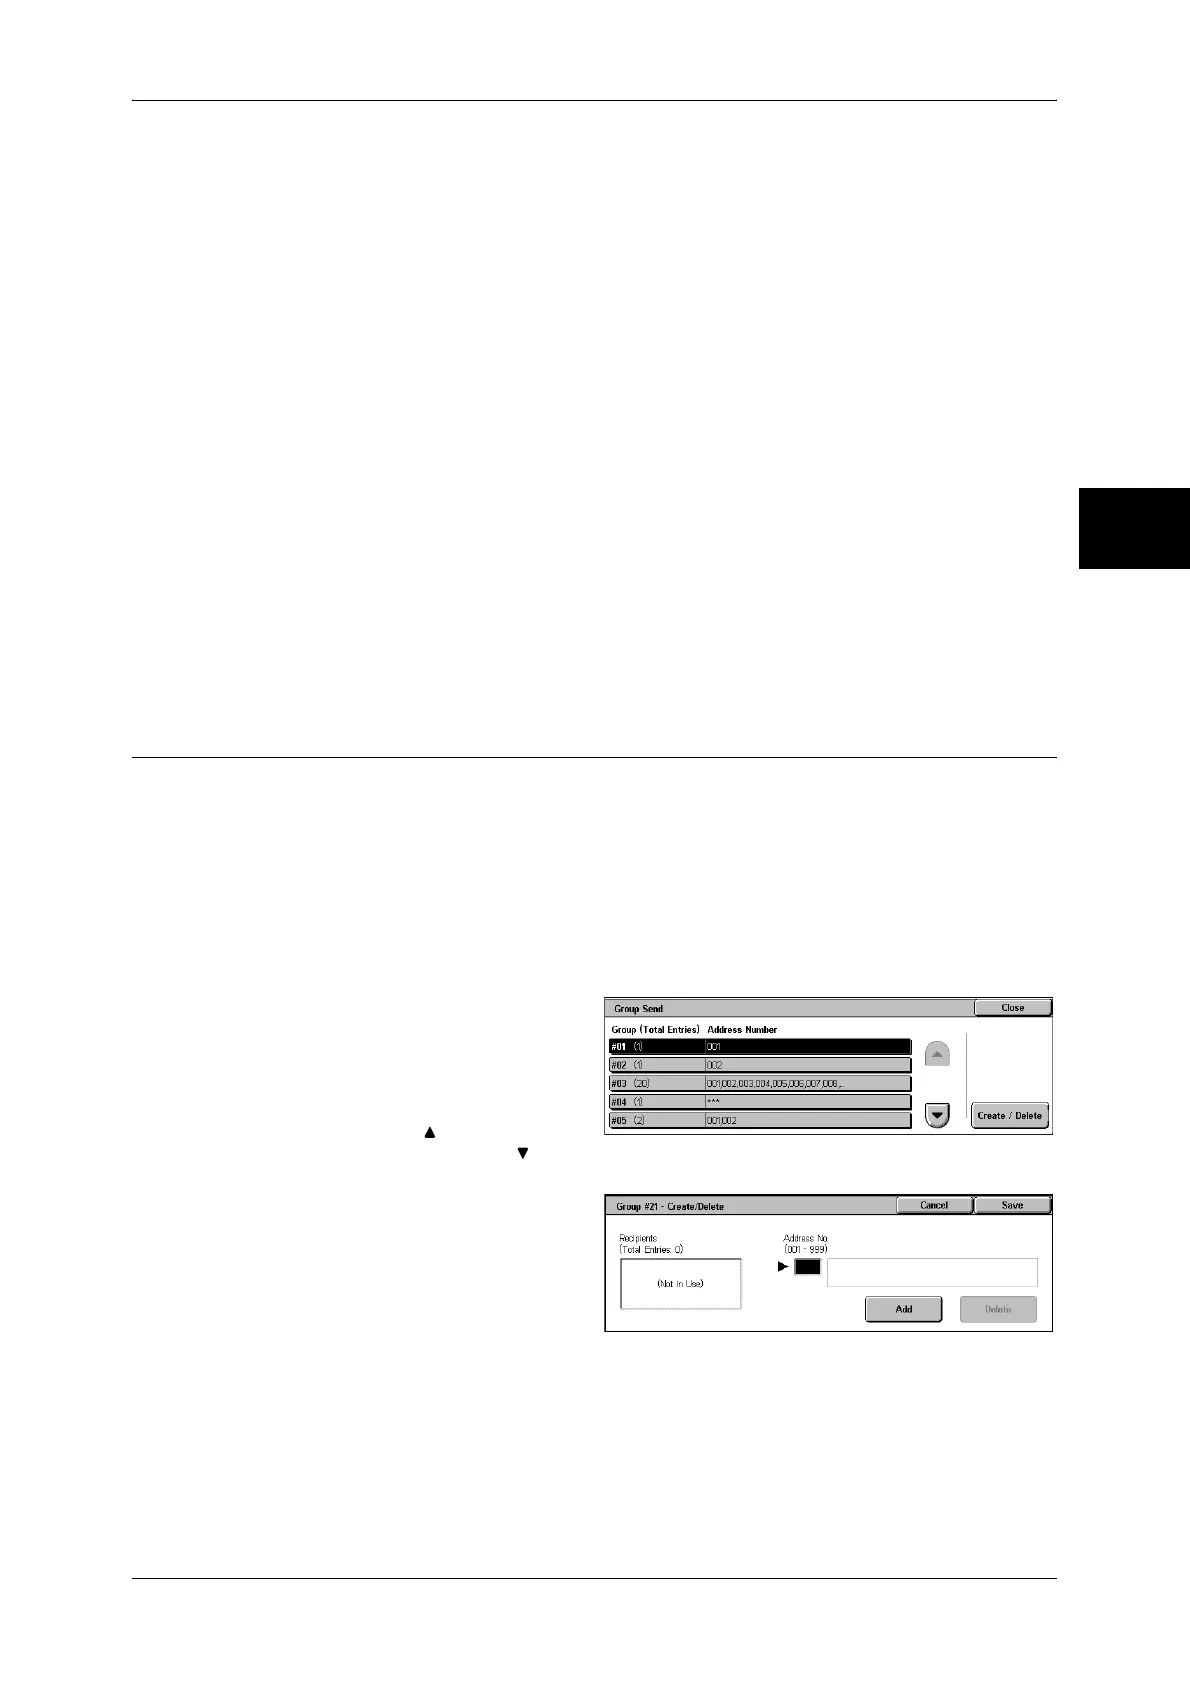
Group Send
You can register addresses for broadcast transmission as a group. Each group can
include up to 20 address numbers. The maximum number of groups that can be
registered is 50.
Note that recipients to be added to a group must already be stored in the address book.
Note • It is not possible to include a group in another group.
• As shown in the following example, you can use wildcards for specifying the numbers.
-01∗ : Specifies the 10 addresses with address numbers 010 to 019.
- ∗∗∗ : Specifies all address numbers.
1 Select [Group Send].
2 Select a group number you want to
register, and select [Create/
Delete].
Note • Select [ ] to return to the
previous screen or [ ] to
move to the next screen.
3 Enter an address number (3 digits)
you want to register with the
numeric keypad, and select [Add].
4 Repeat the procedure of Step 3 to
register the address numbers.
5 Select [Save].
Delete
Deletes a registered address. Enter the address number you want to delete with the numeric
keypad, and select [Delete].
 Loading...