12 Using the Scan Service
114
Using the Scan Service
12
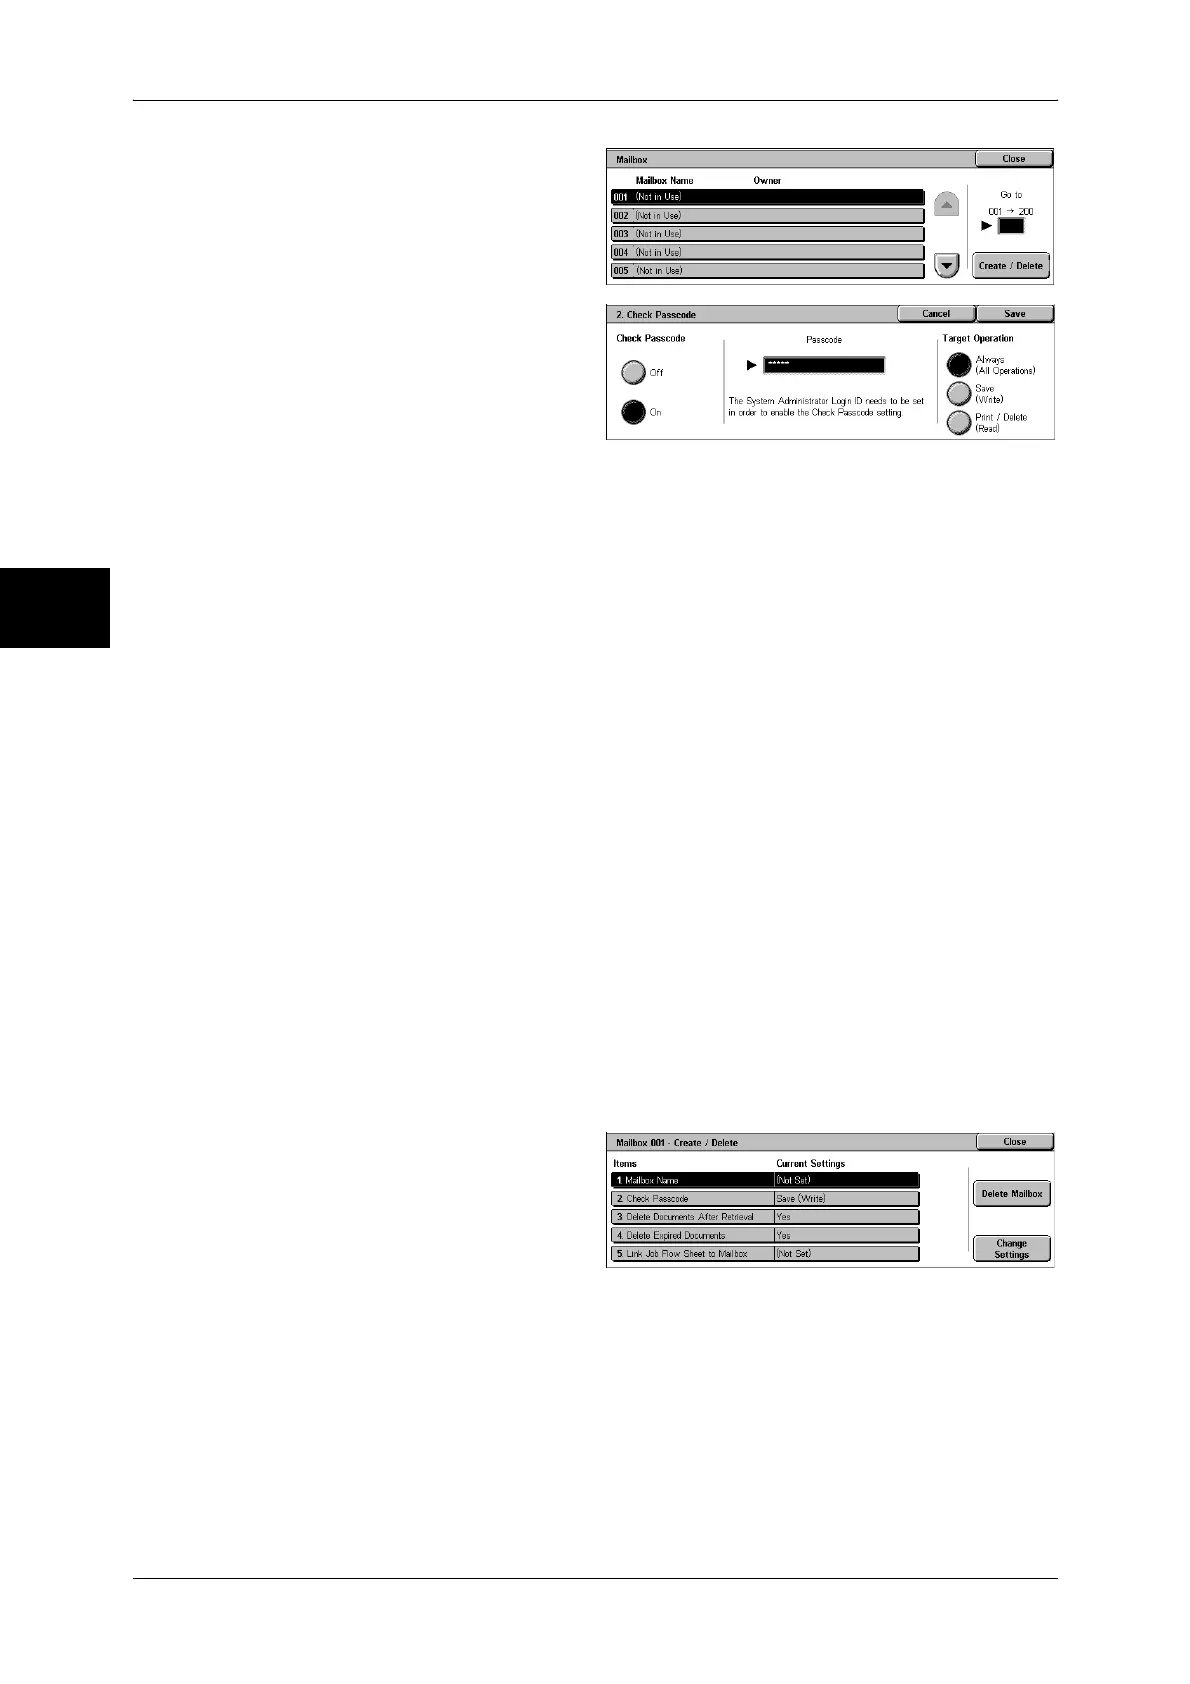
4 Select a mailbox to register and
then select [Create/Delete].
Note • Mailboxes that have not been
registered are displayed as
“(Not In Use)”.
5 Select [Check Passcode] to
configure the Check Passcode
settings.
When applying access restriction
1) Select [On].
2) Enter a passcode using numeric values (0 through 9). Up to 20 digits are allowed
for the passcode.
3) Select an item from [Target Operation], and select [Save]. The [Mailbox XXX -
Create/Delete] screen appears. XXX indicates the mailbox number to be
registered.
Note • The passcode entered is displayed as “∗”. When you make an entry mistake, press the <C>
(Clear) button and enter again.
When not applying access restriction
1) Select [Off] and select [Save]. The [Mailbox XXX - Create/Delete] screen appears.
XXX indicates the mailbox number to be registered.
Target Operation
Select an item to which you want to restrict access.
z
Always (All Operations)
A passcode entry is required for all operations.
z
Save (Write)
A passcode entry is required when the mailbox is selected.
z
Print/Delete (Read)
A passcode entry is required when a document in the mailbox is printed or deleted.
6 Configure the following items as
necessary. Select an item to
configure and select [Change
Settings]. When the setting is
completed, select [Save].
Mailbox Name
Set the name used for a mailbox. Up to 20 characters can be used for the name.
Note • The buttons on the control panel can also be used for the entry.
Delete Document after Retrieval
Set whether to delete a document in a mailbox after the document is retrieved, printed,
or transferred by a job flow.
 Loading...