11 Job Status
418
Job Status
11
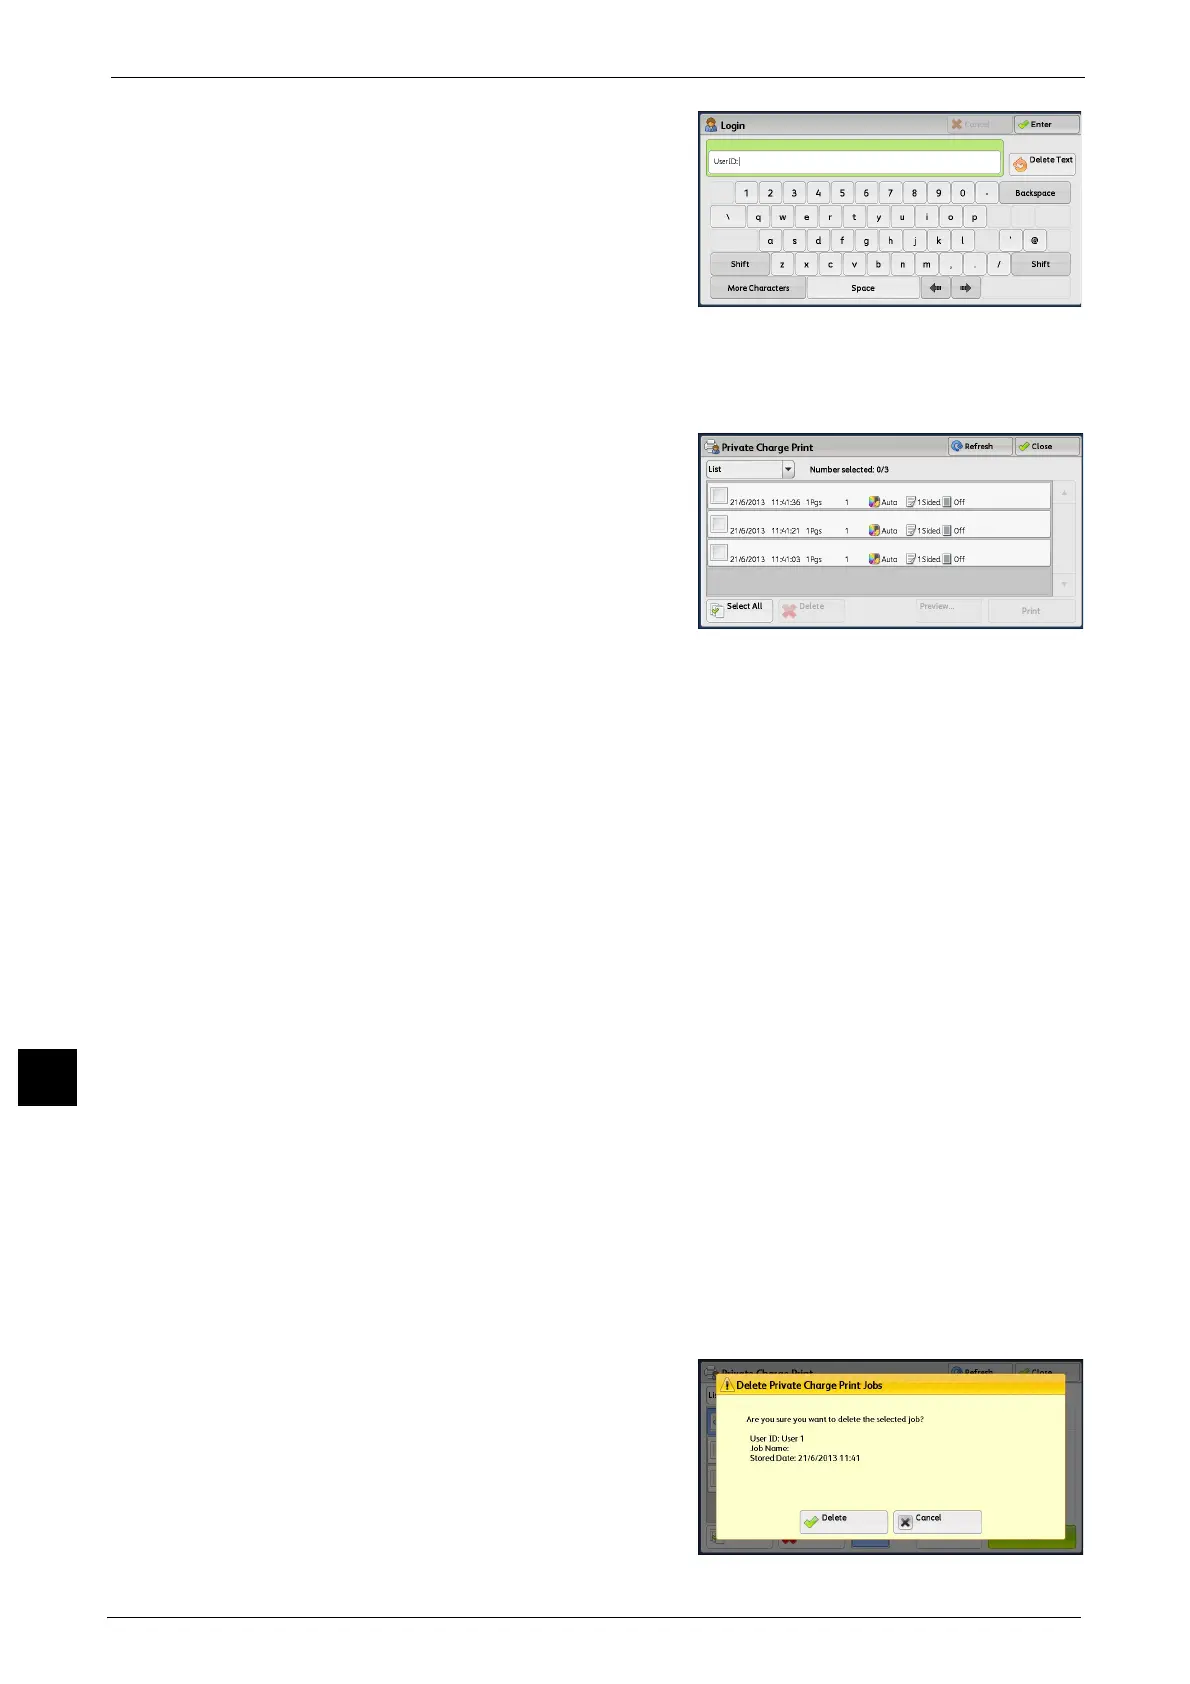
2 Enter the user ID, and select [Enter].
Note • When the passcode is set, enter the user ID
and select [Next]. Then, enter the passcode
and select [Enter].
• While the user is authenticated, the <Log In/
Out> button lights up on the control panel.
• To log out of the machine, press the <Log In/
Out> button on the control panel.
3 Select [Private Charge Print].
Note • If you are authenticated as a system administrator, selecting [Private Charge Print] will display a list
of authentication user IDs. Select a user ID from the list, and then select [Job List] to display a list of
jobs stored for the selected user.
4 Select the job to be printed or deleted.
Note • You can select up to 100 files simultaneously
to print or delete the files. If you select
multiple files, they are printed in the selected
order.
• The files in a folder can be displayed in a list
or thumbnailed view. You can also preview
the files.
5 Select any option.
6 When printing, specify the number of print sets using the numeric keypad.
Select All
Selects all jobs. To deselect all the jobs, select this button again.
Delete
Deletes the Private Charge Print job.
Note • If jobs with the same user ID are all deleted, the user ID will be deleted.
Refer to "When [Delete] is Selected" (P.418).
Preview
Displays the previewed image on the first page of the selected job.
Note • If you select multiple documents, the [preview] button cannot be pressed.
Refer to "When [Preview] is Selected" (P.419).
Print Quantity
Specify the number of print sets using the numeric keypad.
Print
Prints the Private Charge Print job. After printing, the job is deleted.
Refer to "When [Print] is Selected" (P.419).
When [Delete] is Selected
1 Select [Delete].
Delete
Deletes the job.
Important • Once the job is deleted, it cannot be restored.
 Loading...