Adjust Paper Registration
233
9
Check the printed sample sheet and enter the adjustment value.
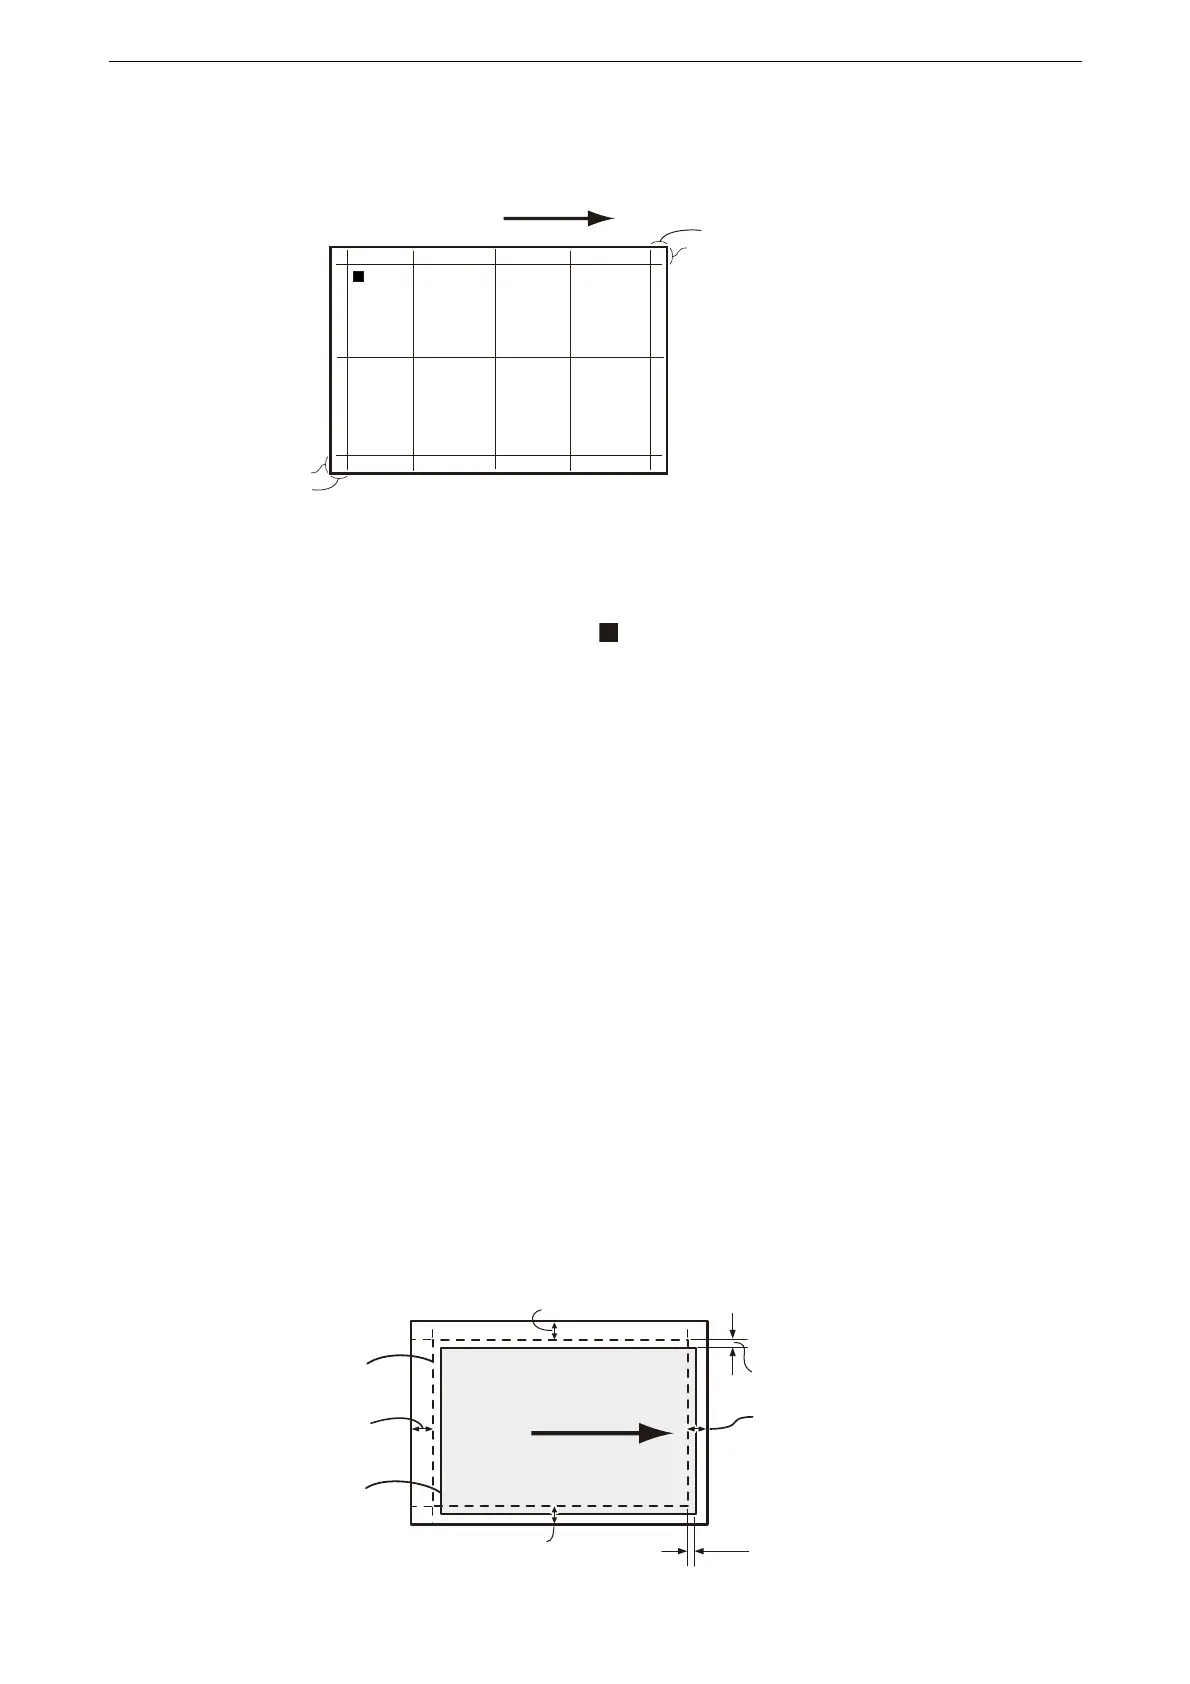
If the printing position of the image is correct, lines are printed 10 mm away from the edges of the sheet. If
you have loaded paper of which size is not suitable for printing sample chart in step 1, the result may not be
reliable.
To show the paper feed direction, squares are printed on the tail edge of paper. One square is printed on
the Side 1 and two squares are printed on the Side 2.
For Lead/Side Registration, refer to "Lead/Side Registration" (P.233).
10
Tap [Adjust].
The adjustment values are set.
11
Tap [Sample Printout] to print another sample sheet and check the adjustment results.
12
Adjust the values again if necessary.
Lead/Side Registration
1
Tap [Lead / Side Registration].
2
Add the adjustment value to the current value and enter it. (1 step = 0.5 mm)
The adjustment values of the lead registration are the same between the tray and the adjustment surface.
You cannot adjust for each.
Adjustment value (mm) = Actual image position distance from paper edge (mm) - 10
10 mm
10 mm
10 mm
10 mm
Paper feed direction
10 mm
10 mm
10 mm
10 mm
Desired image
Current image
Side registration
misalignment
Lead registration
misalignment
 Loading...


