Basic Operation 57
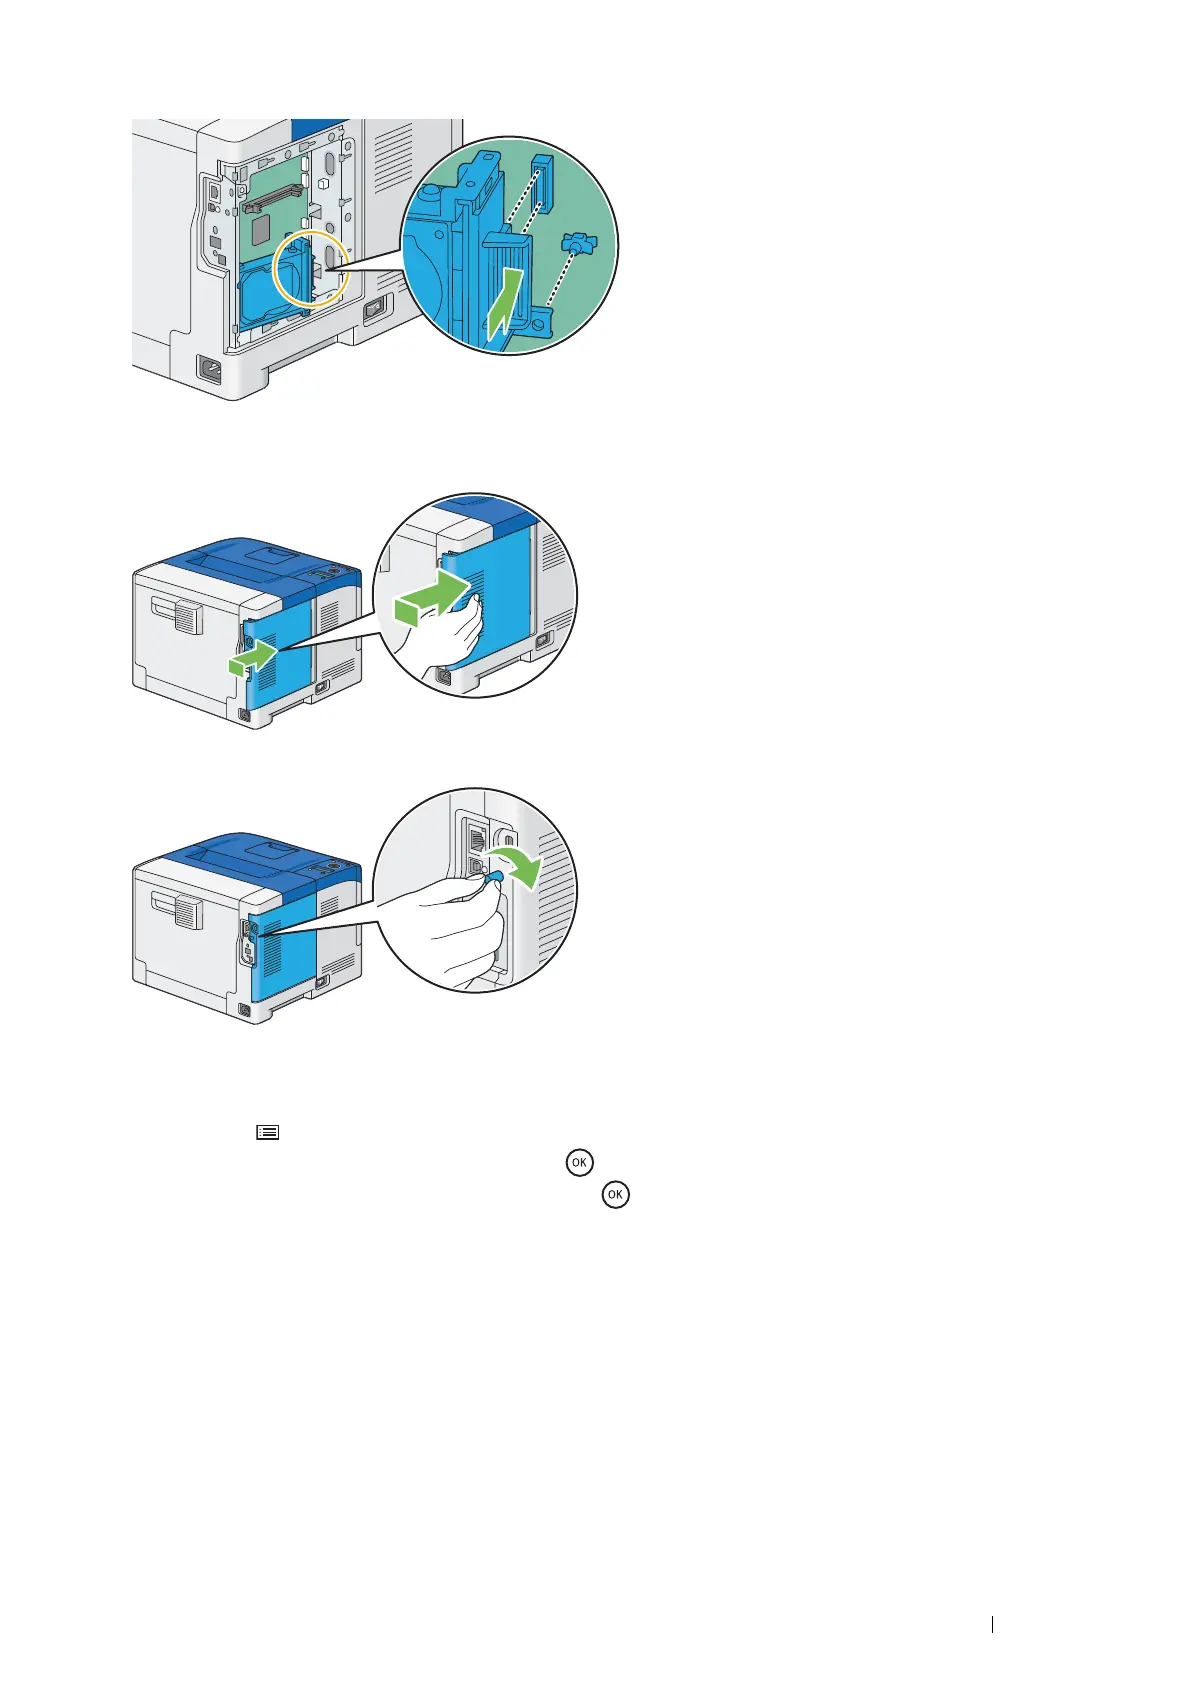
5 Attaching the protrusion and the connector to the control board, push the hard disk unit firmly into place.
6 Align the guide on the control board cover with the slot around the control board, and slide it towards the front
of the printer.
7 Turn the screw clockwise.
8 Turn on the printer.
9 Print the Printer Settings page to confirm the optional hard disk unit is installed correctly.
a Press the (Menu) button.
b Select Report / List, and then press the button.
c Select Printer Settings, and then press the button.
The Printer Settings page is printed.
10 Confirm the amount of Hard Disk is listed under Printer Options in the Printer Settings page.
If the Hard Disk is not listed, turn off the printer, unplug the power cord, and re-install the hard disk unit.
11 If you installed the hard disk unit after installing the print driver, update your driver by following the instructions
for the operating system you are using. If the printer is on a network, update the driver for each client.

 Loading...