8 U41578-J-Z875-1-76
Preparing for installation
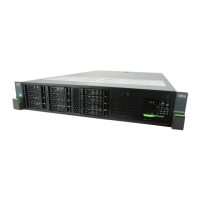
● When you use the configuration software, you must first connect the control-
ler C0 on the right-hand side and the port C0-0 with the HBA optical cable
(see the figure below); only connect
the controller C0 and the port C0-0.
Host Bus Adapter (HBA) connections
● You now need a little patience and will have to wait five minutes while the
system starts up and runs the RAID system self-test.
CAUTION: Do not change any powered down FRU (Field Replaceable Unit)
in a system which has already been installed. If you do this, when you
switch on again the configurations stored in the controller will not match
the previous configurations.
After five minutes and when the start-up has been successfully completed, the
LEDs on the system components will light up as shown below:
Module LED status after successful start up.
Controller
Channel
(if installed)
C1
Controller
Channel
C0
Port
C1
P1
C1 P0
Port
C0
P1
C0 P0
The following Front LEDs are lit:
Ready - (green) - normally on
Device Activity - (green) - flashes intermittent
Host Activity - (green) - flashes intermittent
Controller:
Power - (green)
Loop A/B ok - (green)
2GBit/s mode -(green)
LS Modul(es):
Hard Disks
HDD activity - (green)
HDD status - (green)
may interm. flashing
The following Rear LEDs are lit: :
Signal detected upper port - if
any -(green)
Signal detected lower
port(green)
I/O Modul:
 Loading...