TX150 S6 Service Supplement 23
Replacement routines Replacing the 3.5“ SAS/SATA backplane
Ê Fasten the Power backplane with the knurled screw in the PS cage.
Ê Plug the power cables on the system board and the drives (see the cabling
plans in the Options Guide).
Ê Reinstall the hot-plug power supply unit(s).
Ê Close the server and connect all power plugs (for a detailed description see
the Options Guide).
4.5 Replacing the 3.5“ SAS/SATA backplane
The 3.5“ SAS/SATA backplane is mounted on the hard disk cage. It is not
necessary to remove the hard disk cage before replacing the SAS/SATA
backplane.
Ê Open the server as described in the section “Preparation” on page 17.
Ê Remove all the hot-plug hard disk drives (for a description see the Operating
Manual).
V CAUTION!
Check if all hard disk drives are uniquely identified so that you can
reinsert them into their original bays.
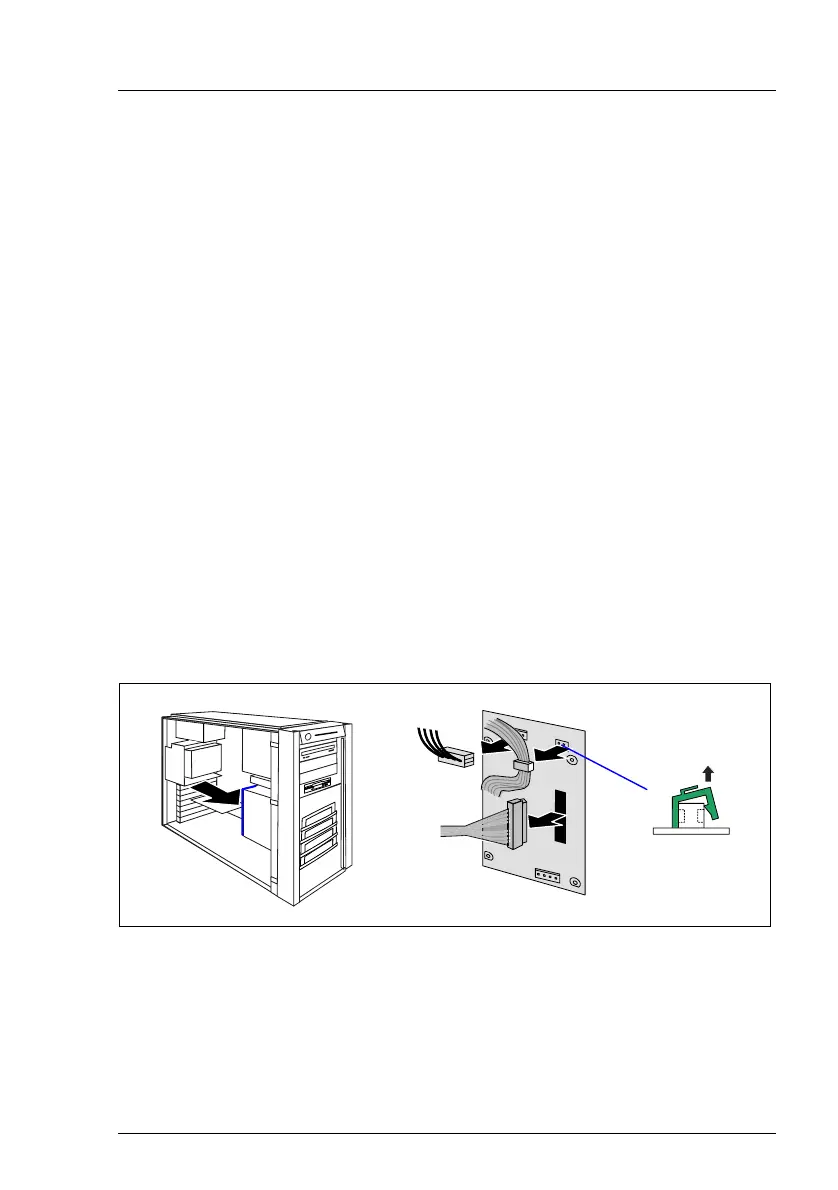
Figure 6: Disconnecting cables - 3.5“ SAS/SATA backplane
Ê Take the I
2
C cable out of the green cable clamp and remove the cable clamp
(1).
Ê Pull out the connectors of the power cable (2), the I
2
C cable (3) and the SAS
cable (4) from the 3.5“ SAS/SATA backplane.
1
2
3
4
 Loading...