TX200 S6 Service Supplement 37
Replacing the 2.5“ HDD backplane
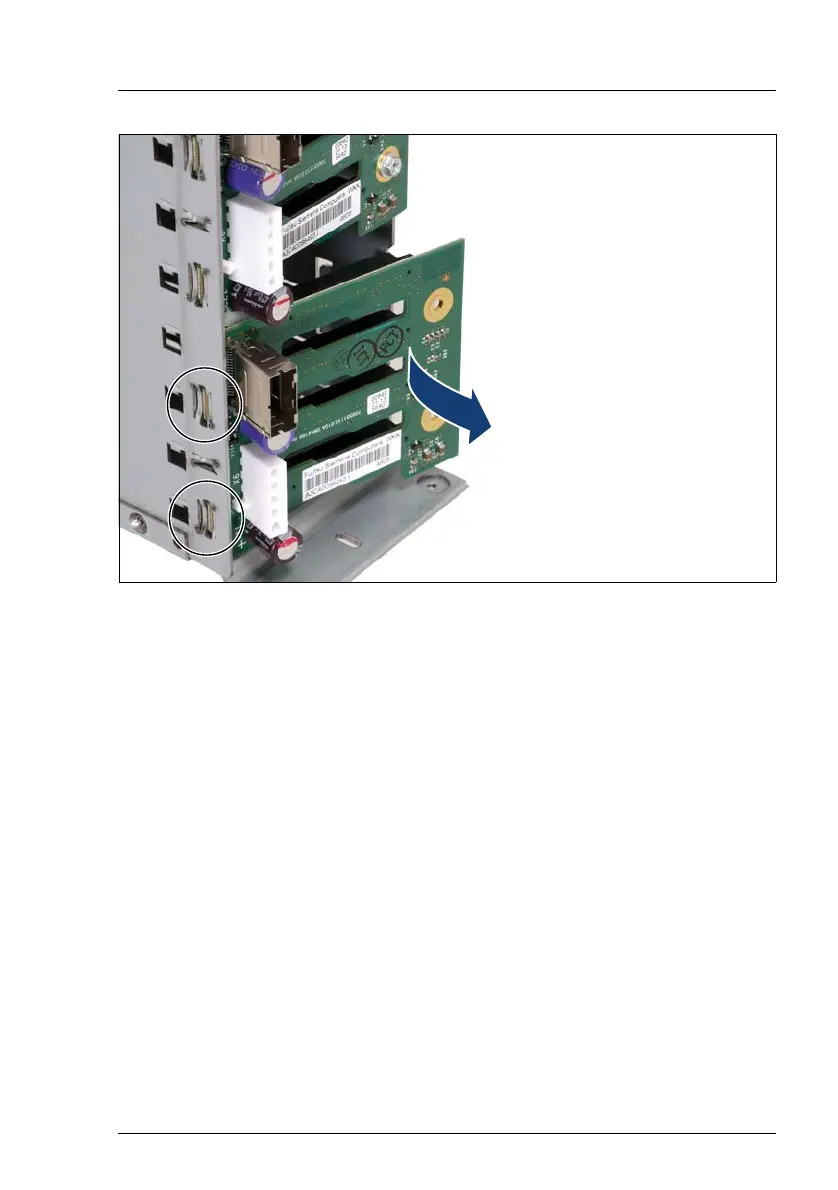
Figure 15: Removing the 2.5“ HDD backplane
Ê Lift the 2.5“ HDD backplane a little way and pull it slightly away from the HDD
cage.
Ê Take the defective 2.5“ HDD backplane out.
Ê Place the new 2.5“ HDD backplane against the HDD cage at a slight angle.
Hook the backplane in the left cant and then push it inward. Metal tongues
on the left cant of the HDD cage (see circles in figure 15) ensure that it is
automatically centered.
Ê Fasten the 2.5“ HDD backplane using the two screws.
Ê Attach the connectors of the SATA cable and the power cable to the
2.5“ HDD backplane (see the cabling plans in the Options Guide).
Ê Reinstall all hot-plug hard disk drives in their former slots.
Ê Close the server and connect all power plugs (for a detailed description see
the Options Guide).

 Loading...