Installation
28
Label Sheet Provided with Each Interface 5000
Every Interface 5000 is shipped with a preprinted label sheet containing:
• Instructions on how to change the label
• The first eight letters of the Greek alphabet (alpha through theta)
• The eight planets in the solar system (Mercury through Neptune)
• Several blank white labels
• Pstat 1 through Pstat 16 on a blue background
• Pstat 1 through Pstat 16 on a red background
You can cut any of these labels from the sheet and insert it as the Interface 5000 Customization Label. The
white labels are provided to allow you to hand-write a label.
How to Change the Label on an Interface Family Potentiostat
These instructions apply to all current members of the Gamry Instruments Interface family. Don’t be confused
because some of the pictures were taken using an Interface 1000.
1) If you are making a custom-printed label, edit the Excel
®
file and print a label sheet as described
above. If you are using the Gamry-supplied label sheet, identify the location on the sheet where the
new label is found.
2) If you are writing by hand on a blank label, do it now.
3) Use scissors to cut out the new label. Cut white labels on the black lines.
4) Power down the Interface 5000 that is receiving the new label.
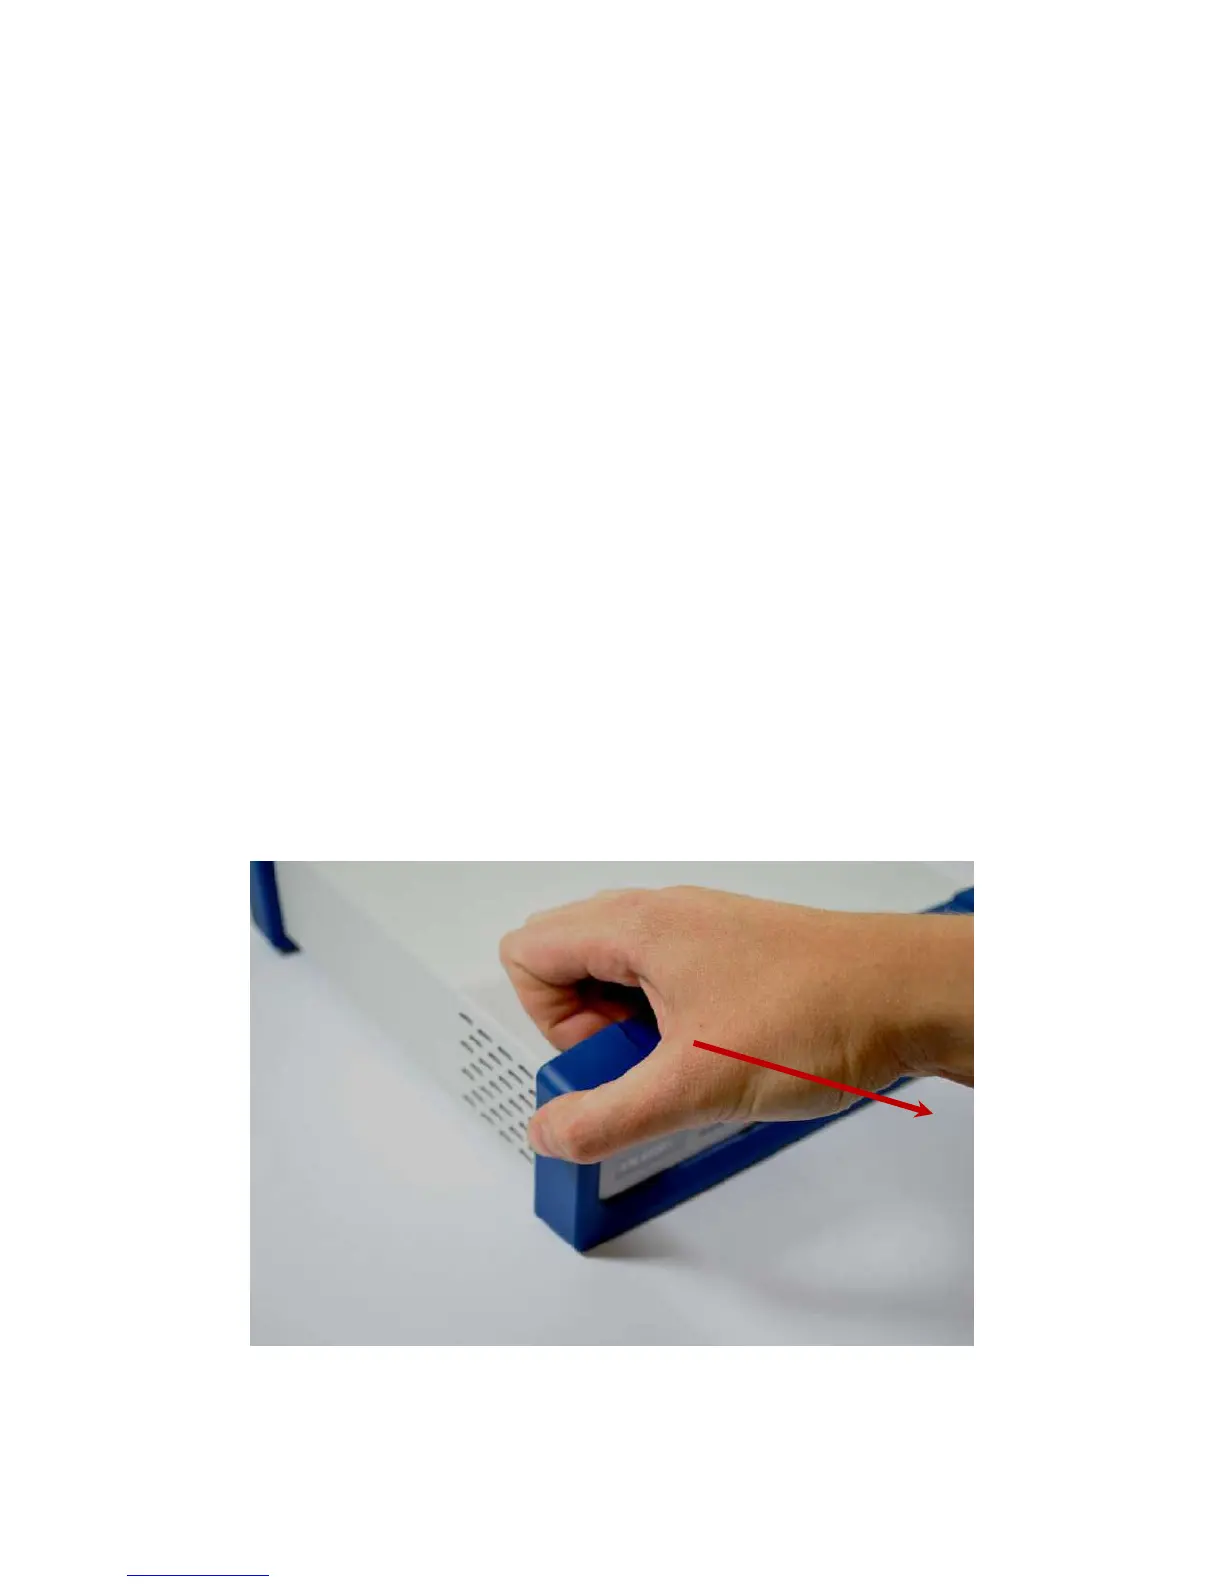
5) Remove the instrument’s rubber front bezel (the rubber frame around the front panel). No tools are
required. See Figure 3-5.
Figure 3-5
Removing the Front Bezel
6) Grip the bezel as shown in the Figure and pull the bezel away from the front panel. Some force is
required. Don’t worry about ripping the bezel; it is quite rugged. There is a 5 mm ear on either side of
the instrument that keeps the bezel in place.