Part # 1382683 (01/08)Page 10
Griddle/Broiler (Model ST)
See griddle seasoning before use.
1. One pilot serves three burners via a lighter burner.
2. Push in the valve knob and turn counter-clockwise to the
ignition position.
3. While holding the knob fully in, depress the ignitor
button and visually conrm that the pilot lights. If the
pilot does not light, repeatedly press the ignitor button
until ignition is achieved.
4. After the pilot is lit, continue to hold the valve knob in for
at least 20 seconds, then release it. If the pilot goes out,
wait ve, (5), minutes, then repeat the procedure.
5. When the pilot is established, push in the valve knob
again and turn it counter-clockwise to the full ame
position, igniting the main burner.
6. For low ame or simmer, push in the valve knob and turn
it to the low ame position.
7. To turn the burner o, push in and turn the valve knob to
the circular “OFF” symbol.
Shut down
1. Turn all gas valves o.
2. If the unit is to be shut down for an extended period of
time, turn the in-line service valve to the “OFF” position,
(this valve is not factory supplied).
Oven, (Standard)
Lighting
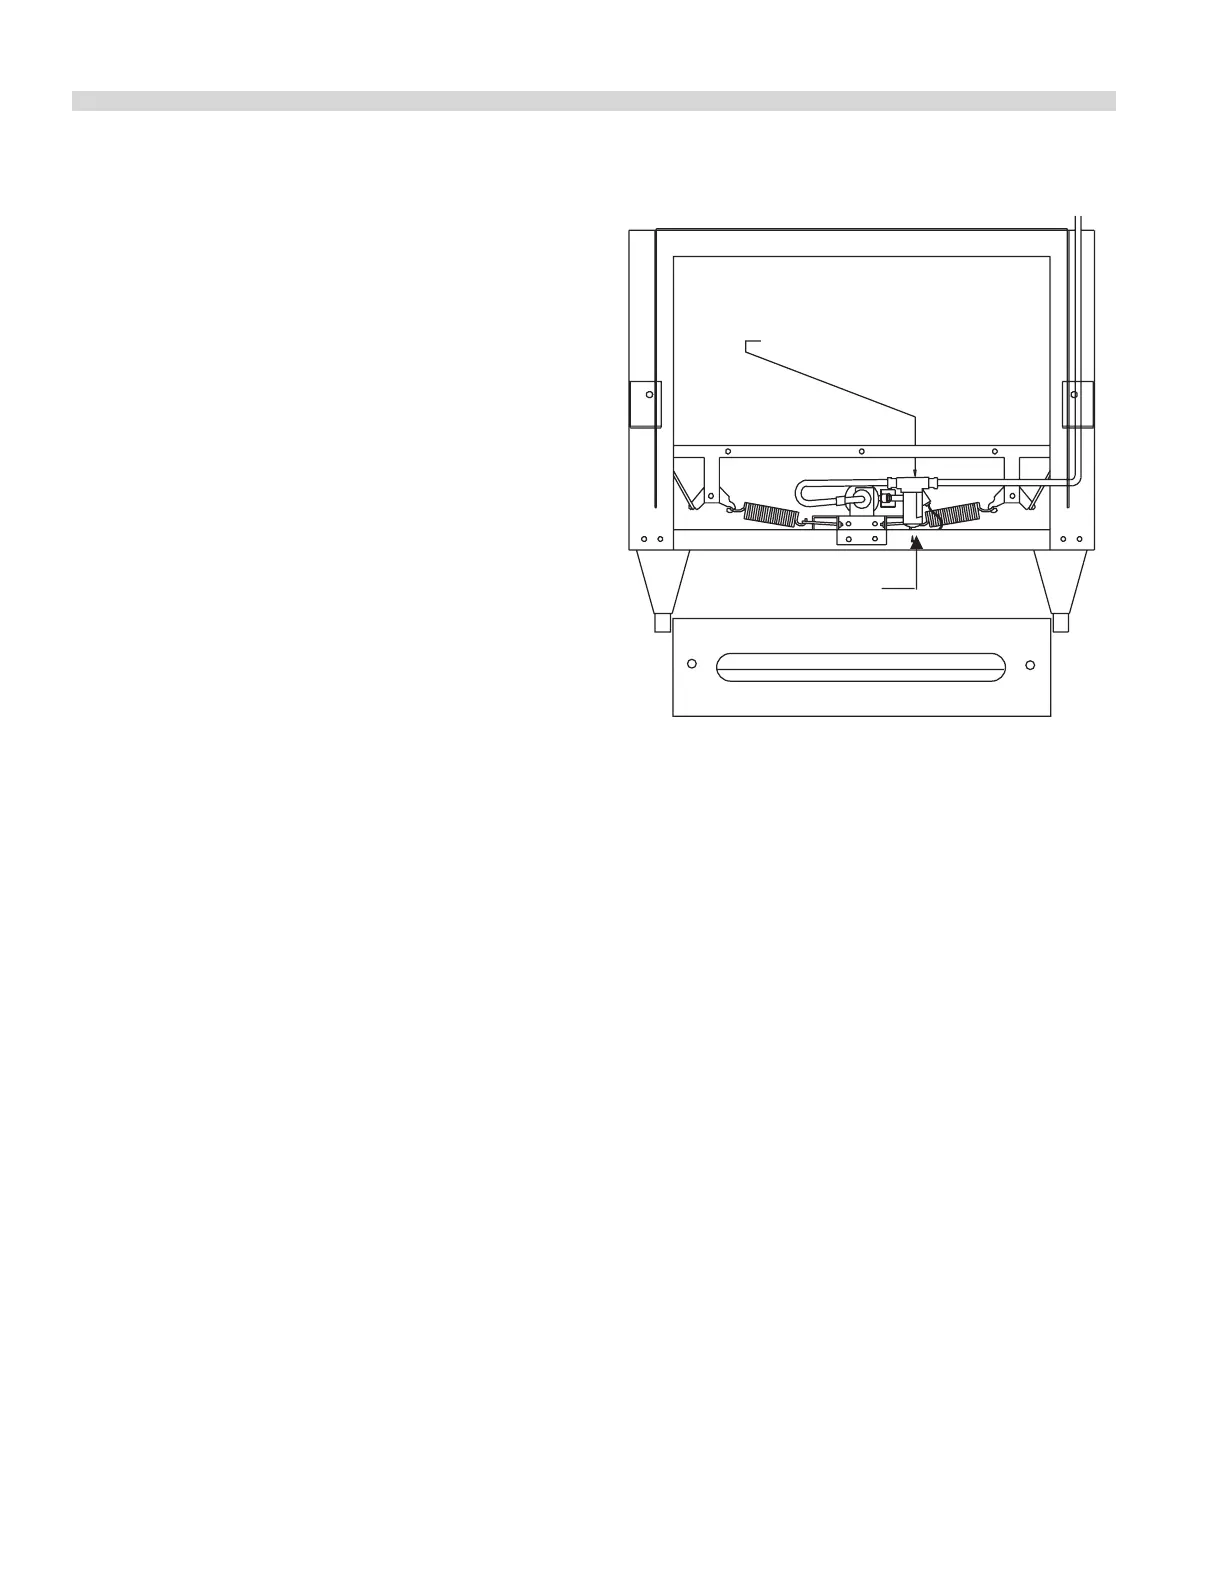
1. Remove oven bottom(s).
2. Depress and hold the red reset button, located at the
lower front of the oven, (beneath the oven door), while
lighting the oven pilot. Continue to hold the reset button
for at least 60 seconds after the pilot is lit. Release the
button. If the pilot does not stay lit, wait ve, (5) minutes,
then repeat the procedure.
OPERATING INSTRUCTIONS Continued
LIGHT BURNER THRU INSIDE OF OVEN
W/MATCH
RESET BUTTON ON SAFETY
Shut Down
1. Turn all valves and thermostats to the “OFF” position, or
lowest setting.
2. If the range is to be shut down for an extended period of
time, close the in-line gas valve.
Relighting
1. Turn all gas valves o.
2. Wait ve, (5), minutes.
3. Follow procedure under “LIGHTING” at left.
“RC” Convection Ovens
For 115v usage, a cord and plug is provided but connection
to the electrical service must comply with local codes; or in
the absence of local codes, with the Canadian Electrical Code
C22.1, (or latest edition), or with the National Electrical Code,
ANSI/NFPA No. 70 (or latest edition).
WARNING: Electrical Grounding Instructions.
The appliance is equipped with a three pronged (grounding)
plug for your protection against shock hazard and should be
plugged directly into a properly grounded three-pronged
receptacle. Do not cut or remove the grounding prong from
this plug.