47 232001840G(08)
Once you have installed the LaserPro USB Driver (USB connectivity only), LaserPro Print Driver, and have
connected the LaserPro C180II to your computer, you will need to familiarize yourself with the LaserPro
C180II’s control panel and LaserPro Print Driver. The print driver will be where you spend most of your time
configuring specific laser parameters for your jobs, while the control panel will allow you to set repeat times,
manipulate the file order, perform auto / manual focusing, configure the start point, and more.
5.1 Using the Hardware
5.1.1 Adjusting the LCD Display Screen’s Contrast Setting
Depending on the lighting of your immediate work area, you may need to adjust the LCD display
screen’s contrast. You may increase or decrease the display screen’s contrast via the contrast
adjustment wheel found on the inside of the front cover on the bottom, right side. You can access this
area by opening the top window and looking inside to the near, right side of the work area (as shown
in the picture below).
5.1.2
Graphic
Control
Panel
Overview
(Description)
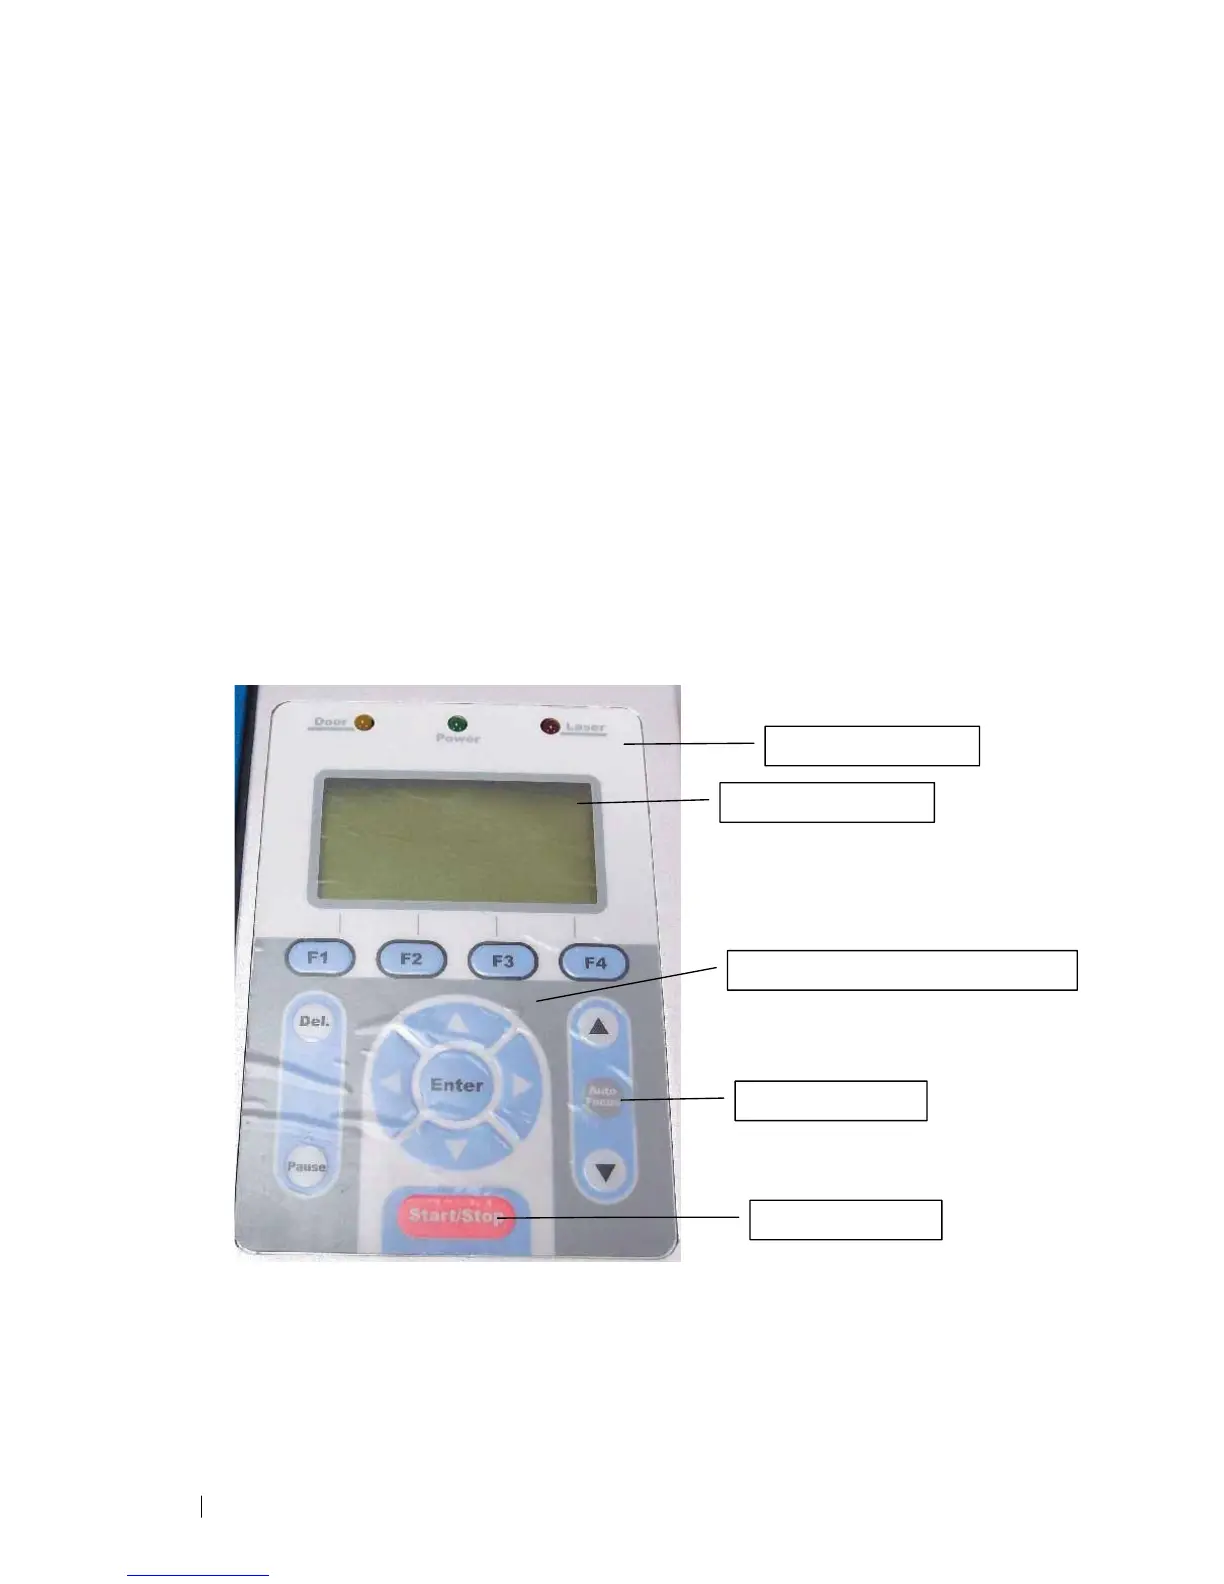
The Control Panel
The control panel on the LaserPro C180II provides easy access to all of the manual controls needed
for cutting and engraving. The liquid crystal display (LCD), functional, directional and selection
buttons
make navigating through the machine’s manual controls easy to do.
LCD Display Screen
Directional and Selection Buttons
Auto Focus Button
Start/Stop Buttons
LED Indicator Lights