DigitalFlow™ GF868 Service Manual (1 and 2-Channel) 1
Chapter 1. Calibration
Chapter 1. Calibration
1.1 Introduction
Calibrating the Model GF868’s analog outputs and inputs is explained in this chapter. In addition, testing the optional
totalizer/frequency and alarm relay outputs is discussed. The following specific topics are included:
• calibrating Slot 0-6 analog outputs
• calibrating Slot 1-6 analog inputs
• calibrating Slot 1-6 RTD inputs
• testing Slot 1-6 alarm relays
• testing Slot 1-6 totalizer/frequency outputs.
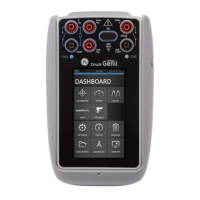
The Model GF868 electronics console includes six expansion slots for the installation of option cards. These slots are
numbered 1-6, from right to left. In addition, every Model GF868 flowmeter includes two built-in analog outputs (A
and B) at terminal block
I/O, which is designated as Slot 0.
Note: Convention in this manual identifies any expansion slot as Slot x, where x is a number from 0-6.
See Chapter 1, Installation, of the Startup Guide for a complete description of the available option cards and the
procedures for wiring them.
1.2 Menu Map
The Calibration Menu is accessed by pressing the [CAL] key on the keypad. Use this menu to calibrate and test the Slot
0 analog outputs, as well as to calibrate and test any option cards that are installed in the expansion slots. Refer to the
menu map in Figure 6 on page 15 as a guide in following the calibration instructions.
Note: The instructions on the next page apply to both the 1-Channel and 2-Channel versions of the Model GF868
flowmeter.
The following discussion assumes that the left screen pane is active. If the right screen pane is active, only the function
key designations change. That is, replace [F1]-[F4] with [F5]-[F8]. Proceed to the appropriate sections of this chapter to
calibrate and test all of the installed inputs and/or outputs.
Note: While in the Calibration Menu, if there is no keypad activity for two minutes, the Model GF868 will
automatically reboot and return to measurement mode.

 Loading...