EasyManuals Logo

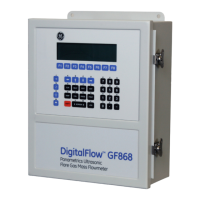
GE DigitalFlow GF868 Service Manual

GE DigitalFlow GF868
74 pages
To Next Page IconTo Next Page
To Previous Page IconTo Previous Page
Page #14 background imageLoading...
Page #14 background image
Chapter 1. Calibration
4 DigitalFlow™ GS868 Service Manual
1.4 Accessing the Calibration Menu
1. Press the [CAL] key to enter the Calibration Program.
2. Press
[Fx] to calibrate the desired slot. (The option bar will include a slot listing for each installed option card.)
3. Press
[Fx] to select the desired output.
IMPORTANT: The procedure for calibrating all the outputs is the same. However, when calibrating a different output, be
sure to reconnect the ammeter to the appropriate pins on terminal block I/O. See Figure 1 on page 2 or
Figure 2 on page 3 for the correct pin numbers.
1.4.1 Calibrating the Low End of the Output Range
1. Press [F1] to calibrate the low end of the output range.
2. Press
[F1] or [F2] to adjust the ammeter reading UP or DOWN, until a 4 mA reading is achieved. If you press [F3],
Numer,
enter a numeric value for the calibration point and press [ENT].
3. Press [F4] to STORE the setting, or press and [F1] to ABORT the calibration.
Note: If the ammeter reading cannot be adjusted within 5.0 A of the 4 mA setting, contact the factory for assistance.
1.4.2 Calibrating the High End of the Output Range
1. Press [F2] to calibrate the high end of the output range.
2. Press
[F1] or [F2] to adjust the ammeter reading UP or DOWN, until a 20 mA reading is achieved. If you press [F3],
Numer
, enter a numeric value for the calibration point and press [ENT].
Note: If the ammeter reading cannot be adjusted within 5.0 A of the 20 mA setting, contact the factory for
assistance.
3. Press
[F4] to STORE the setting, or press and [F1] to ABORT the calibration.
Note: Skip the next section if the linearity test will not be performed at this time. Go to Procedure Options on page 5.
1.4.3 Testing the Analog Output Linearity
Note: If you exited this menu and are returning, follow steps 1 through 3 in Accessing the Calibration Menu on page 4.
1. Press
[F3] to TEST the linearity of the currently selected analog output.
2. Check the ammeter reading at the 50% output level.
3. Then, enter a different output level (0-100%) and press
[ENT].
4. Check the ammeter reading at this setting and press
[ENT] when done.
Table 1 on page 5 lists the expected ammeter readings at various % Full Scale settings, for both 4-20 mA and 0-20 mA
scales. Refer to this table to verify the accuracy of the ammeter readings taken above.

Table of Contents

Other manuals for GE DigitalFlow GF868

Questions and Answers:

Question and Answer IconNeed help?

Do you have a question about the GE DigitalFlow GF868 and is the answer not in the manual?

GE DigitalFlow GF868 Specifications

General IconGeneral
BrandGE
ModelDigitalFlow GF868
CategoryMeasuring Instruments
LanguageEnglish

Related product manuals