– 30 –
5. Test the circuit operation.
a. Connect temporary jumper leads across
relay contacts, and primary interlock and
door sensing switches to simulate shorted
switch contacts. Locate convenient
connections in the circuit to be certain
COM and NO terminals are used.
b. Connect the ohmmeter (Rx1) across the
line terminals of the power cord. Continuity
must show:
• Door closed: low ohms
• Door open: 0 ohms
c. Remove the 20-amp fuse. The circuit must
open (infinite ohms). If the circuit does not
open, check wiring of monitor and interlock
circuits.
WARNING: After completing the test, remove the
temporary jumper leads from the interlocks and
relay, and reconnect the monitor switch leads.
Remove and Adjust Door Latches
Caution: Perform the microwave leakage test
when replacing or adjusting interlock switches or a
latch board.
To Adjust the Right Latch Assembly:
1. Remove the top and right access covers (see
page 28).
2. Adjust the screws or replace the door switch
as needed.
3. Retighten screws.
GEA00454
Adjustment
Screws
Adjustment
Screws
Latch SwitchLatch Switch
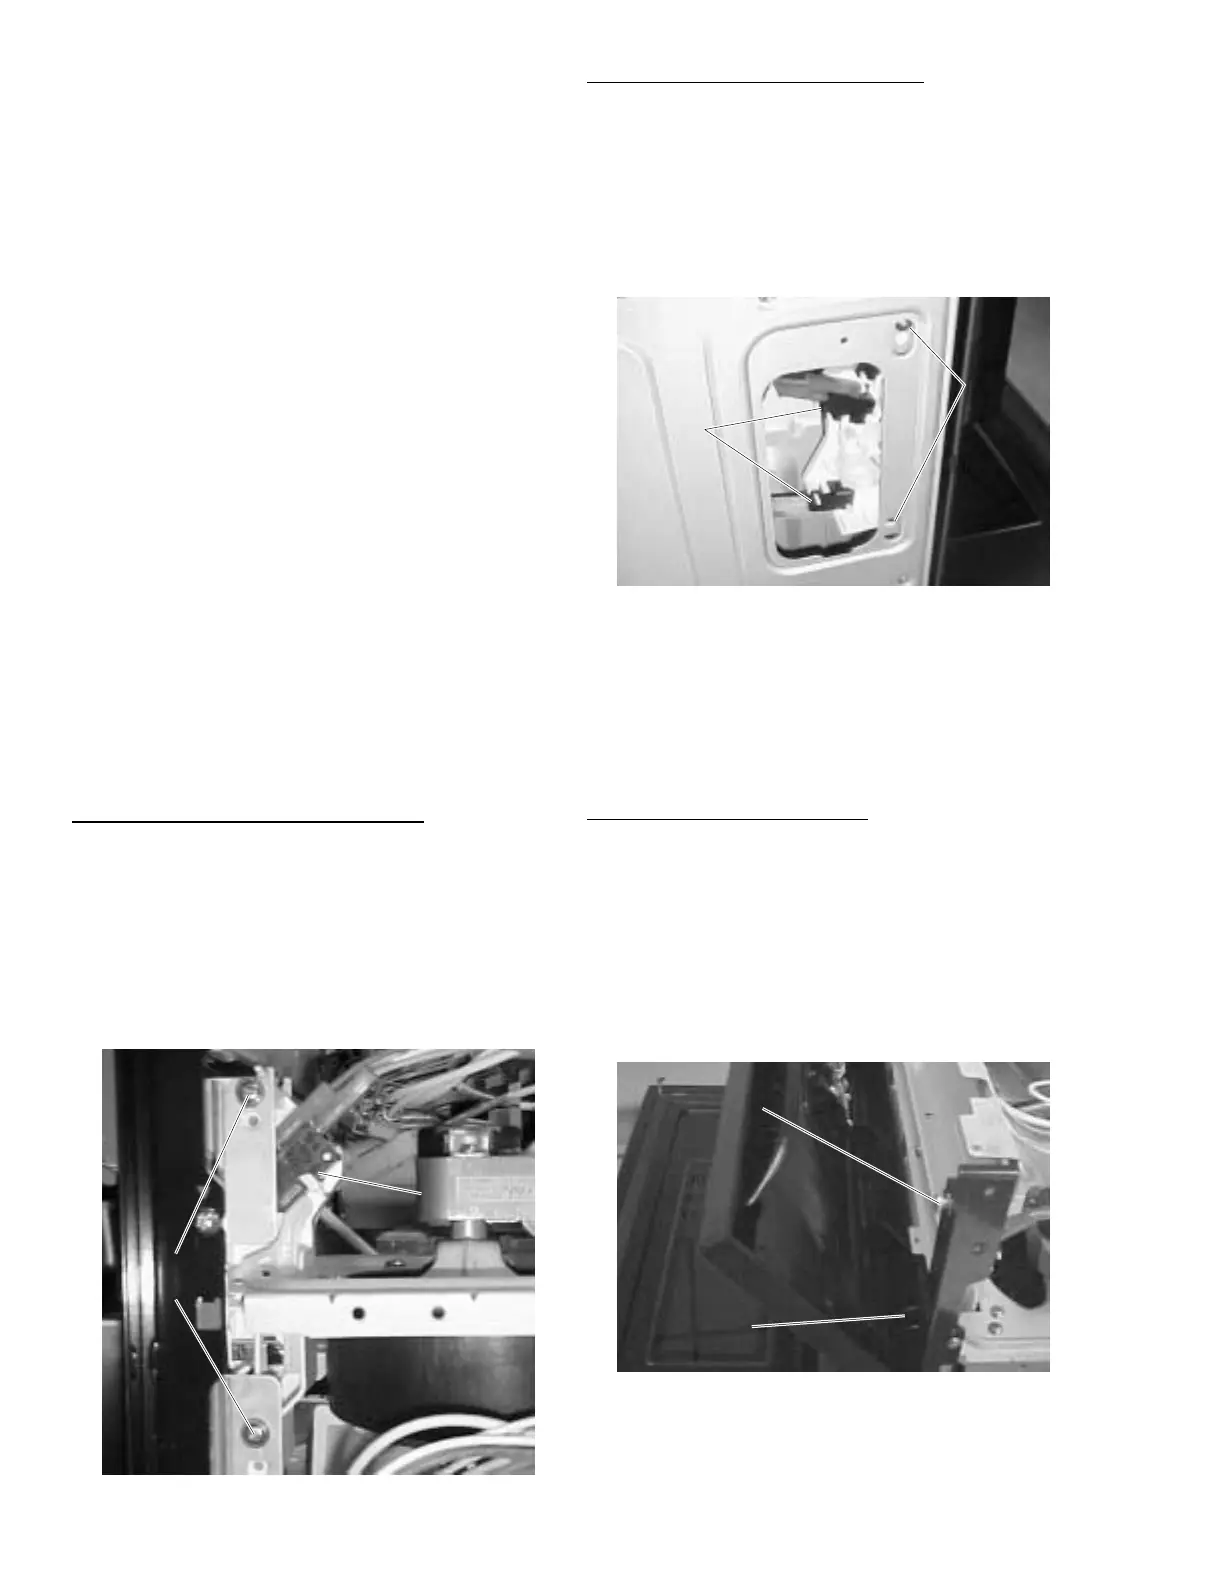
To Adjust the Left Latch Assembly:
1. Remove the door switch access cover on the
left access panel.
2. Adjust the screws or replace the door switches
as needed.
3. Retighten screws.
GEA00455
Latch
Switch
Latch
Adjust
Slots
Latch
Switch
Latch
Adjust
Slots
Access and Remove Control Panel
The control panel is hinged at the bottom and
secured at the top with holes that fit over
alignment pegs on the oven trim.
To Access the Control Panel:
1. Open the oven door and place your thumbs
under each end of the control panel.
2. Push upward to disengage the holes from the
alignment pegs.
3. Allow the top of the control panel to fall
forward.
GEA00445
Lower Hinge
(1 on Each Side)
Lower Hinge
(1 on Each Side)
Alignment Peg
(1 on Each Side)
Alignment Peg
(1 on Each Side)
 Loading...