GE
D
IRECTION GB091046, REVISION 2 VIVID E9 / VIVID E7 BT’13 SERVICE MANUAL
Chapter 3 - System setup 3 - 25
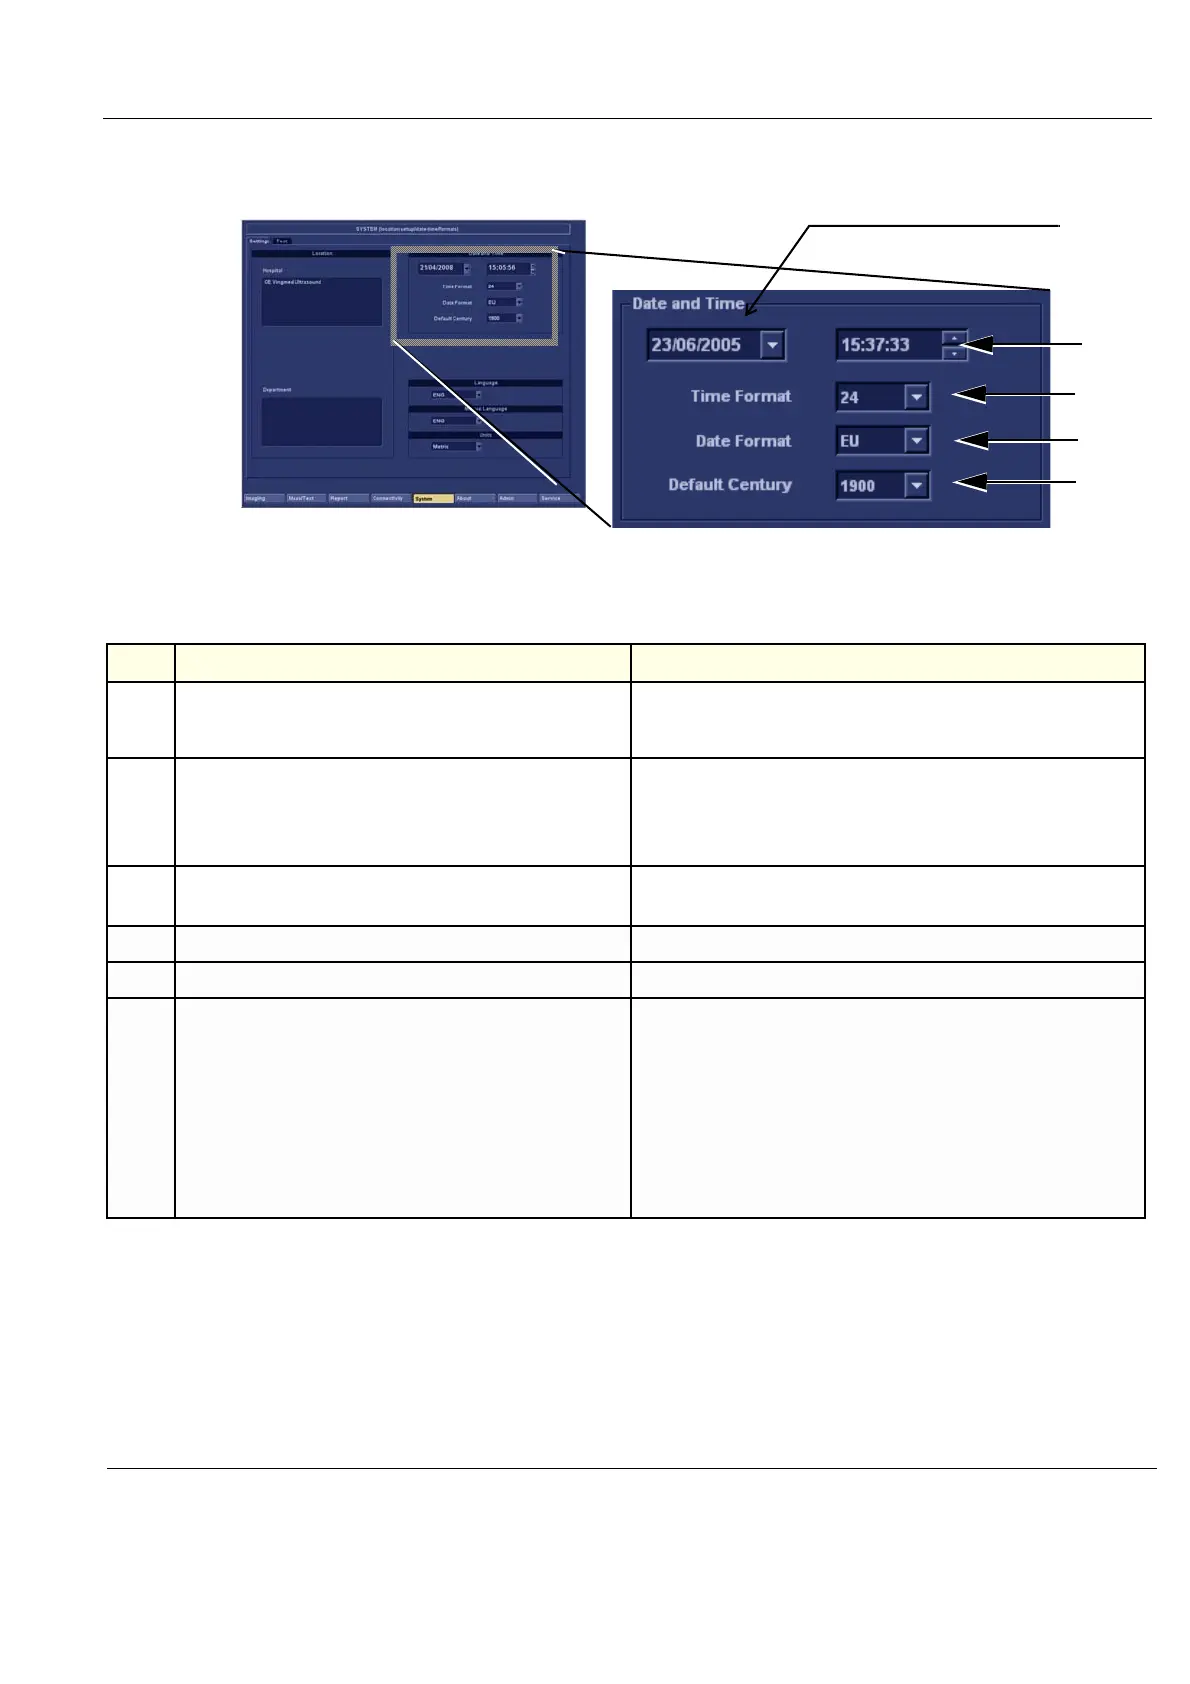
3-6-2-3 Date and time adjustments
Figure 3-9 Date and time adjustments
Table 3-14 Date and Time adjustments
STEP TASK EXPECTED RESULT(S)
1
Open the System (Configuration) Window, see 4-2-5 "Logging
on to VIVID E9 / VIVID E7 as ‘ADM’" on page 4-15.
Select System, if needed.
The System Settings window is displayed.
2
Select the preferred Date Format, see (d) in Figure 3-9.
DD = Date (two digits)
MM = Month (two digits)
YYYY = Year (four digits)
EU: the European/International “DD.MM.YYYY” format is used
US: the American “MM.DD.YYYY” format is used
3
Select the preferred Time Format, see (c) in Figure 3-9.
24: the 24 hour format is used
12: the 12 AM/PM hour format is used
4
Adjust the date, see (a) in Figure 3-9. New date is displayed
5
Adjust the time, see (b) in Figure 3-9. New time is displayed
6
Select Default Century (1900, 2000 or None), see (e) in Figure
3-9.
1900: the number 19 is automatically displayed when entering the year
in the patient date of birth.
To edit century, press BACKSPACE
twice.
2000: the number 20 is automatically displayed when entering the year
in the patient date of birth.
To edit century, press BACKSPACE
twice.
None: the four digits have to be typed when entering the year in the
patient date of birth.
The selected setting will be used as soon as the unit has been restarted.