Usingthe oven.
Toavoid possible bums, place the shelves in the desired position before you turn the oven on.
Before you begin...
The shelves have stop-locks, so that when
placed correctly on the supports, they will
stop before coming complemly out, and
will not tilt.
_A'hen placing and removing cookware,
pull the shelf out to the bump on the
shelf support.
Toremove a shelf, ptdl it toward you, tilt the
ti'ont end up and pull it out.
Toreplace, place the end (ff the shelf
(stop-locks) on the support, tilt up the
ti'ont and push the shelf in.
NOTE: Theshelf/s not des/)ned tos/ida out at the
special low shelf (R)position.
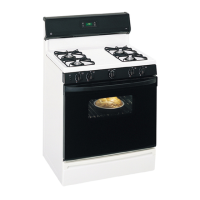
Theoven has 5 shelf positions.
It also has a special low shelf
position (R)for extra large items,
such as a large turkey.
Plastic items on the cooktop may
melt if left too close to the vent.
Vent appearance and location varg
Oven Vent
Your oven is vented through ducts at the
rear _ff the range. Do not block these ducts
when cooking in the oven--it is important
that the flow of hot air fi'om the oven
and fl'esh air to the oven burner be
uninterrupted. Avoid touching the vent
openings or nearby surfhces during oven or
broiler operadon--they may become hot.
Handlesofpotsandpansonthecooktopmay
becomehot if left tooclosetothevent
Donotleaveplasticitemsonthecooktop--
theymaymeltif left toodoseto thevent
Donotleaveanyitemsonthecooktop.Thehot
air fromtheventmayigniteflammableitems
andwi//increasepressureindosedcontainers,
whichmaycausethemtoburst
Metalitemswi//becomeveryhot if theyare
leftonthecooktop,andcouldcauseburns.
Oven Light
Touch the OVEN LIGHTpadon the upper
control panel to turn the light on or off.
12
 Loading...