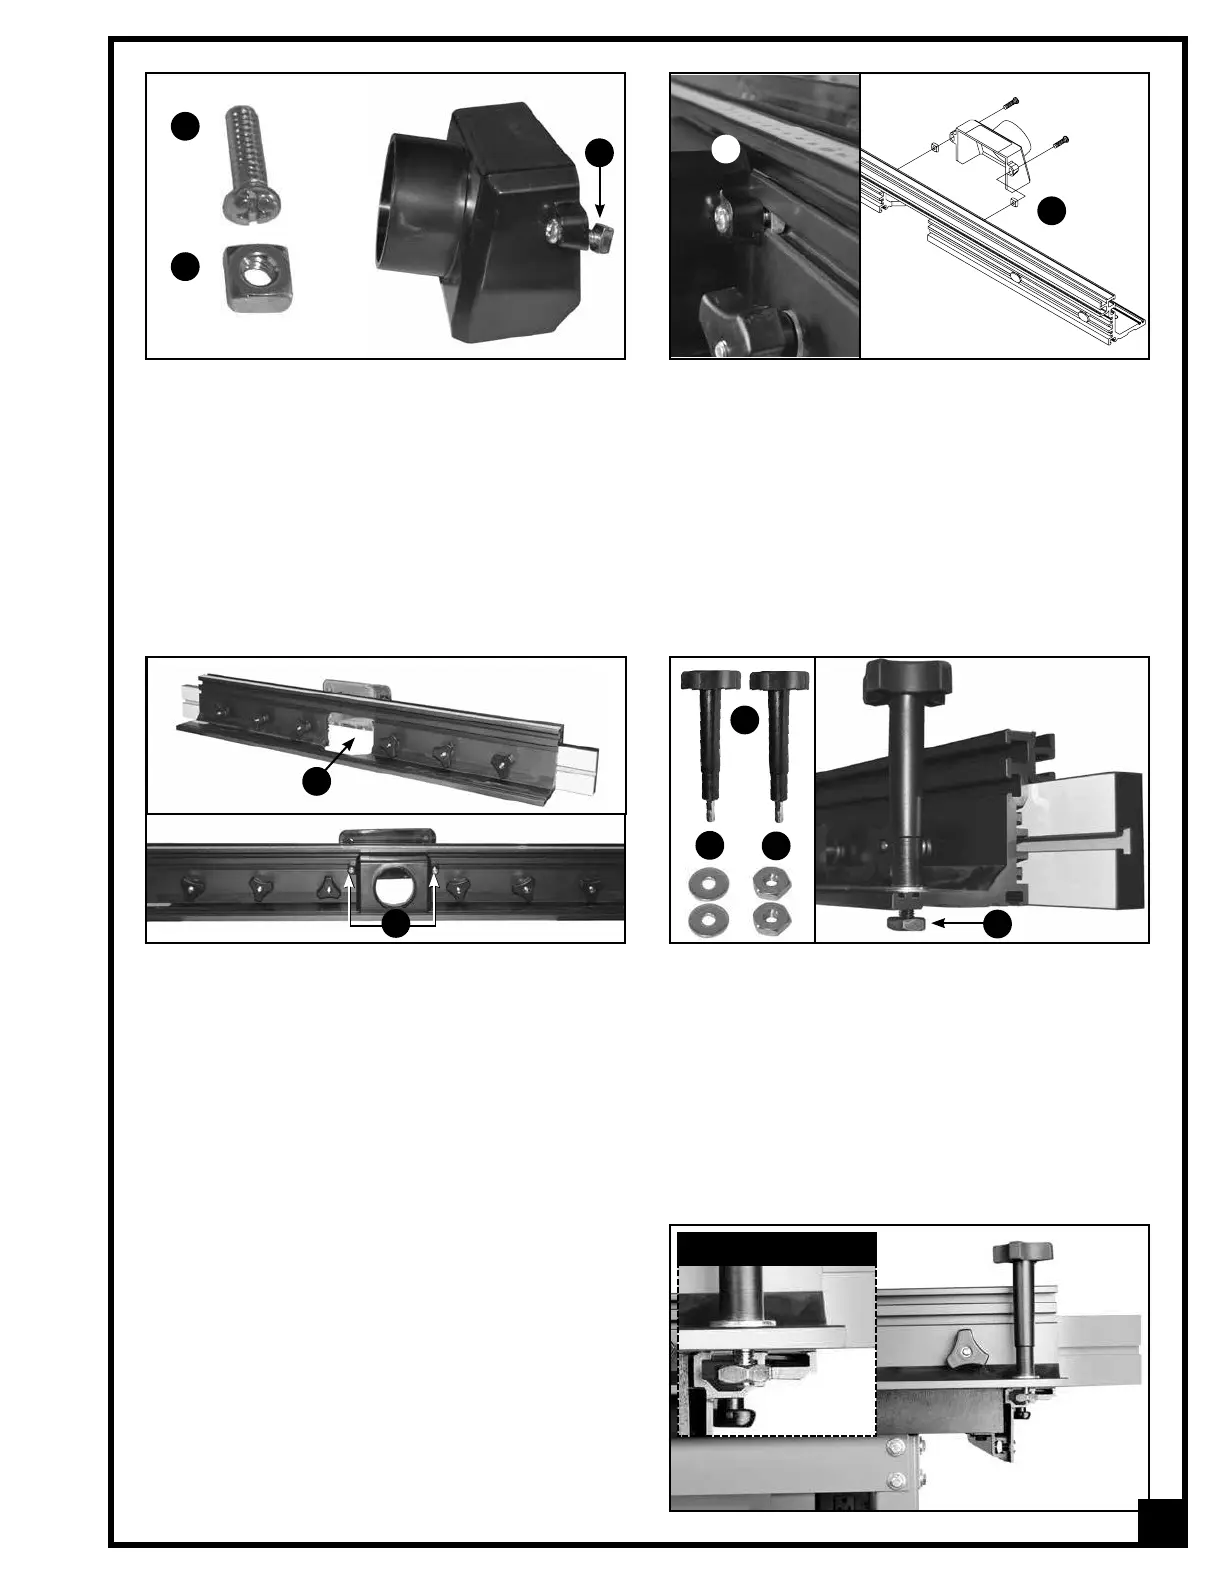
17. Slide the hex nut in the fence rail as shown.
18. Repeat steps 16 and 17 on the other end of the
fence, then fully tighten the locking handle to lock
the fence in position.
11. Insert a Phillips head screw A through both dust
outlet mounting holes.
12. Loosely thread a square nut B on both screws as
shown in C.
13. Insert the square nut in the fence body slot, A.
14. Insert the other square nut in the slot on the other
side of the fence, B.
A
B
C
A
15. Center the dust outlet with the hole in the fen-
ce body A, then tighten the two phillips head
screws B.
A
16. Insert a locking handle A with large flat washer B
in the T-slot at one end of the fence, then
from below, loosely thread a large hex nut C as
shown in D.
B
A
B
C
D
B
CLOSE UP VIEW
17
 Loading...