15
For Help, call 1-800-35-GENIE or visit www.geniecompany.com
CH ASSEMBLE AND CONNECT
DOOR ARMS
Installation Step 5:
For sectional doors:
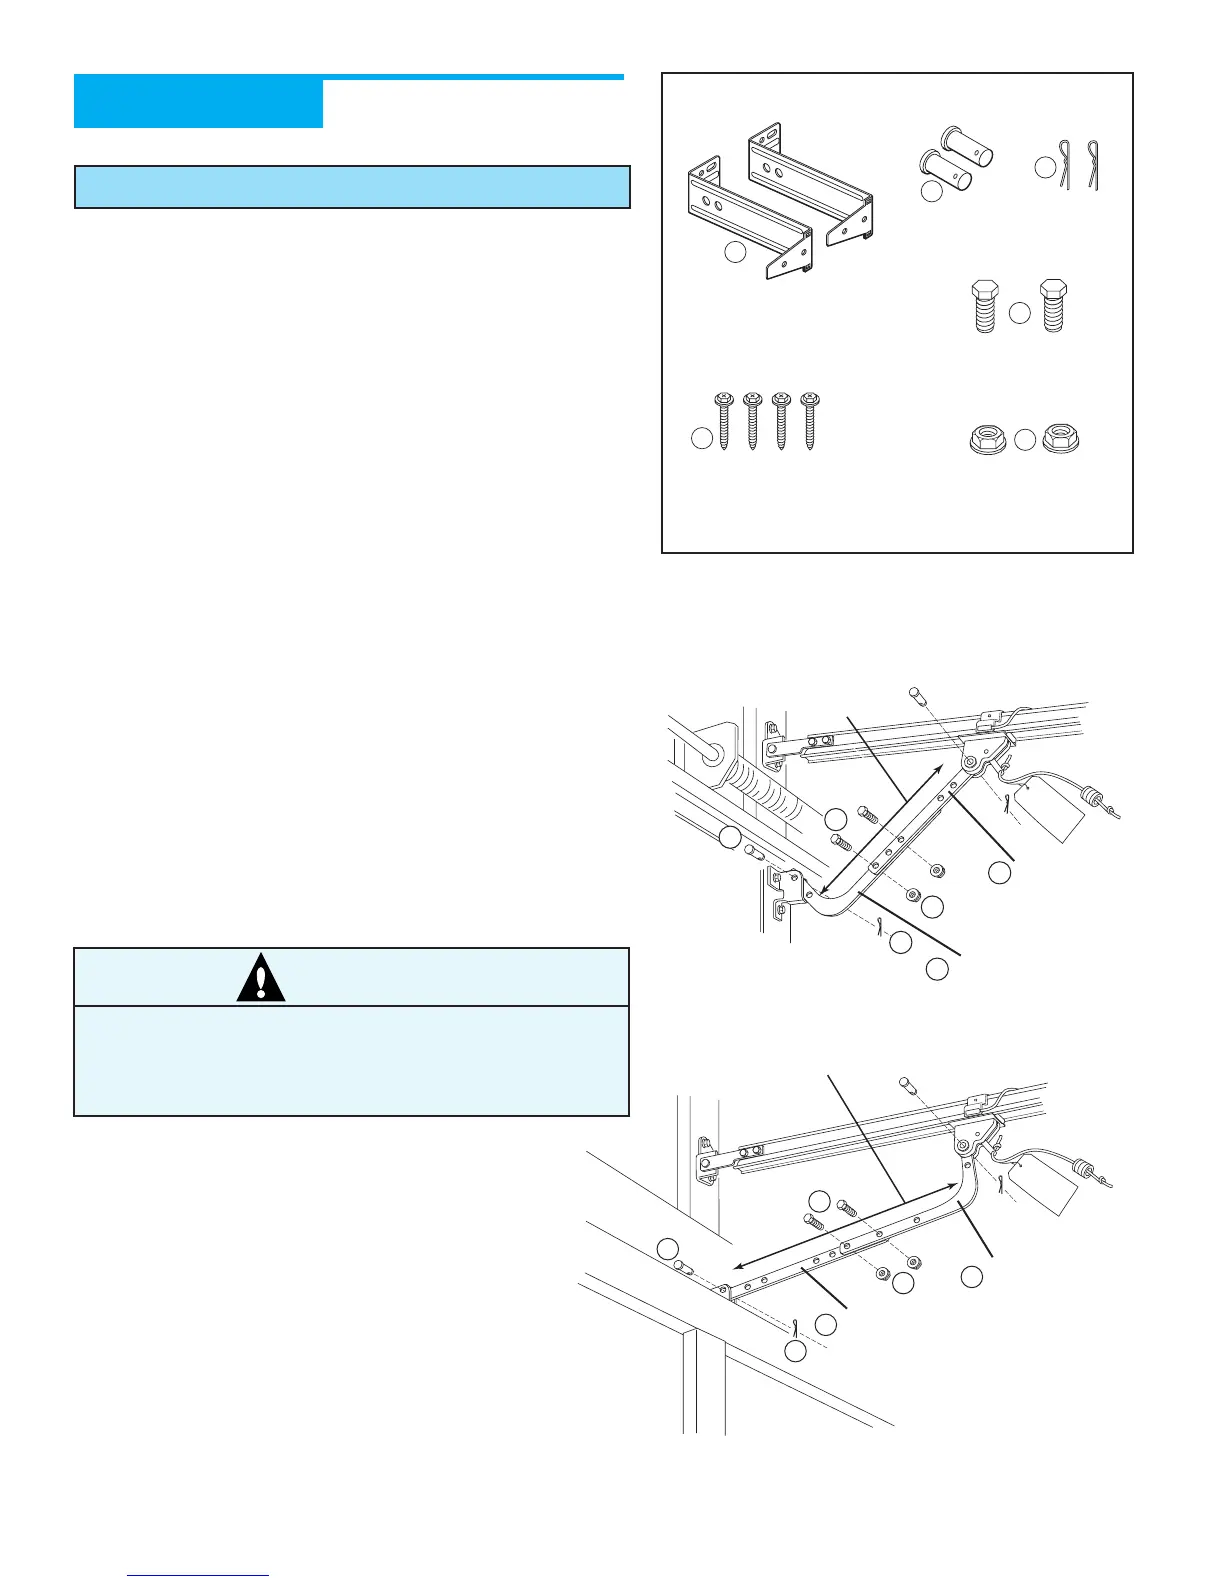
A Attach Curved Door Arm to Door Bracket with Clevis Pin and
Cotter Pin (Figure 23).
B Attach Straight Door Arm to Magnetic Carriage Assembly.
C Attach both Arms together with 2 (3/8" x 7/8") Hex Head
Bolts and 2 (3/8") Serrated Flange Hex
Nuts so overall length is as short as pos-
sible. Securely tighten fasteners.
D Adjust height of Emergency Release Cord Knob to 6' above
floor:
• Pull Cord through Magnetic Carriage Assembly Lever
until Knob is 6' from floor.
• Tie a new overhand knot in Cord at Magnetic Carriage
Assembly Lever.
For one-piece doors:
A Attach Straight Arm to Door Bracket with Clevis Pin and
Cotter Pin (Figure 24).
B Attach Curved Arm to Magnetic Carriage Assembly.
C Attach both Arms together with 2 (3/8" x 7/8") Hex Head
Bolts and 2 (3/8") Serrated Flange Hex Nuts so overall length
is as long as possible. Securely tighten fasteners.
D Adjust height of Emergency Release Cord Knob to 6' above
floor:
• Pull Cord through Magnetic Carriage Assembly Lever
until Knob is 6' from floor.
• Tie a new overhand knot in Cord at Magnetic Carriage
Assembly Lever.
OPEN YELLOW PARTS BAG
WARNING
Do Not skip Step D above!
Failure to comply may leave Emergency Release Knob within
reach of children. If the Knob is pulled with garage door fully
or partially open, garage door may close without warning!