Zenith15/25 GNSS Series - 14 -
Installation Guide © 2017 GeoMax AG, Widnau, Switzerland
4.5 CONNECTION TO THE GNSS RECEIVER
When starting FieldGenius, the Project Manager screen is displayed each time. Create a
new project by tapping the appropriate icon and enter a project name. The onscreen
keyboard can always be accessed by double tapping on the editable field. The screens
that follow are used to set the default settings for this project.
At the Instrument Selection screen that follows, a connection to the receiver can be
made. Ensure that the receiver is switched on and select either GPS Rover or GPS
Reference. In the Instrument Profile window, tap Add and enter a name for your
receiver. Save the name and then tap Edit to configure the profile.
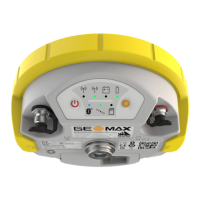
To ensure that measured heights are computed correctly, it is important to define the
receiver type. At the Antenna Height panel, choose the Model as Zenith15/25. The
Measured Height is the default length of the telescopic pole.

 Loading...