Auto Target Zeta125/ Zeta125s | 61
EN
5.3.2 Auto Alignment Procedure
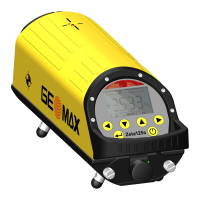
Step 1 Auto target in pipe
Attach the auto target to the optional bracket, which allows you to put it onto
a grade rod, post, stake or pole. Be sure not to move the auto target during
the auto alignment procedure. It is best to use a ranging pole support or bi-
pod to fix the post or pole during the alignment procedure. You do not need
the red target plate.
Align the Zeta125s manually, +/-3° for narrow mode or +/-6° for wide mode,
into the direction of the auto target.
The nearer the auto target is to the laser, the longer needs the auto
alignment procedure.
Step 2 Switch on the auto target and check, which mode is activated - narrow or wide
mode. If necessary, switch the mode.
Before you start the auto alignment procedure, ensure that there is
free sight between the Zeta125s and the auto target. While the auto
alignment is running, nobody must move through the area.
Narrow Mode +/-3°: Auto alignment needs up to 2.5 min
Wide Mode +/-6°: Auto alignment needs up to 3.5 min
GeoMax_Zeta125_Zeta125s_UM_v1.0.0_en.fm Page 61 Friday, November 28, 2014 9:23 AM
 Loading...