THE ADVANCED SWITCHING SYSTEM
THE GIGRIG G3 USER MANUAL
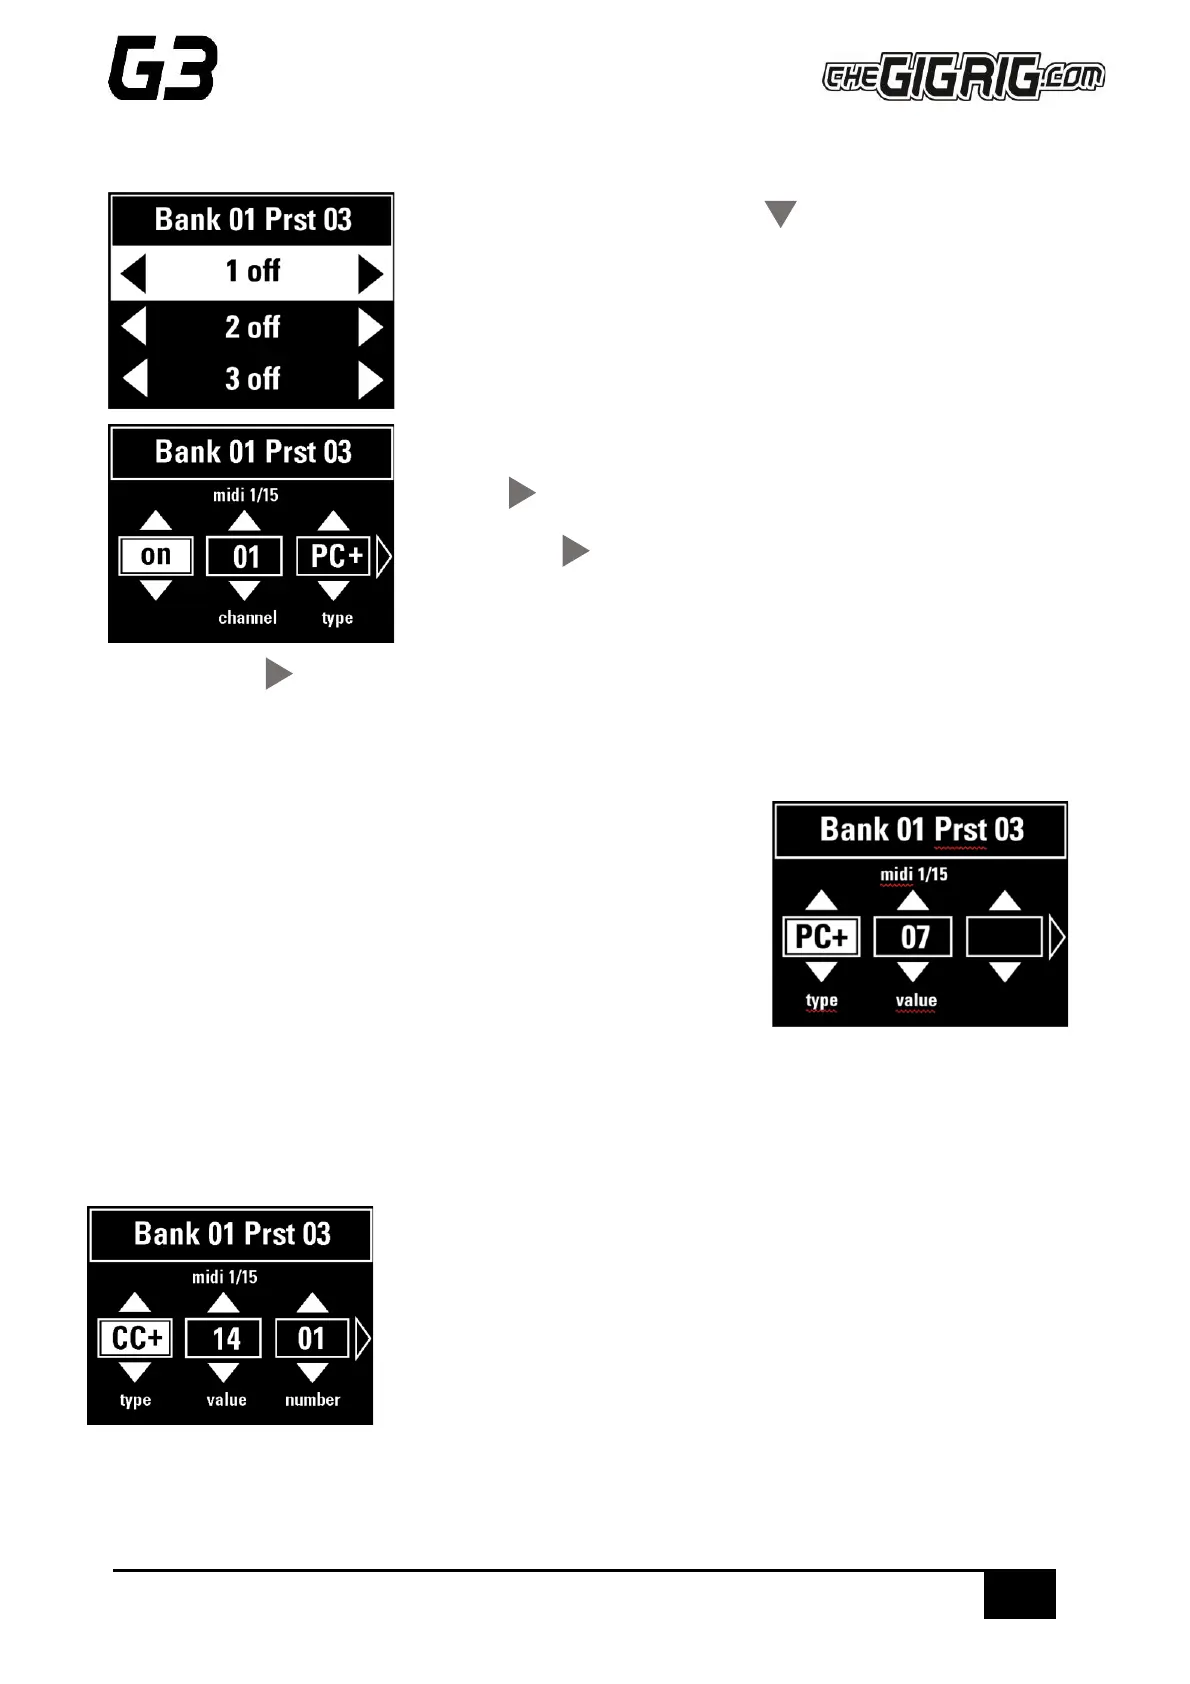
MIDI Menu screen – to edit, scroll down (2) to each of the 20 available
MIDI messages.
Scroll right (4) to edit the selected MIDI command.
Scroll right again t (4) to turn the MIDI on and select the type of PC
(Programme Change), CC (Control Change) message you want using
footswitches 1 and 2. (Standard MIDI messages use the + symbol).
Scroll right again (4) to select the Value (if CC is selected, scroll right again to select the CC number).
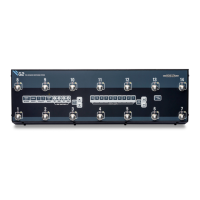
Choose the MIDI command that you want to send - , this example we will choose PC + then scroll to the right to
choose the programme change number.
For example, if you want to programme channel 7 and would like Preset
Number 1 on G3 to send MIDI programme 7 on MIDI channel 3, you will
need to:
a. Select a MIDI command (1-20).
b. Edit MIDI Channel (in this instance, to MIDI channel 3).
c. Set Type to PC +.
d. Set Value to 7.
e. Press DEEP EDIT. Push button 3 to exit.
You can repeat this process up to 20 separate times per individual preset.
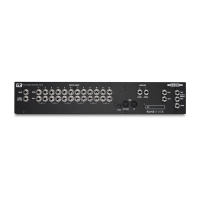
To Set Up Control Change (CC) Messages:
a. Select a MIDI command (in this example, MIDI command 2 is selected)
b. Scroll right to set Type to ‘CC+’
c. Scroll right again to set VALUE and NUMBER.