G10
25
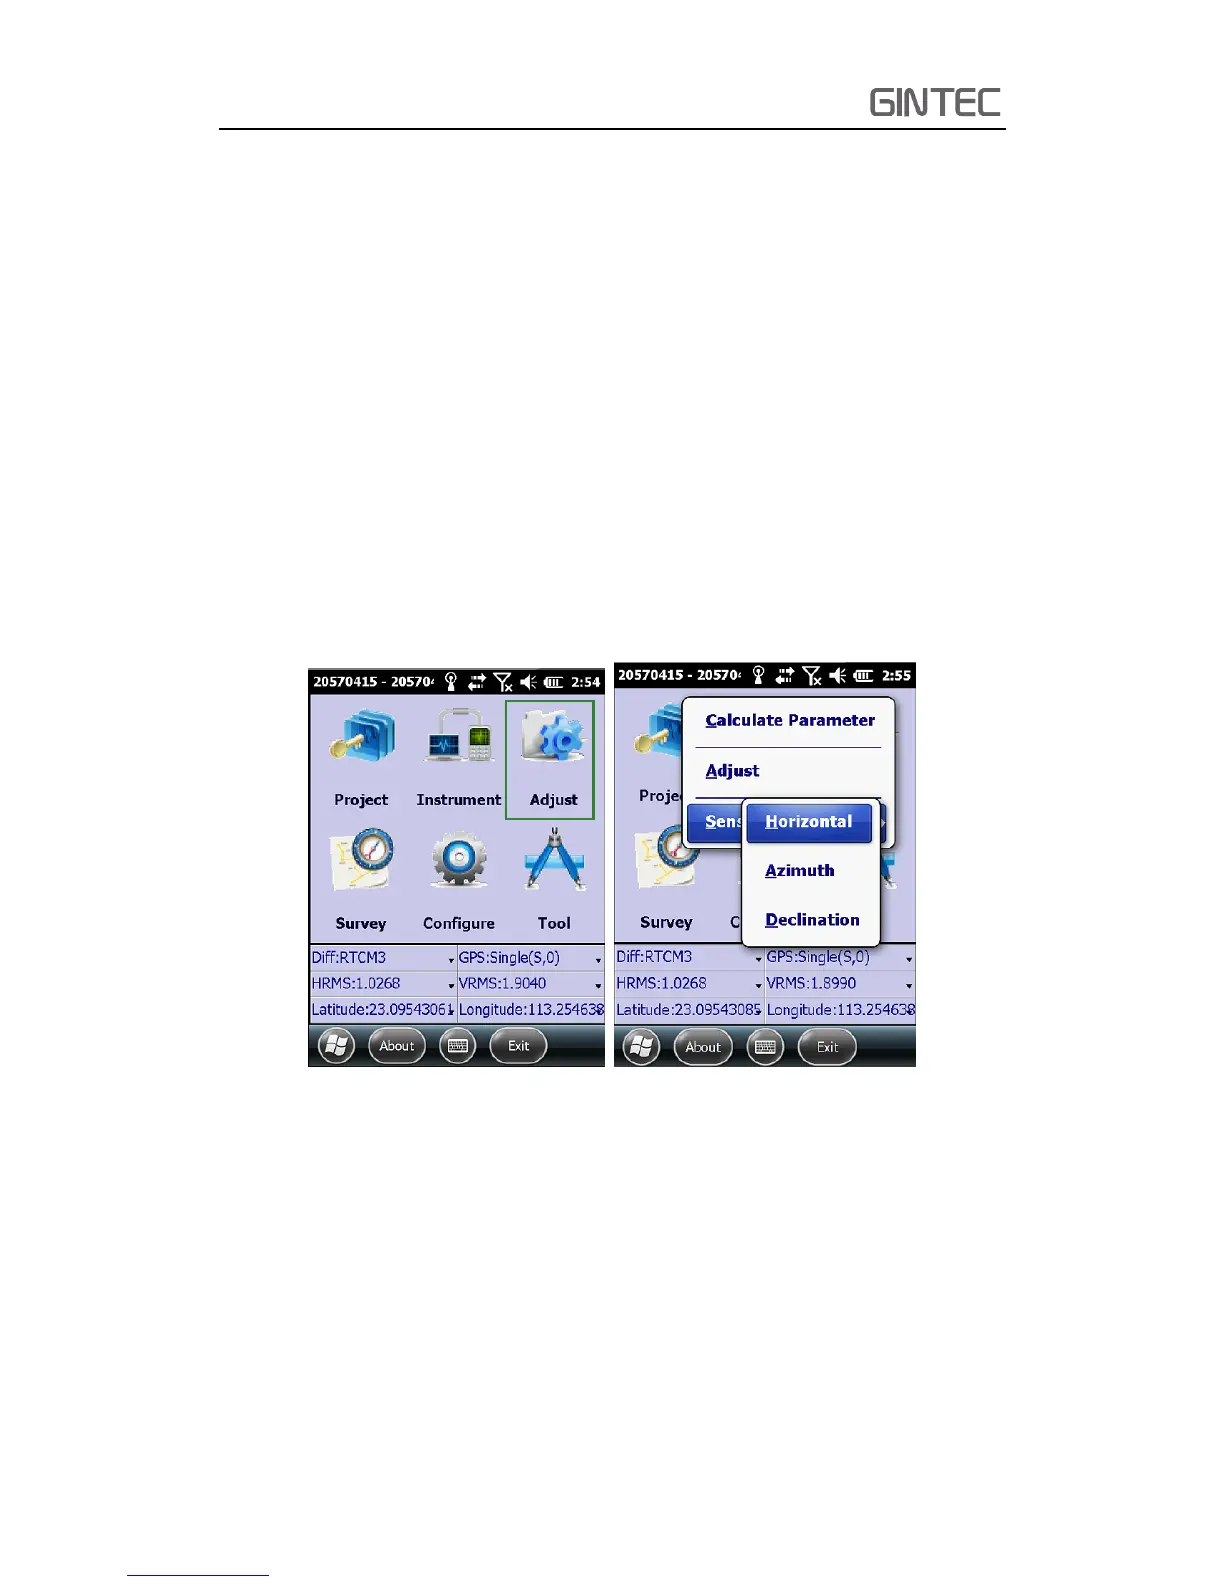
4.2 Sensor Calibrate
Activate tilt survey function is the first step, then it’s “Sensor Calibrate”. Some
times when you check “Sensor Calibrate”, it can’t be used. You should check
Configure—System Setting, make sure tilt survey function is opened. At the beginning
of this chapter, it says that “Sensor Calibrate” contains “Horizontal, Azimuth and
Declination”, now describe them.
Tip: 1. In order to make sure the accuracy, don’t replace battery during calibration
2. The pole should be set on the same point during all of the steps.
(1) Horizontal Calibration
Horizontal calibration actual is calibrating the E-bubble. Click “Adjust—Sensor
Calibrate—Horizontal”.
Figure 4-2
Enter horizontal calibration interface, you will see an electrical bubble in the
screen. Center the carbon pole, make sure the physical bubble of the pole is in enter
place, then click “Adjust” in the screen. It has a prompt tone which means the
horizontal calibrate is finished.
Tip: Before calibrate, when physical bubble is in center, the E-bubble may be not,
it’s normal. Because the sensor has deviation before calibrate. But after calibration,
the physical bubble and E-bubble will be in center together.