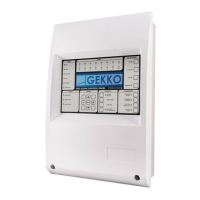
QUEUE REVIEW
FIRE - General User Access (no code entry required)
If more than one fire has been detected, then the LED next to this button will flash. Press the button to step through all
detected fires. Once all fires have been reviewed, the LED will be constantly ON. Subsequent fires will be added to the end
of the queue and the LED will start to flash again. After each button press the information will be displayed for 20 seconds.
After that time the screen will revert back to the first fire.
FAULT - General User Access (no code entry required)
If more than one fault has been detected, or if a fault and fire have been detected, then the LED next to this button will flash.
Press the button to step through all reported faults. Once all faults have been reviewed, the LED will be constantly ON.
Subsequent faults will be added to the end of the queue and the LED will start to flash again. After each button press the
information will be displayed for 20 seconds. After that the screen will revert back to the first fault (or fire).
TEST - General User Access (no code entry required)
If the LED next to this button is ON, then a test mode has been selected via the programming menus. Pressing the button
will show which sounders and zones have been set to test mode. If there are more zones under test that can be displayed,
then pressing the button again will show the next set of zones under test.
The information is displayed for 15 seconds before the default display is restored.
NOTE:
A SYSTEM RESET will clear all test modes.
DISABLED - General User Access (no code entry required)
If the LED next to this button is ON then there is at least one disablement active in the system. Pressing the button will
display the disablements. If there are more disablements that can be displayed, then pressing the button again will show the
next set of disablements and so on.
The information is displayed for 15 seconds before the default display is restored.
Possible disablements include - auxiliary relays, loops, zones, detectors and sounders.
GETTING THE PANEL RUNNING
Apply AC power to the Panel.
The LCD should display the splashscreen image with the Panel Logo. This will be followed by the date and time (and the
company name if it has been set). Within a few seconds faults will be reported, these will overwrite the date and time (and
company name).
The SYSTEM LED should be flashing green. This indicates that the system is in Installation Mode. If the LED is solid green
the system is in Active Mode and needs to be put into Installation Mode - refer to the programming section for details on how
to do this.
If the SYSTEM LED is flashing and information is being displayed on the LCD then the Panel is functional.
24
 Loading...