GETTING AN EXTERNAL CHAMELEON DISPLAY RUNNING
The supply to the remote display can be obtained directly from the auxiliary power supply output on the panel. Start by
connecting the power to the remote display.
If the panel is powered up and the serial communication connections between panel and the display(s) are properly made
(through RS422 or Optical Fibre), the information shown on the LCD as well as all LED indicator status from the panel will
replicate itself on the remote display (Chameleon Display).
Press the SYSTEM RESET switch and you should see on the LCD display the Splash Screen Image.
If after a few seconds upon completion of the initialization phase, the LCD display shows the message "NO COMMS TO
PANEL" and the FAULT LED is lit-up, verify the condition of the panel. If it is powered up and working properly then verify
the network connections.
GETTING A CHAMELEON REPEATER PANEL RUNNING
The supply to the Repeater can be obtained directly from the auxiliary power supply output on the panel (source panel).
Start by connecting the power to the Repeater.
Press the SYSTEM RESET switch and you should see on the LCD display the message "GEKKO" .
Please refer to Chameleon Communications Manual for network troubleshoot.
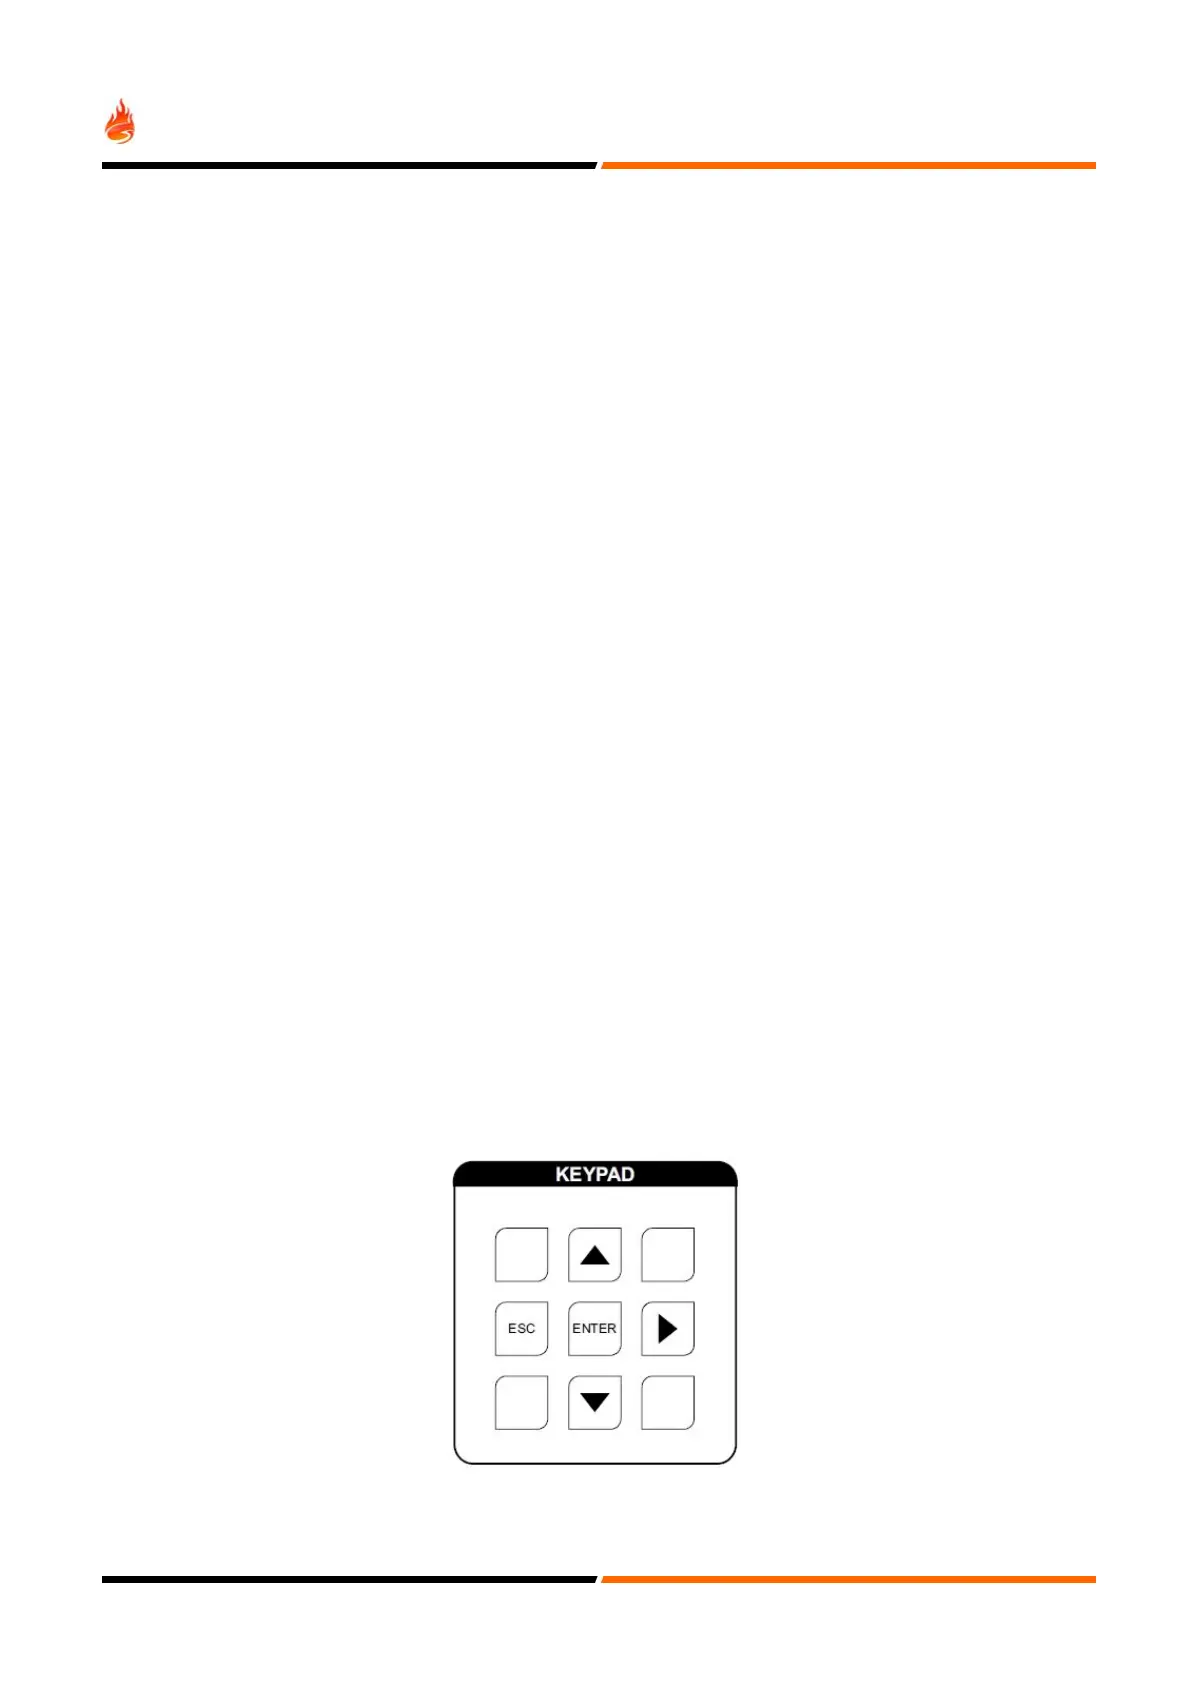
GETTING INTO PROGRAMMING MODE (ACCESS LEVEL 3)
When the Panel is powered up, it will be necessary to enter the panel programming mode. Familiarize yourself with this
section before proceeding to the next section in the manual and powering up the panel.
Programming mode is accessed via the front panel keypad, as pictured below.
To program device and zone text messages, it is essential to use the Chameleon Connector PC based software.
25
 Loading...