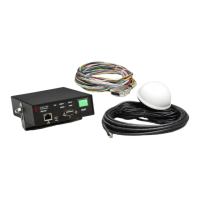
Vehicle Equipment Installation Instructions
21
6 Checkout
This section describes how to check out and test
the installed Opticom™ GPS System.
6.1 Configuration Setup and Checkout
Using the Vehicle Configuration window of the
ITS Explorer application, configure the vehicle
control unit with the following parameters: (See
the on-line Help files and the Operation Manual
for additional information.)
Using the General Configuration window, set the
following parameters:
Configuration
Vehicle Name
Up to 40 alphanumeric characters
Agency ID
1 – 254
Vehicle Class
1 – 15
Vehicle ID
1 – 9999
Operating Mode
Disable Mode
Latching or Non-Latching
Disable Trigger method
+12 VDC to Ground
Ground to +12 VDC
GPS Receiver Power Options
Always On
Standby
6.2 Input Verification
1. Open the Vehicle Configuration window in
ITS Explorer.
2. Using the Diagnostic Activity window, open
the View Inputs Sensing window and activate
the left turn signal followed by the right turn
signal. Verify that the vehicle equipment
detects each input. You may also use the
vehicles heard window.
If both signals are being detected when only the
left or right signal is activated, it may be
necessary to connect the turn signal line to
another point.
3. Activate the disable switch and verify that the
vehicle equipment detects this action. Also
observe the DISABLE indicator and the
ON/OFF switch indicator. Both indicators
will be flashing green when the disable switch
is activated. See Table 6-1.
4. Verify that Disable mode activation is correct.
If Latching Disable mode is used, the vehicle
control unit stays in Disable mode after the
disable switch is returned to its normal state.
Turning the vehicle control unit off for a few
seconds and then back on removes the Disable
mode.
If Non-Latching Disable mode is used, the
vehicle control unit removes the Disable mode
as soon as the disable switch is returned to its
normal state.
Table 6-1. Vehicle Control Unit Indicators
Indicator
Color or
Condition
Meaning
POWER Green Power applied to unit
ON/OFF
Switch
Green
Flashing
Green
Power applied to unit
Vehicle in Disable
mode
DISABLE Off
Amber
Flashing
Green
Vehicle NOT in Disable
mode
Vehicle is transmitting
“Probe” mode
Vehicle in Disable
mode
GPS Amber
Green
Not receiving GPS,
radio not transmitting
GPS has good 3D fix
RADIO Amber
Green
No communication
between radio/GPS unit
and vehicle control unit
Good communication
between radio/GPS unit
and vehicle control unit