LC 100
2-3 GLW 102786_en_01
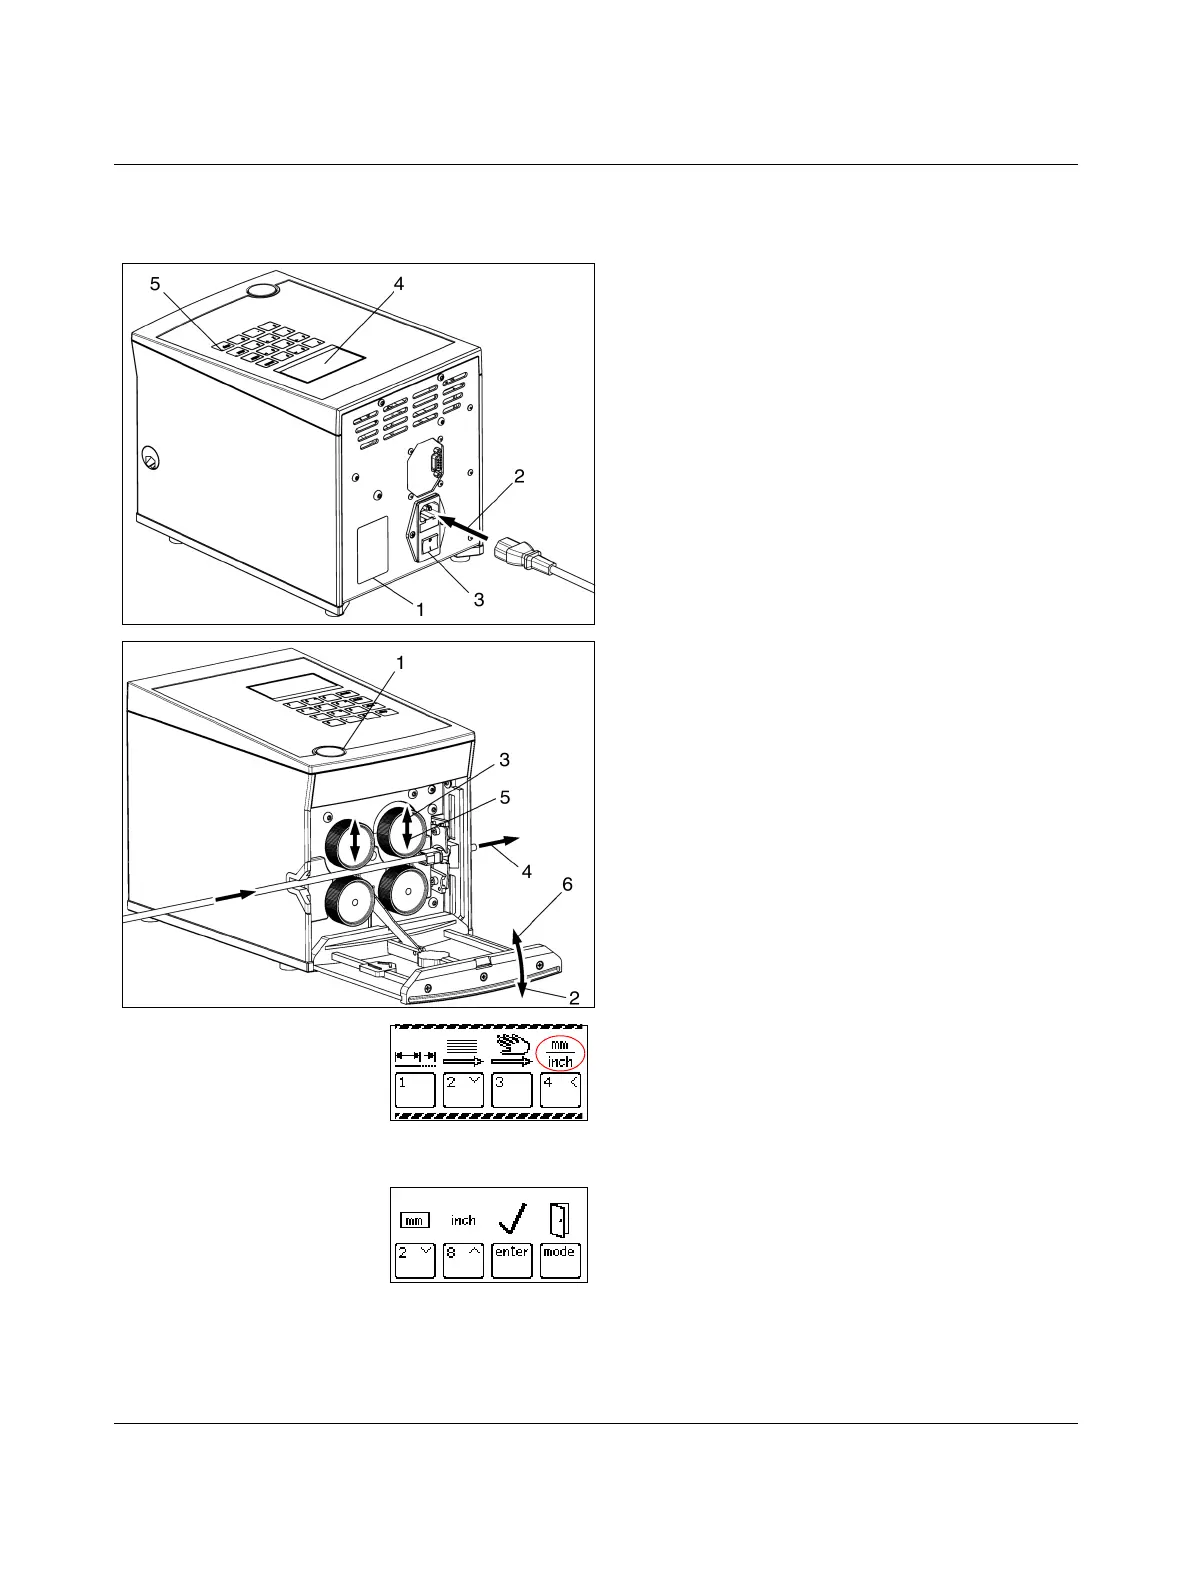
2.3 Connecting and inserting the cable
Connecting to mains
• Connect the power cable (2).
• Switch on the LC 100 with the mains switch (3) (press I).
The display (4) and the red "stop" LED (5) light up.
Inserting the cable
• Press the door opener (1) and fold down the front door
(2).
The rollers are raised (3).
• Insert the cable between the rollers and pull it through
the cable routing and out through the outlet slot (4).
• Fold up the front door (6).
The rollers clamp the cable firmly (5).
If you cut very soft or hard material, it is advisable to change
the clamping pressure (see page 3-4).
Adjusting the measuring unit between millimeter and
inch
The default is millimeter.
• Press and hold the "mode" button for approx. six sec-
onds, until this display appears.
• Press the "4" key for mm/inch adjustment.
The measuring unit currently in use is framed (here, it is
mm).
• The "2" key sets the measuring unit to mm.
The "8" key sets the measuring unit to inch.
• Press the "enter" key to save the value and return to
mode selection.
With the "mode" button, you can return to mode selec-
tion without saving.
 Loading...