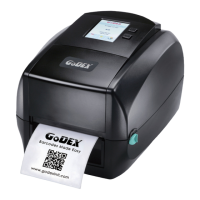
3 Printe r Se tting a nd C o ntro l
** The USB Ho st p o rt o n p rinte r is no t sup p o rt ‘ ’ USB HUB’ ’ func tio n.
*
* The USB Me mo ry Stic k sup p o rts with ‘ ’ FAT32’ ’ Disk Fo rma t a nd up to 32G B o nly. The c e rtifie d ve nd e rs a re Tra nsc e nd ,
Ap a c e r, ADATA, Pa trio t, C o nsa ir a nd King sto n.
** The USB Me m o ry Stic k o nly sup p o rts d o wnlo a d thro ug h the p rinte r, O n a PC, use r ma y c o p y e ntire fo ld e r “ \LABELDIR”
fro m USB me mo ry stic k to PC o r vic e -ve rsa . C a n no t c o p y the d a ta to USB Me mo ry Stic k via PC ind ivid ua lly.
*
* Exte rna l USB Ho st p o rt is fo r p o w e r 500m A, is no t re c o mme nd e d a s e le c tro nic s c ha rg ing use .
USB Ke yb oa rd
Whe n p lug -in a n USB ke yb o a rd to the p rinte r, LC D to uc h p a ne l will d isp la y “ Ente r Sta nd a lo ne ” , p re ss the
“ Y” ke y o n ke yb o a rd to e nte ring “ Ke yb o a rd Mo d e ” o p e ra tio n. Und e r this m o d e l c a n p e rfo rm "Re c a ll La b e l",
se t "C o untry C o d e ", "C o d e Pa g e ", "C lo c k Se tting ", "Da ta b a se Se tting " a nd "La b e l Ed it".
C o nne c t a USB ke yb o a rd to the p rinte r, if no t into the ke yb o a rd mo d e , p re ss the "N" ke y to le a ve .
Into Sta nd a lo ne mo d e o f o p e ra tio n, to le a ve the Sta nd a lo ne o p e ra tio n, p re ss "ESC " ke y to e xit.
Afte r le a ving the ke yb o a rd mo d e , fo r re -e ntry, p re ss the ke yb o a rd "F1" ke y o r re b o o t, yo u c a n fo llo w the ste p s
in the first ste p c ho o se whe the r o r no t (Y / N) into the ke yb o a rd mo d e .
Sc a nne r
Whe n p lug -in a n USB sc a nne r to the p rinte r, LC D to uc h p a ne l will d isp la y “ Ente r Sta nd a lo ne ” , ta p the “ Fe e d ” Ke y to
e nte ring “ Ke yb o a rd Mo d e ” o p e ra tio n.
No te
38