36 37
High-Speed Sync
High speed sync (FP flash) enables the flash to synchronize with all camera
shutter speeds. This is convenient when you want to use aperture priority for
ll-flash portraits.
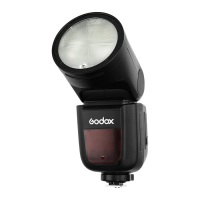
1. Press function button 2<SYNC> so
that the <
> icon is displayed on the
LCD panel.
2. Check whether the < > icon is displayed in the viewnder.
1. If you set a shutter speed that is the same as or slower than the camera’s
maximum flash sync speed, <
> will not be displayed in the viewnder.
2. With high-speed sync, the faster the shutter speed, the shorter the effective flash
range.
3. To return to normal flash, press <SYNC> button again. Then <
> will disappear.
4. Multi flash mode cannot be set in high-speed sync mode.
5. Over-temperature protection may be activated after 10 consecutive high-speed
sync flashes.
Note:
3. Press set button again to conrm
the setting, then the FEC and FEB
settings are displayed on the LCD
panel at the same time.
1. FEB will be cancelled after three photos are taken.
2. For best results of FEB function, set the camera drive mode to “single” and ensure
the flash is ready before shooting.
3. FEB can be used with FEC and FEL.
4. You can prevent the FEB from being cancelled automatically after three photos
are taken in MENU-FEB ACL.
Note:
FEL (Flash Exposure Lock)
FEL can lock the correct flash exposure setting for any part of the scene.
With <ETTL> displayed on the LCD
panel, press the camera’s <FEL>
button. If the camera does not have a
<FEL> button, press the < * > button.
1. Focus the subject.
2 . Press the <FEL> button.
1. If the subject is too far away and underexposure, the < > icon will blink in
the viewnder. Please get closer to the subject and try the FEL again.
2. If <ETTL> is not displayed on the LCD panel, FEL cannot be set.
3. If the subject is too small, FEL might not be very effective.
Note:
Aim the subject at the center of the viewnder and press <FEL> button.
The camera flash will re a pre-flash and the required flash output for the subject is retained
in memory.
The “FEL” will be displayed in the viewnder for 0.5s.
The camera flash will re a pre-flash and the new flash exposure settings is locked every
time the <FEL> button is pressed down.
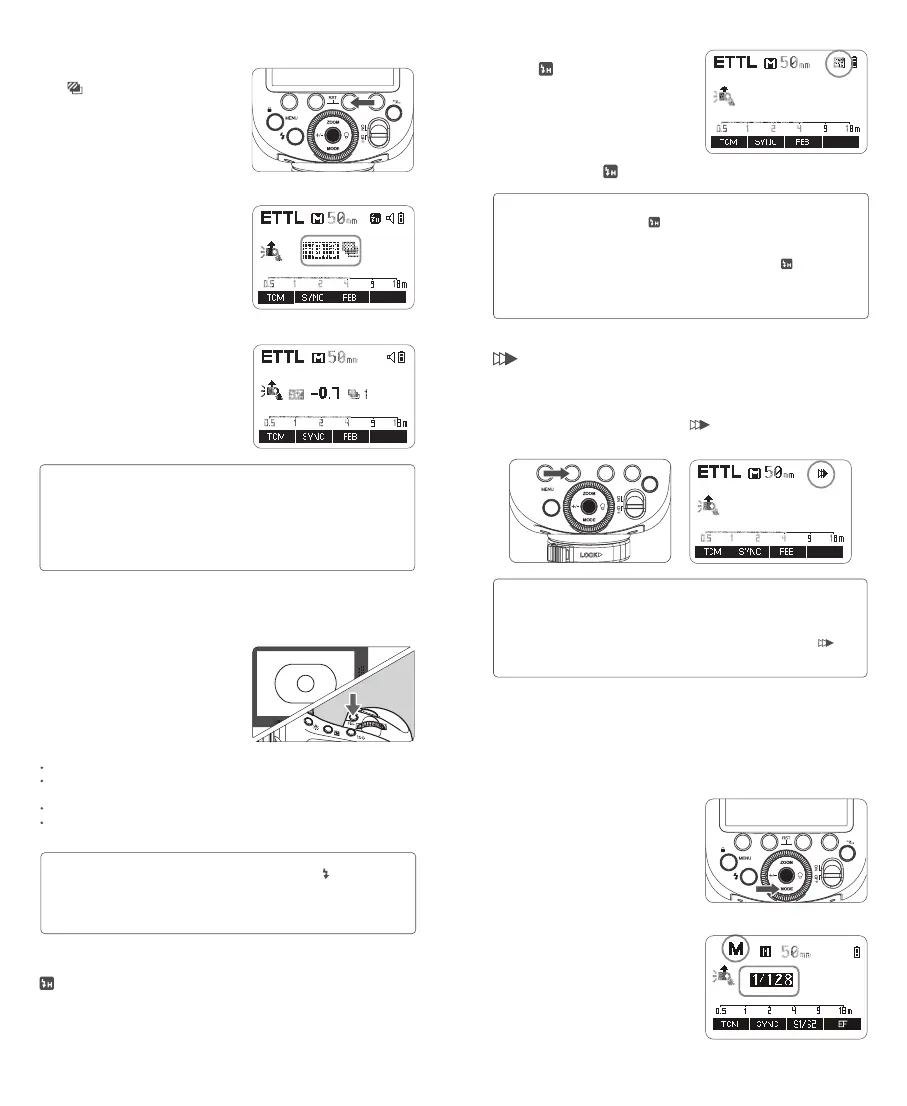
1. Press function button 3 <FEB>.
The <
> icon and the FEB amount
will be highlighted on the LCD panel.
Setting FEB Amount
2. Turn the select dial to set the amount.
“0.3”means 1/3 step,“0.7”means 2/3 step.
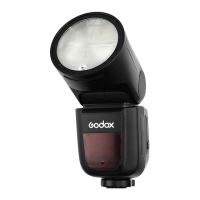
Second-Curtain Sync
With a slow shutter speed and second-curtain sync, you can create a light
train following the subject. The flash res right before the shutter closes.
Press function button 2<SYNC> so that <
> is displayed on the LCD panel.
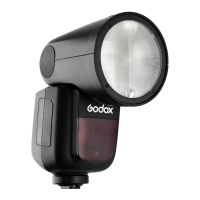
Flash Mode — M: Manual Flash
The flash output is adjustable from 1/1 full power to 1/256 power with 1/10
increment each step. To obtain a correct flash exposure, use a hand-held
flash meter to determine the required flash output.
1. Press <MODE> mode button so that
<M> is displayed on the LCD panel.
2 Press the <+/-> button to select flash
output amount, then turn the select dial
to adjust it. Press the set button again
to conrm the setting.
1.The second-curtain sync will have better effect in BuLb shooting.
2. The camera flash will re twice in <ETTL> flash mode, the rst of
which is a pre-flash to determine the flash output, not a failure.
3. To return to normal flash, press <SYNC> button again. Then < >
will disappear.
Note: