Service
332922D 9
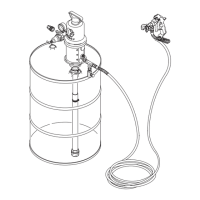
9. Grease o-rings (221) and place on sleeve. Slide
sleeve/piston rod assembly into bottom of cylinder.
Replace o-ring (207) if desired.
NOTE: O-ring (207) is not required for safe pump
operation.
10. Mark IV, Mark VII, and APX6200 models: Install
o-ring (231) on sleeve spacer (230) and install
sleeve spacer on sleeve.
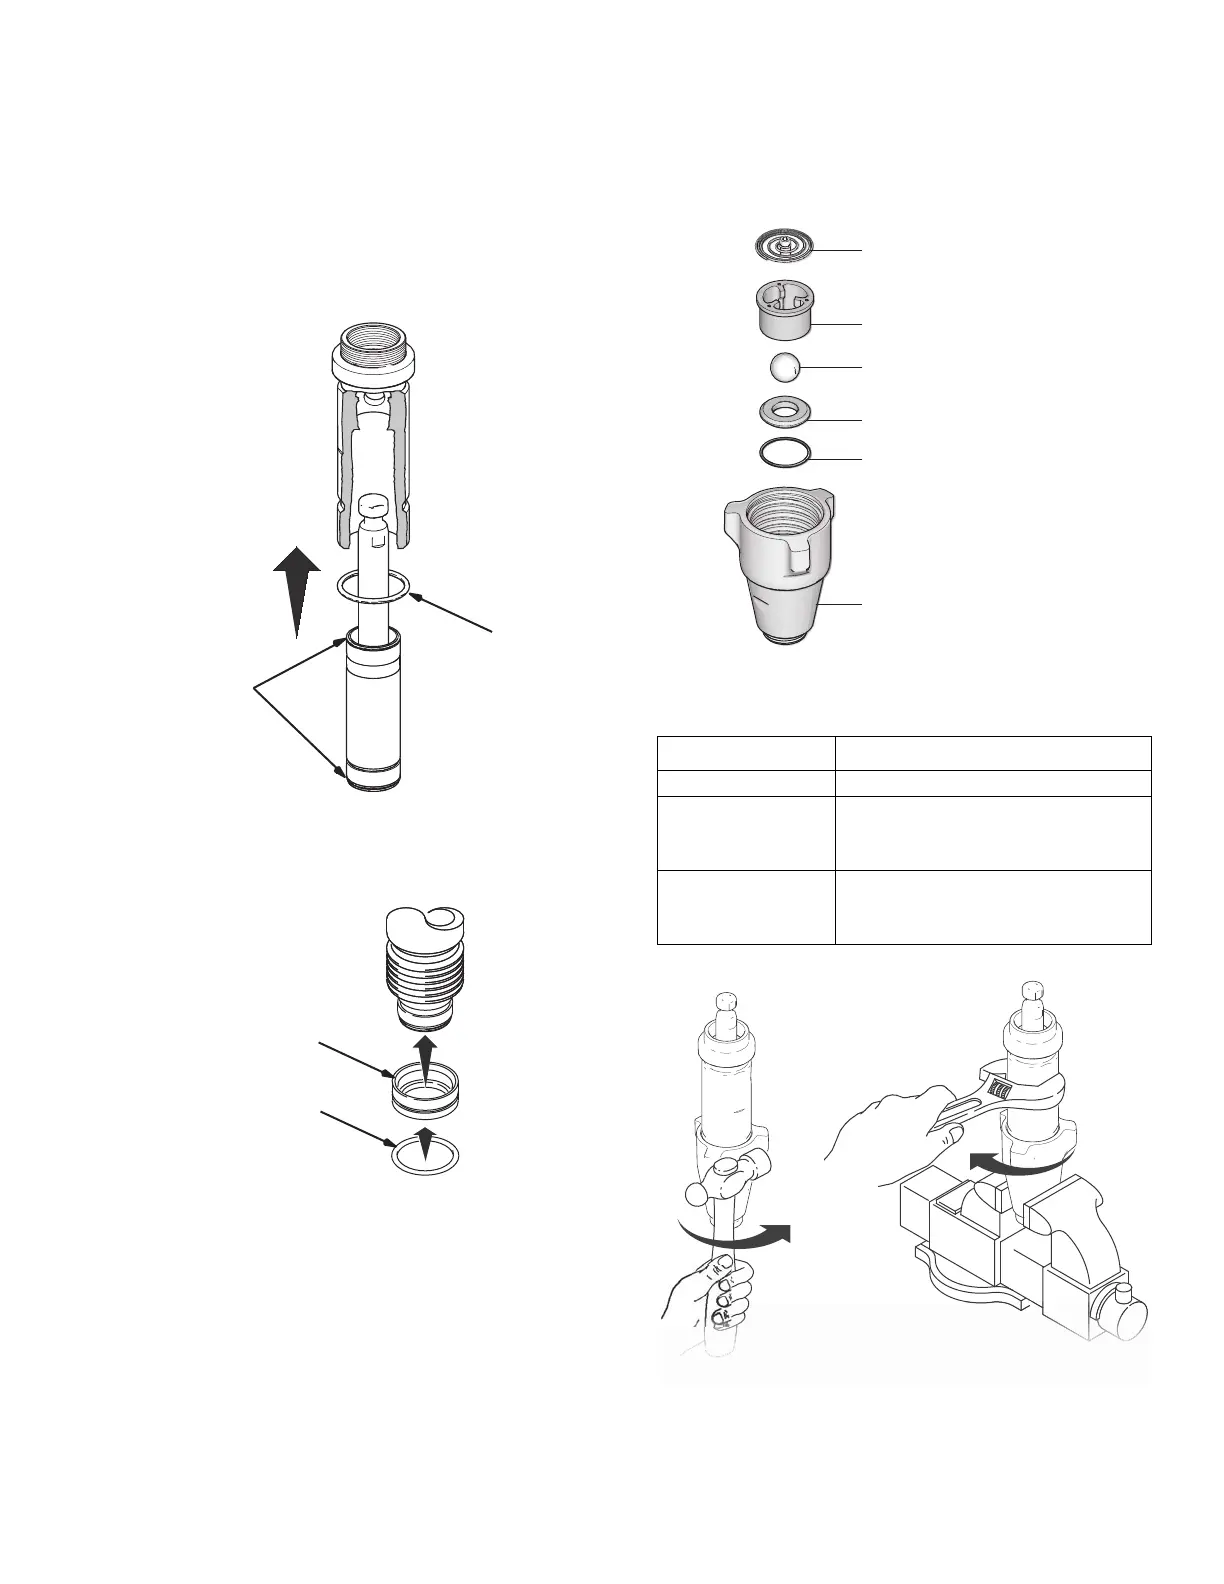
11. Reassemble intake valve with new o-ring (227),
seat (212) and ball (214). Seat may be flipped over
and used on other side. Clean seat thoroughly.
12. Install intake valve on cylinder. If a wrench is used
torque as follows:
231
230
Models Torque
16X414, 16X418 67 ± 5 ft-lb (90.8 ± 6.8 N•m)
16X419, 16X420,
16X421, 16Y602,
16Y599
80 ± 5 ft-lb (108.5 ± 6.8 N•m)
16X426, 16X427,
17N693, 17N694,
17R041, 17R044
200 ± 15 ft-lb (271.2 ± 20.3 N•m)
233
215
214
212
213
227
ti23115a
NOTE: Spring (233) only
used on 16X426, 16X427,
16Y602, 17N693, 17N694,
17R042, and 17R044.
 Loading...


