Repair
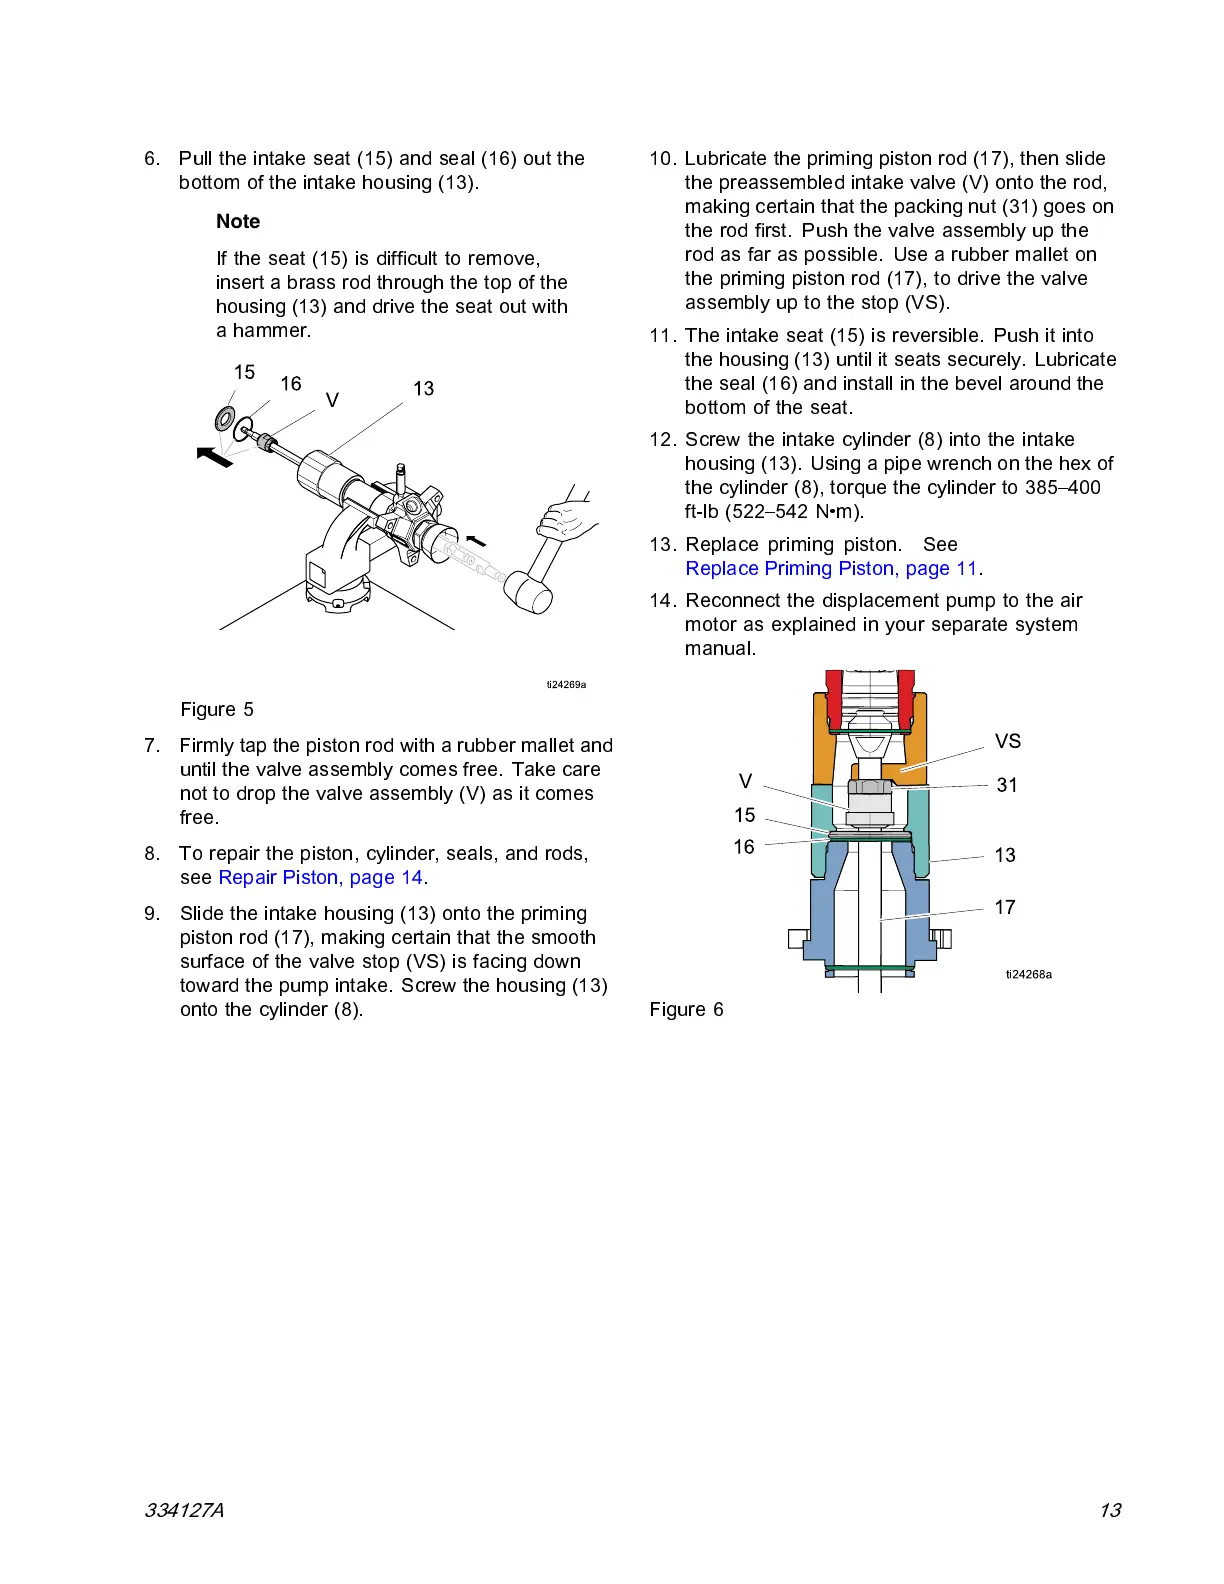
6. Pull the intake seat (15) and seal (16) out the
bottom of the intake housin g (13).
Note
If the seat (15) is difficult to remove,
insert a brass rod through the top of the
housing (13) and drive the seat out with
a hammer.
Figure 5
7. Firmly tap the pi ston rod with a rubber mallet and
until the valve assembly comes free. Take care
not to drop the valve assembly (V) as it comes
free.
8. To repair the piston, cylinder, seals, and rods,
see Repair Piston, page 14.
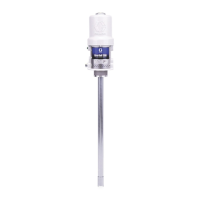
9. Slide the intake housing (13) onto the priming
piston rod (17), making certain that the smooth
surfaceofthevalvestop(VS)isfacingdown
toward the pump intake. S crew the hous ing (13)
onto the cy linder (8).
10. Lubricate the priming piston rod (17), then slide
the pre assembled intake valve (V) onto the rod,
making certain that the packing nut (31) goes on
the rod first. Push the valve assembly up the
rod as far as possible. Use a rubber mallet on
theprimingpistonrod(17),todrivethevalve
assembly up to the stop (VS).
11. The intake seat (15) is rev ersible. Push it into
the housing (13) until it seats securely. Lubricate
the seal (16) and install in the bevel around the
bottom of the s eat.
12. Screw the intake cylinder (8) into the intake
housing(13).Usingapipewrenchonthehexof
the cylinder (8), torque the cylinder to 385–400
ft-lb (522–542 N•m).
13. Replace priming piston. See
Replace Priming Piston, page 11.
14. Recon nect the displacement pump to the air
motor as explained in your separate system
manual.
Figure 6
334127A 13