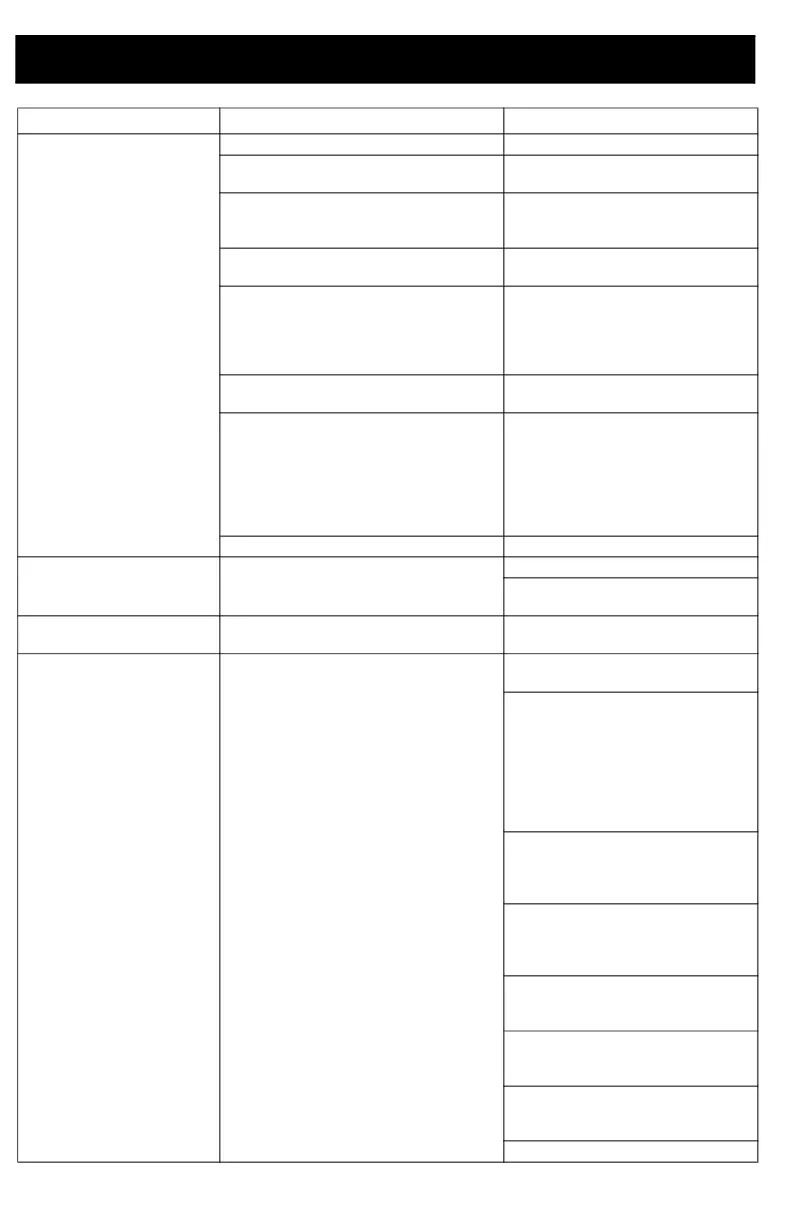
Troubleshooting
30 3A4702E
Sprayer sprays with poor
results
Spray Tip is partially clogged. See Clear Tip Clogs, page 19
.
Spray Tip is not in correct position Rotate Spray Tip to SPRAY
position.
Incorrect Spray Tip for application of
material.
Install different size Spray Tip.
See Tip Selection Chart, page
16.
Spray Tip is worn or damaged Replace Spray Tip. See
Reference, page 25.
Material being sprayed is aerated
because it was shaken.
Do NOT shake material. Stir the
material or check the
manufacturer’s
recommendation for the
material being sprayed.
Material being sprayed is too cold to
spray.
Warm material.
Outlet valves are dirty or worn. Remove two pump plugs and
front valve to gain access to the
three outlet valves. Clean outlet
valves. Outlet valves are not
installed properly. See
Cleaning Outlet Valves, page
26. Replace if necessary.
Pump has reached the end of its life. Replace pump assembly.
Sprayer runs
intermittently or very
slow
Fluid has gotten into the sprayer. Allow the sprayer to dry out.
Replace motor and/or
Smartcontrol with enclosure.
Pump will spray paint but
will not spray water
Pump has reached the end of its life. Replace pump assembly.
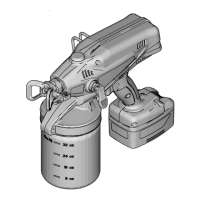
Paint leaks out of the cup
threads.
Cup not properly seated. Make certain that there is only
one FlexLiner in Cup Support.
Make certain the cup cover is
properly threaded to the Cup
Support. If threads are visible
below the Cup Support when
tight, fully remove the cup cover
and reinstall to the Cup Support
so no threads are visible when
tight.
Make certain the cup cover is
tightened to Cup Support. For
proper sprayer operation lid
must seal tightly with the cup.
Avoid flexing or pushing on the
Cup Support when you
evacuate the air out of the
FlexLiner.
Avoid pulling down on the
FlexLiner when you evacuate
the air out of the FlexLiner.
Make certain there is no
damage to the FlexLiner lip or
the cup cover gasket.
Make certain that the FlexLiner
lip and cup cover gasket is free
of debris and dried paint.
Replace FlexLiner.
Problem Cause Solution