EasyManua.ls Logo

Graco ProMix 2KS - User Manual

Graco ProMix 2KS
134 pages
Print Icon
To Next Page IconTo Next Page
Loading...
312779E
EN
Operation
ProMix
®
2KS
Plural Component Proportioner
Automatic system for proportional mixing of plural component coatings, with Wall Mount
Fluid Station or RoboMix Fluid Station. For professional use only.
Approved for use in explosive atmospheres (except the EasyKey).
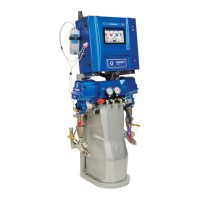
Automatic System with Wall Mount Fluid Station
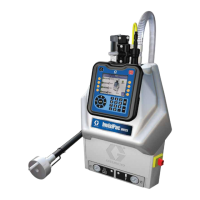
Automatic System with RoboMix Fluid Station
TI12553a
TI12552a
See pages 4-7 for model information, including maxi-
mum working pressure. Equipment approval labels are
on page 3. Some components shown are not included
with all systems.
Important Safety Instructions
Read all warnings and instructions in this
manual. Save these instructions.
#53
II 2 G0359
Get other manuals https://www.bkmanuals.com

Table of Contents

Other manuals for Graco ProMix 2KS

Questions and Answers

  • R
    Richard SandersSep 18, 2025
    What does the E-15 SYSTEM IDLE WARNING mean on my Graco Control Unit?
    • B
      brandybergSep 18, 2025
      The E-15 SYSTEM IDLE WARNING means that the mix input is high, but the gun has not been triggered for 2 minutes. If you are not painting, clear the alarm and resume operation. If you are painting, shut down and inspect the fluid meter and air flow switch.
  • P
    pnelsonAug 25, 2025
    What to do if I get a potlife alarm on my Graco ProMix 2KS?
    • E
      Erica AlexanderAug 26, 2025
      If the potlife time has been exceeded for the mixed material, press the Alarm Reset key to stop the audible alarm. Then, purge the system with solvent, fresh mixed material, or perform a color change. You can purge with solvent until the preset purge time is complete, switch to Mix mode and spray the required volume to restart the timer, or perform a color change.
  • K
    kevinfrostAug 26, 2025
    Why am I getting a RATIO_HIGH_ALARM on my Graco ProMix 2KS?
    • K
      Karen BradleyAug 26, 2025
      A RATIO_HIGH_ALARM indicates there may be too little restriction in the system. Here's what you can check: * Ensure the system is fully loaded with material. * Verify the supply pump’s cycle rate is set correctly. * Confirm the spray tip/nozzle is properly sized and not worn. * Ensure the fluid regulator is set correctly. If the alarm occurs during start-up after purging, restrict gun needle travel to slow the initial fluid delivery rate. If it occurs after spraying for some time, adjust component A and B fluid supply regulator pressures until they are about equal. Also, ensure air pressure to the valve actuators is adequate (75-120 psi, with 120 psi recommended) and that there are no restrictions in the solenoid or tubing interrupting valve actuation air.
  • A
    Allen JosephAug 27, 2025
    What to do if I get a RATIO_LOW_ALARM on my Graco ProMix 2KS Industrial Equipment?
    • W
      westjohnAug 27, 2025
      A RATIO_LOW_ALARM indicates there is too much restriction in the system. Check that the system is fully loaded with material, the supply pump’s cycle rate is set properly, the spray tip/nozzle is properly sized and not clogged and that the fluid regulator is set correctly. If the alarm occurs during start up, after purging, restrict gun needle travel to slow down the initial fluid delivery rate until fluid hoses are loaded with material. If the alarm occurred after you were spraying for some time, adjust component A and B fluid supply regulator pressures until they are about equal. Increase air pressure to the valve actuators to 75-120 psi (120 psi is recommended). Ensure there is no dirt or moisture in the air supply and adjust air and fluid pressure.
  • T
    Thomas BergSep 18, 2025
    How do I fix the E-20 PURGE INITIATE ALARM on my Graco Control Unit?
    • A
      alexanderkelleySep 18, 2025
      If the system detects atomizing air to the gun when purge is selected, shut off gun air. For systems with a gun flush box, if the gun is not in the box when purge is selected, place gun in gun flush box and verify that gun flush box is operating properly. For systems with auto dump on, if the gun is not in the box when auto dump is initiated, place gun in gun flush box and verify that gun flush box is operating properly. For systems with a gun flush box, verify condition of fuse and replace if necessary if Fuse F2 is blown.
  • B
    Brian SalasNov 23, 2025
    What to do if the gauge reading doesn't change with % Open on Graco ProMix 2KS Industrial Equipment?
    • E
      elizabeth59Nov 23, 2025
      If the gauge reading on your Graco Industrial Equipment does not increase or decrease when the % Open value is changed, the issue is likely electrical. Here's what you can do: 1. First, measure the voltage to the regulator. You can do this either at J5 on the fluid control board (across the white and black wire connections) or at J2 on the flow control board of the module (across the red and black wire connections). The voltage at J5 should be in the range of 0-3.3 Vdc for 0%-100% Open, and at J2 it should be 0-21 Vdc for 0%-100% Open. 2. If there's no voltage, check fuse F2 on the fluid control board to see if it's blown. 3. If voltage is present, ensure the cable is properly connected to the module circuit board. 4. If the cable is connected correctly, try replacing the pressure con...
  • R
    Ruth HuntSep 6, 2025
    What does REMOTE_STOP_ALARM mean on Graco ProMix 2KS Industrial Equipment?
    • D
      Debra AndersonSep 7, 2025
      A REMOTE_STOP_ALARM indicates that automation has requested that the system abort all operations. Abort operations and troubleshoot the automation system.
  • E
    Eric HamiltonSep 7, 2025
    What to do if I get a potlife alarm on my Graco Control Unit?
    • M
      mestradaSep 7, 2025
      If the potlife time has been exceeded for the mixed material, press the Alarm Reset key to stop the audible alarm. Then, purge the system with solvent, fresh mixed material, or perform a color change. For solvent purge, the system purges until the preset purge time is complete. For new mixed material purge, go to Mix mode and spray the required volume to restart the timer. To perform a color change, follow the procedure on page 69.
  • R
    Robert MejiaSep 2, 2025
    Why am I getting a COLOR/CATALYST_PURGE_ALARM on my Graco ProMix 2KS?
    • A
      Adam GriffinSep 2, 2025
      A COLOR/CATALYST_PURGE_ALARM indicates that the system detects no meter pulses, or a disruption in meter pulses lasting longer than 1 second throughout the Color/Catalyst purge time duration. Check that the meter cable is connected and clean or repair the meter.
  • T
    Tamara MillerAug 31, 2025
    How to resolve CAN_COMM_ERROR_ALARM on Graco Industrial Equipment?
    • A
      Allison Hudson MDAug 31, 2025
      A CAN_COMM_ERROR_ALARM indicates an interruption in communication. Verify that the cable is correctly connected between the Color Change Module and the Fluid Station, or between the Booth Control and the Fluid Station. Also, check the fluid control board fuse and replace if necessary.

Summary

Operation

ProMix 2 KS

Electronic two-component paint proportioner for mixing plural component coatings.

Plural Component Proportioner

System for proportional mixing of plural component coatings.

Important Safety Instructions

System Configuration and Part Numbers

Wall Mount Fluid Station Configurator Key

Key for configuring part numbers for Wall Mount Fluid Station systems.

RoboMix Fluid Station Configurator Key

Key for configuring part numbers for RoboMix Fluid Station systems.

Warnings

FIRE AND EXPLOSION HAZARD

Warnings related to flammable fumes and preventing fire and explosion.

ELECTRIC SHOCK HAZARD

Warnings related to grounding, setup, and usage to prevent electric shock.

INTRINSIC SAFETY

Warnings regarding the proper installation and connection of intrinsically safe equipment.

SKIN INJECTION HAZARD

Hazards associated with high-pressure fluid injection and necessary precautions.

EQUIPMENT MISUSE HAZARD

Hazards related to improper operation, misuse, or alteration of the equipment.

TOXIC FLUID OR FUMES HAZARD

Hazards from toxic fluids or fumes and necessary safety measures.

PERSONAL PROTECTIVE EQUIPMENT

Requirements for protective equipment to prevent serious injury during operation or servicing.

Overview

Component Identification and Definition

Identification and description of key system components.

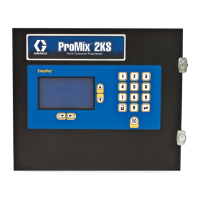
EasyKey Display and Keyboard

Run Mode Screens

Status Screen

Detailed explanation of the information presented on the Status Screen.

Manual Override Screen

Screen for manually controlling system operations and modes.

Flow Control Calibration

Procedure for calibrating the flow control system for each recipe.

Alarms Screen

Screen displaying active alarms and their E-Codes.

Level Control Screen

Screen showing current fluid volumes and alarm levels.

Setup Mode

Password Screen

Screen for entering password to access Setup mode.

Set Up Home Screen

Main screen for navigating Setup Mode options.

System Configuration Screens

Screens for configuring system settings and options.

Option Screens

Advanced Setup Screens

Advanced Setup Screen 1

Setup for Flow Control Override, Manual Override, Potlife Volume, and Color/Catalyst Purge/Fill.

Advanced Setup Screen 2

Setup for Purge Sources, Chop Type, and Chop Times.

Advanced Setup Screen 3

Setup for Purge Times, Chop Time, and Mixed Material Fill Time.

Advanced Setup Screen 4

Setup for K-Factor values for meters.

Advanced Setup Screen 5

Setup for Flow Rate Range, Tolerance, Ki, Kp, and Alarm Time.

Advanced Setup Screen 6

Status of recipe analog inputs and digital outputs.

Advanced Setup Screen 7

Status of digital inputs and digital outputs.

Advanced Setup Screen 8

Setup for Special Outputs timing and configuration.

Recipe Setup Screens

Recipe Setup Screen 1

Setup for Ratio, Ratio Tolerance, and Color/Catalyst Valves.

Recipe Setup Screen 2

Setup for Minimum Flush Volume, Potlife Time, and Color/Catalyst Purge/Fill.

Recipe Setup Screen 3

Setup for Purge Sources, Chop Type, and Chop Times for recipes.

Recipe Setup Screen 4

Setup for Purge Times, Chop Time, and Mixed Material Fill Time for recipes.

Recipe Setup Screen 5

Setup for K-Factor values for recipes.

Recipe Setup Screen 6

Setup for Flow Rate Monitor, Low Flow Limit, and High Flow Limit.

Recipe Setup Screen 7

Setup for Special Outputs timing and configuration for recipes.

Calibration Screen

ProMix 2 KS Integration Specifics

Discrete I;O vs Network Communications

Overview of system integration methods using Discrete I/O or Network Communications.

Discrete I;O

Requirements and connections for Discrete I/O integration.

Automation Flow Charts

Integrated Flow Control

Flow Control Calibration

Automatic routine to establish a pressure vs flow profile.

Flow Control Troubleshooting

Steps to diagnose and resolve issues with Flow Command not producing fluid output.

System Operation

Typical PLC Interaction with ProMix 2 KS

Description of typical interaction between a PLC and the ProMix 2KS.

Start Up

Shutdown

Pressure Relief Procedure

Purging

Solvent Push Feature

Meter Calibration

Color Change

Alarms and Warnings

Alarm Troubleshooting

Schematic Diagrams

System Pneumatic Schematic

Pneumatic schematic illustrating air and fluid flow paths.

System Electrical Schematic

Electrical schematic showing wiring and connections for the system.

EasyKey Electrical Schematic

Electrical schematic specific to the EasyKey unit.

Graco Standard Warranty

Graco ProMix 2KS Specifications

General IconGeneral
BrandGraco
ModelProMix 2KS
CategoryIndustrial Equipment
LanguageEnglish

Related product manuals