Parts
Proportioner Assembly Parts
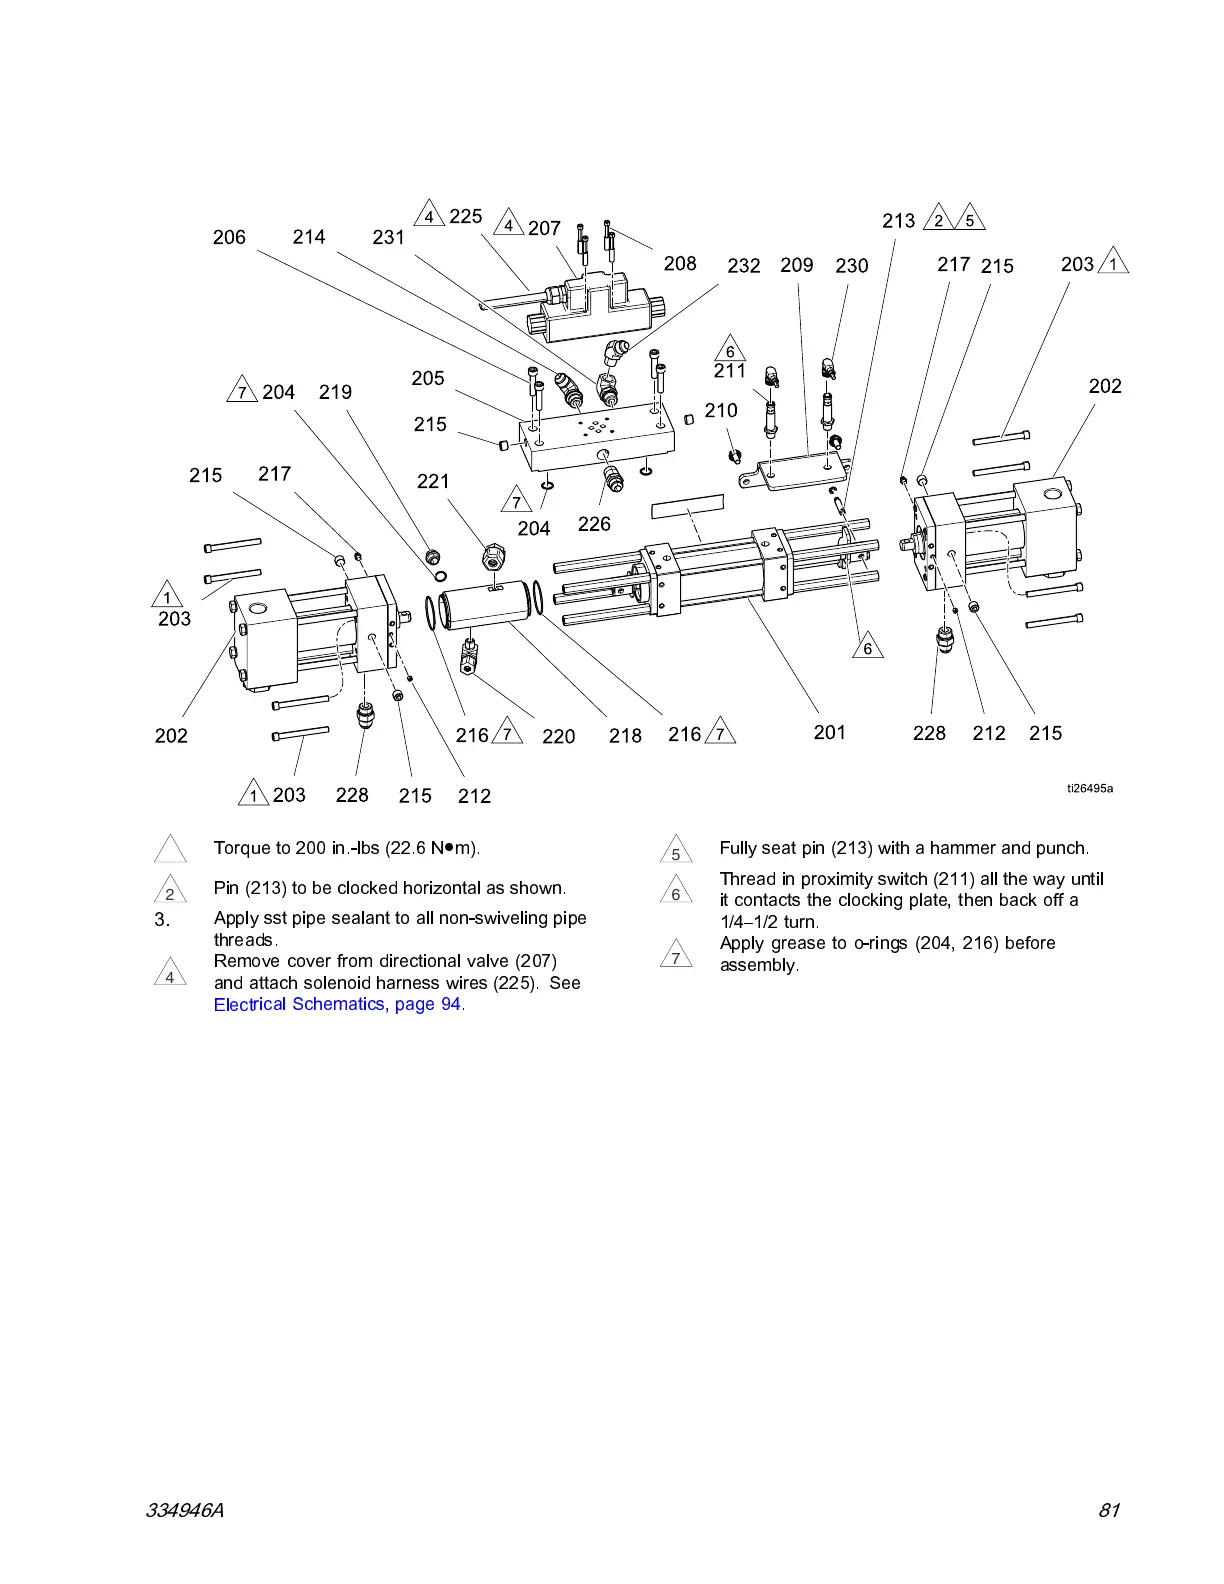
1
Torque t
o 200 in.-lbs (22.6 N●m).
2
Pin (213) to be clocked horizontal as shown.
3.
Apply sst pipe sealant to all non-swiveling pipe
threads.
4
Remove
cover from directional valve (207)
and at
tach solenoid harness wires (225). See
Elect
rical Schematics, page 94.
5
Fully s
eat pin (213) with a hammer and punch.
6
Thread
in proximity switch (211) all the way until
it cont
acts the clocking plate, then back off a
1/4–1/
2 turn.
7
Apply grease to o-rings (204, 216) before
assembly.
334946A 81