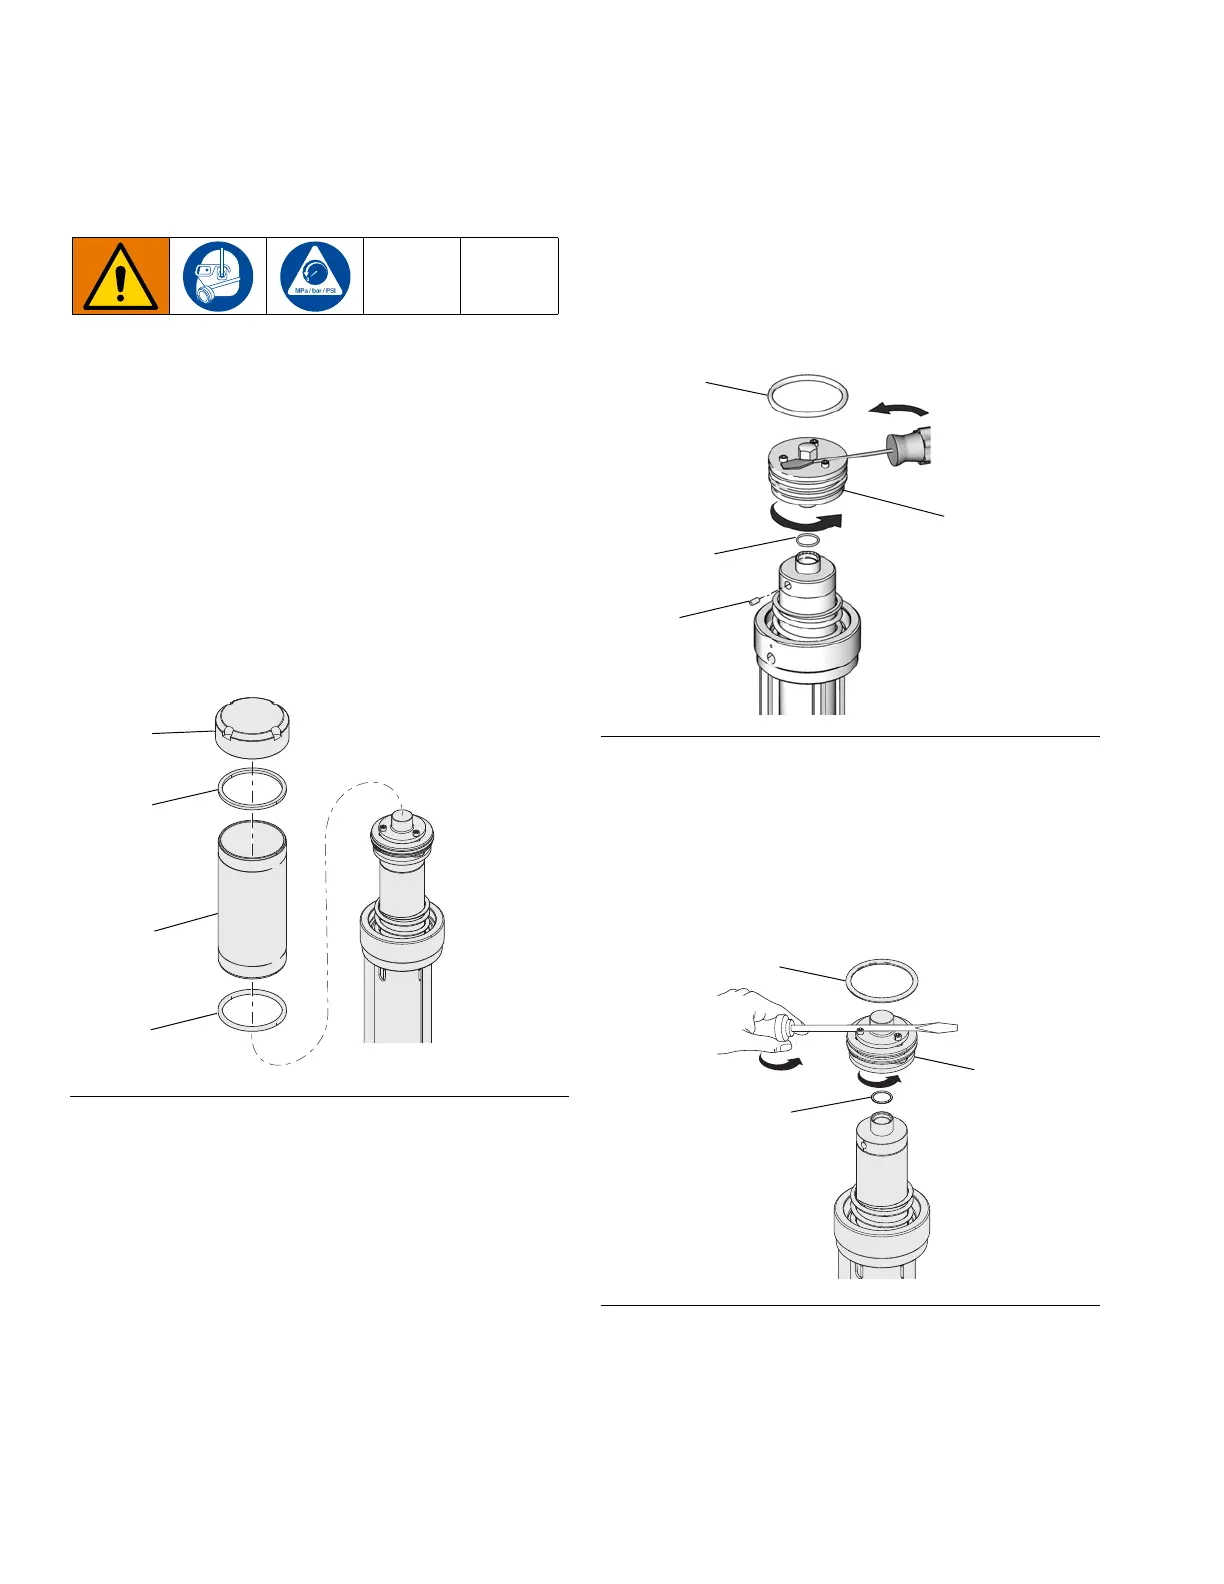
Repair the Air Motor
16 311882U
Repair the Air Motor
NOTE: Air valve assembly has changed to series B for
improved performance. Parts are not interchangeable
between series A and B air motor. Series A air valves
can be upgraded to series B with kit 262042.
1. Relieve the pressure. Follow Pressure Relief
Procedure, page 14.
2. Remove cap (1), cylinder (4), and square gaskets
(3*). Inspect all parts, including spring under cap
(not shown in F
IG. 10) for damage and replace if
necessary. See F
IG. 10. Unscrew by hand or use a
chain wrench to prevent distortion of the cylinder’s
shape.
NOTE: Cap (1) was replaced with a spring stop
assembly for improved spring life. Existing pumps can
be upgraded with Kit 24T043.
NOTE: Series A air motors have thin, flat, white seals in
air valve. Series B (and later) air motors have thicker
black seals in the air valve.
3. Series A air motors only: Loosen set screw (18)
and unscrew air valve (5). If necessary to assist
turning, wedge a screwdriver blade between the
screw heads and the hex cap of air valve (5).
Discard items 5, 13, 15, and 18. See F
IG. 11.
4. Series B (and later Air Motors): Unscrew air
valve (5). If necessary to assist turning, wedge a
screwdriver blade between the screw heads and the
hex cap of the air valve (5). Inspect o-rings (13* and
15*) for damage and replace if necessary. Ensure
o-ring (13*) is correctly positioned and not pinched.
See F
IG. 12.
FIG. 10
FIG. 11: Series A Air Valve
FIG. 12 Series B Air Valve